Configuring Site Payment Rules and Tracking Payments Based on Data Entry
Specific monetary amounts can be assigned to individual forms across all the visits in a study and then managed and tracked as the study progresses.
Configuring Payments
Prerequisite:
User has access to Payment Configuration
Web | App |
|---|---|
|
|


This will open the table of payment definitions
Note
The visits will be listed in the order as defined by the sequence set in the study schedule setup.
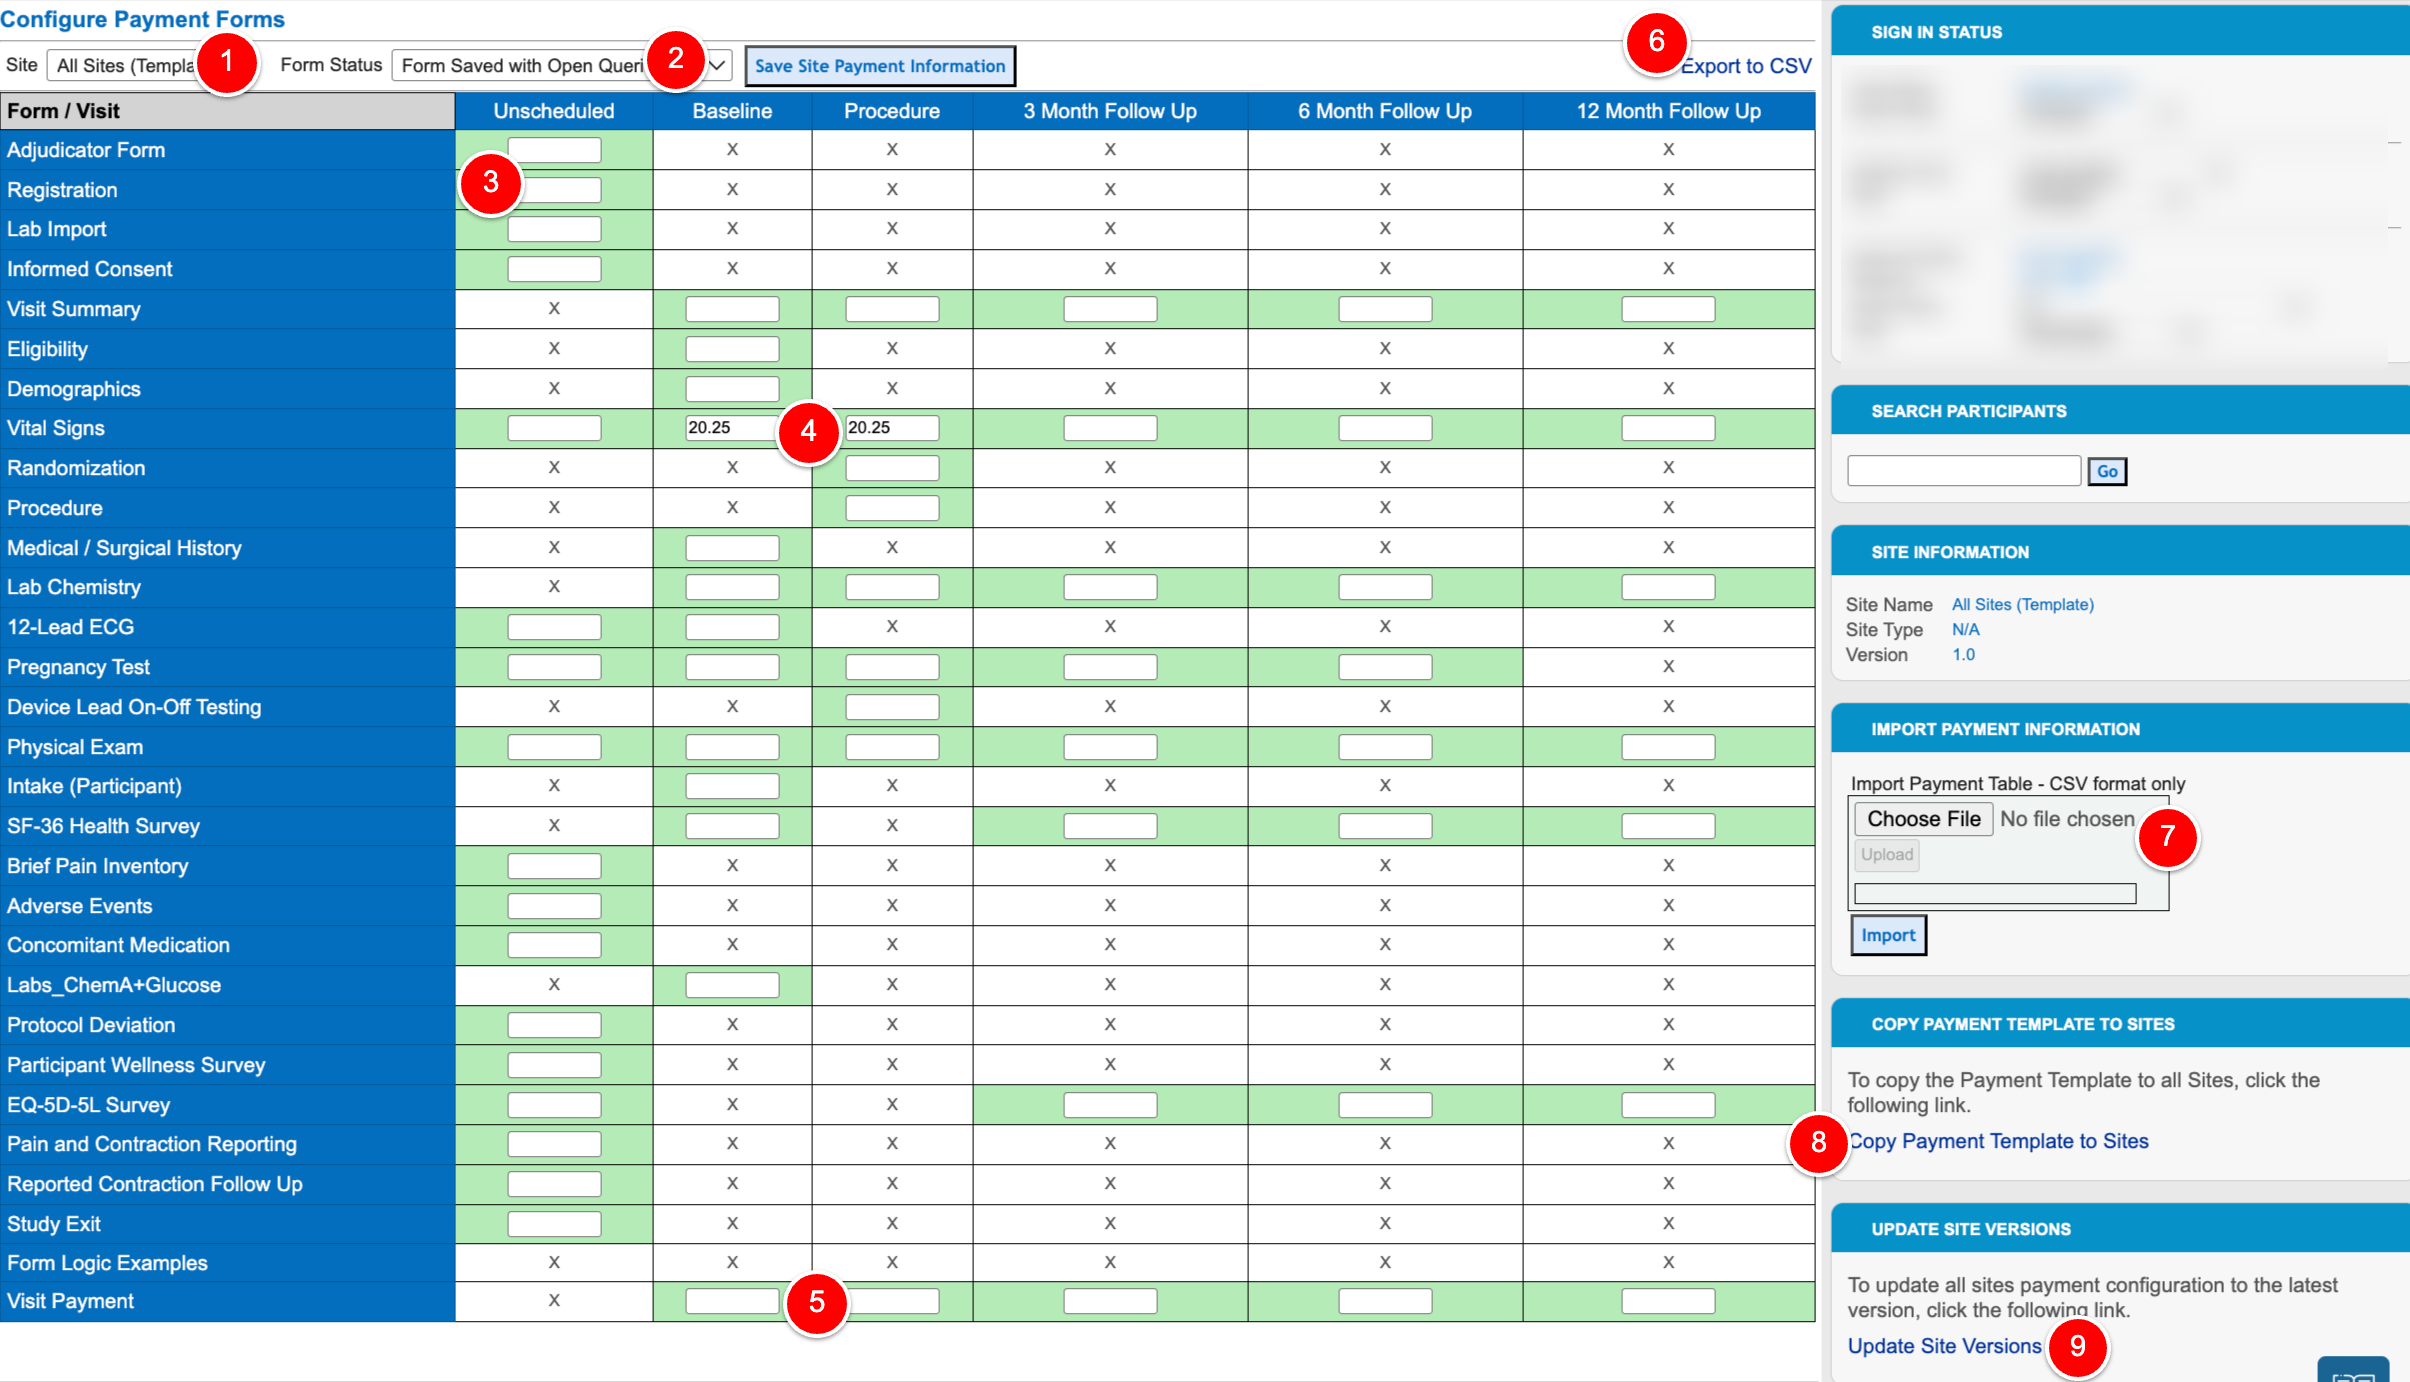
Numbered descriptions referring to the image above:
1 - Select which site to configure, or select ALL sites to configure a common template to use as a baseline
2 - Set the status that each form or visit must obtain before being available for payment.
3 - Enter the amounts due to pay on LOG forms that get entered at a site
4 - Enter the amounts due to pay on SCHEDULED forms that get entered at a site
5 - Enter the amounts due to pay on VISITS. Visits become payable depending on the settings:
By default a visit becomes payable when all required forms in that visit have met the status rule (#2), even if there is no value set for the required forms.
If the box is checked to make the visit Independent of form payments. In this case the visit becomes payable when any form with a payment value has met the rule within that visit. Entry of other required forms is not enforced.
6. Export the table to Excel for filling in outside of TrialKit. When finished, it can be imported back in (#7) to update the values for the current selected site.
7. Import an externally-completed table
8. Copy the ALL SITES template to all sites. This prevents the need to fill in repeating configurations per site if they are not different.
9. If a table was configured for version 1 of the study and now the study is on version 2, there might be new forms missing that were added in version 2. This is where it becomes necessary to update the existing configuration table to the latest version of the study.
NOTE: The table is automatically updated when existing sites are added to a new study version
Copying a template to all sites
If the template is blank, do not update the site versions. Doing so will overwrite the existing site configurations if they have already been set up.
A few notes to consider:
Only Subject forms are included in the payment manager.
If the initial subject registration form does not appear in the unscheduled column, it must be marked as a log form in the form builder.
If opening the Payment Manager page results in an error, it's because there is no site template saved in the payment configuration or no subject records in the study.
Managing Payments
The Payment Manager is found under the Study menu.

Records Awaiting Payment
Records that have met the payment rule and not yet paid will be viewable with a DUE status.
Use the filter to see the list of what is due for a given site.
Optionally, include the corresponding visit window and date of save for reference purposes. This can be helpful if payments are made in intervals based on when the data was saved by the site.

If a payment integration is being used with a payment provider, records will be automatically set as Paid when the API sends the information to the provider.
To manually set specific records as Paid, use the checkboxes along the left followed by the action button on the right.
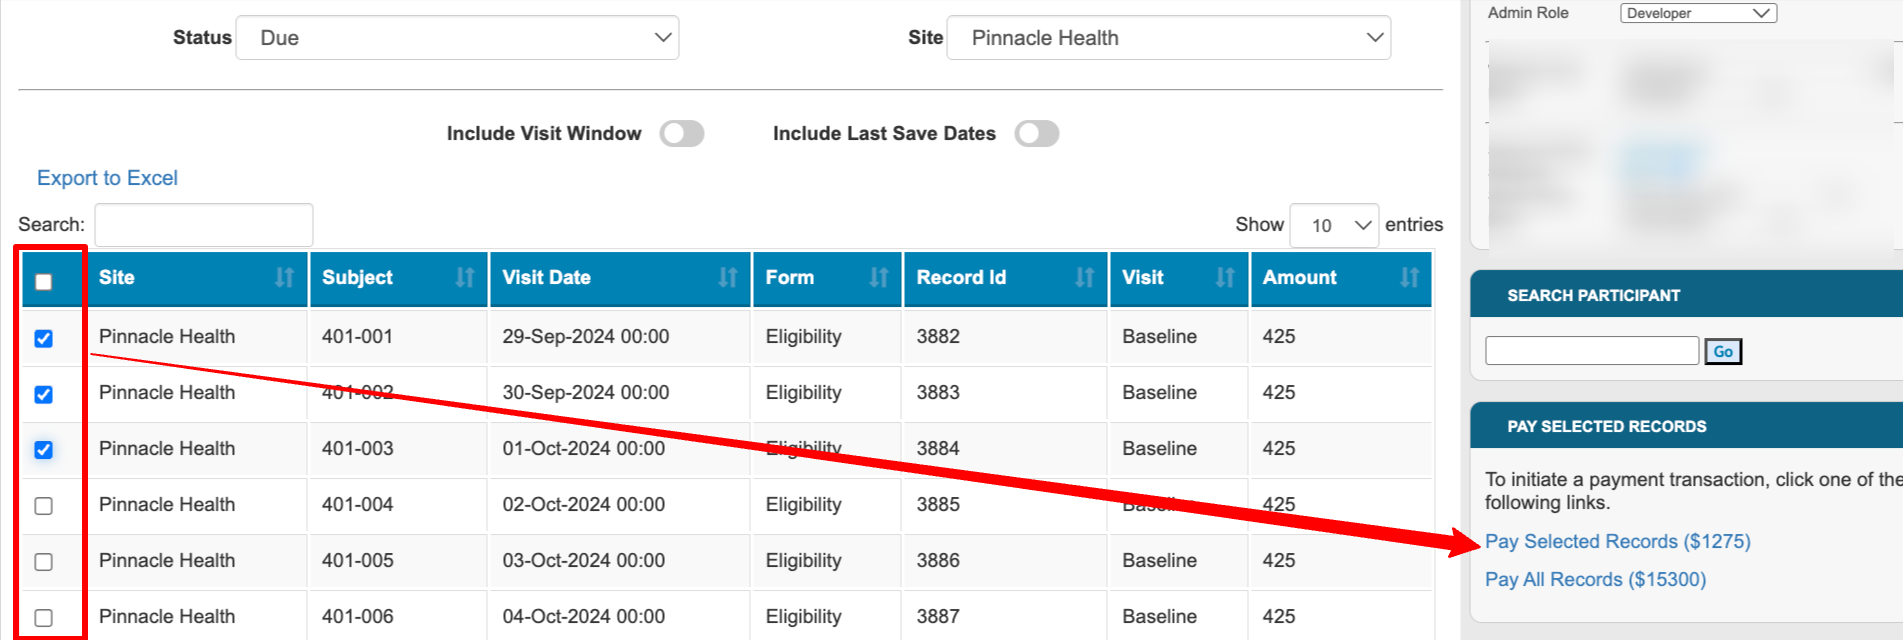
When a group of records is marked as Paid, this will get stored as a transaction which can separately be referenced from the Paid records list described below.
Historical/Paid Records
Each set of payment transactions is stored by this report so the Payor can look at the history of batch payments made.
Select the status as “Paid”, followed by a transaction.
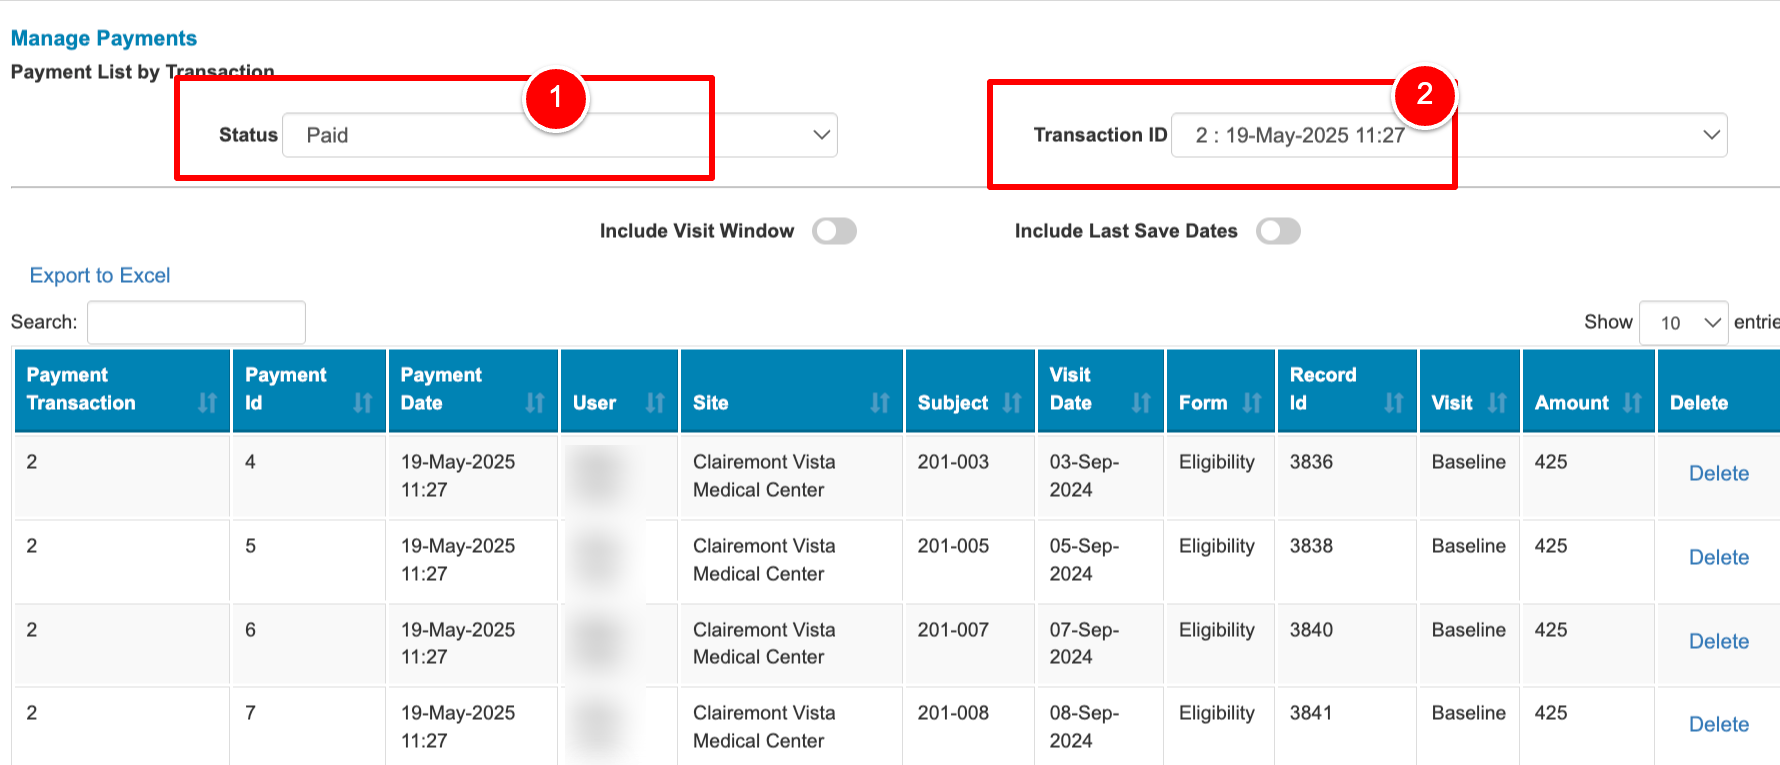
To also see the visit windows corresponding to each record, use the toggle at the top of the table:

The Visit Date indicated is the visit date field from each form. For visit payments (where the form is N/A), the visit date is the date of the most recent record entered into the corresponding visit.
Removing a record from the Paid list
If a record was accidentally marked as paid, or it needs to be re-paid under a different transaction, it can be deleted from the current transaction by using the DELETE button in the table.
Note: there is not audit history stored this action. It only stores when the data was saved and when the record was last marked as paid.