Managing Inventory Distribution From an Administrative Level
The Inventory Management screen is where an Administrative level user with access can:
- View the full inventory list and location of each item
- Release items to Sites
- Accept items back into Distribution if necessary
This article covers the following:
- Manually Allocating Items To a Site
- Automatic Allocation to Sites (Site Activation)
- Inventory Report: Viewing an Item's Details (Item rollback and deleting)
- Printing Barcodes
- Inventory Audit Log
Prerequisite: User has access to Inventory Management, Allocate Inventory to Sites, and View Non-Allocated Items
Web Browser:
Mobile App:
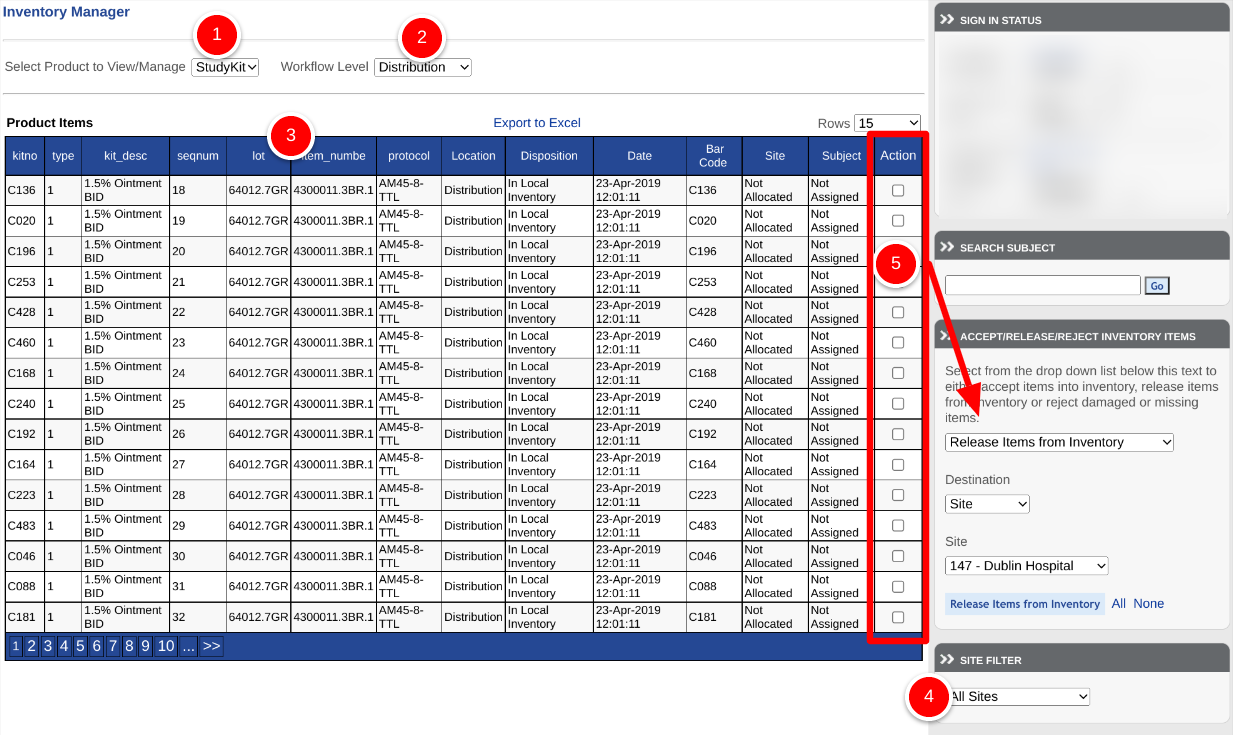
The following descriptions correspond to the annotated image below:
- Select the inventory to work with
- Choose which workflow level is being conducted.
- These are the user-defined columns imported into the configuration.
- Site Filter
- Action - Select single or multiple items to perform the action that is currently selected on the right side of the page. In the instance below, no checkboxes are showing because there are no items to accept into inventory currently. Checkboxes will only appear when applicable.
Manually Allocating Items To a Site
As shown in the image above in #5, select which action to conduct (Release Items from Inventory). A series of checkboxes will display in the table. If checkboxes are not displaying, the workflow level at the top (#2) needs to be selected, or the current user role is not responsible for the action being attempted.
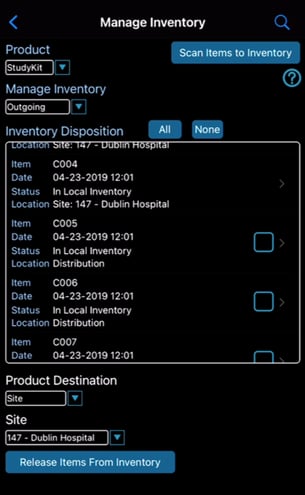
The same can be done from the mobile app.
Select which inventory to work with. If there’s only one it will be selected already.
- Choose which inventory to view
- Select "Outgoing" to release items to a site. Select "Incoming" to accept items.
- If outgoing, select the destination point and specific site if the destination is a site
Check the appropriate boxes and then the button at the bottom of the screen.
Automatic Allocation to Sites
TrialKit is capable of automatically distributing items to sites that have been activated. It does this by monitoring the level of items at each site and comparing to the site floor level each time a new item is assigned to a study subject.
Activating Sites
Site activation is required to initiate automated distribution to sites that will require it. When this is done, the system will send an email notification to distribution (normally an external/3rd party IP vendor) of items that need to be shipped to the respective site, and a similar notification to the site contact person. Study Administrator(s) will also receive these emails.
This step is performed from the Inventory Configuration screen, and is only required for initial site activation. All other orders are made automatically by the system as sites reach the defined floor levels.

Site activation will not be possible if the system does not have the contact information for sending applicable notifications. Read more.
Refilling Sites and Notification Log
This part is automated and only requires occasionally monitoring to ensure sites all have the levels they need in time.
As items are used (assigned to study Participants), the system will check the site's floor level to determine if the site needs to be refilled. If it doesn't, a notification will be sent to the contact in the first workflow level along with an attached spreadsheet of which items to ship.
The site contact person - identified in the Site Manager - will get a similar notice with less details included (to prevent unblinding).
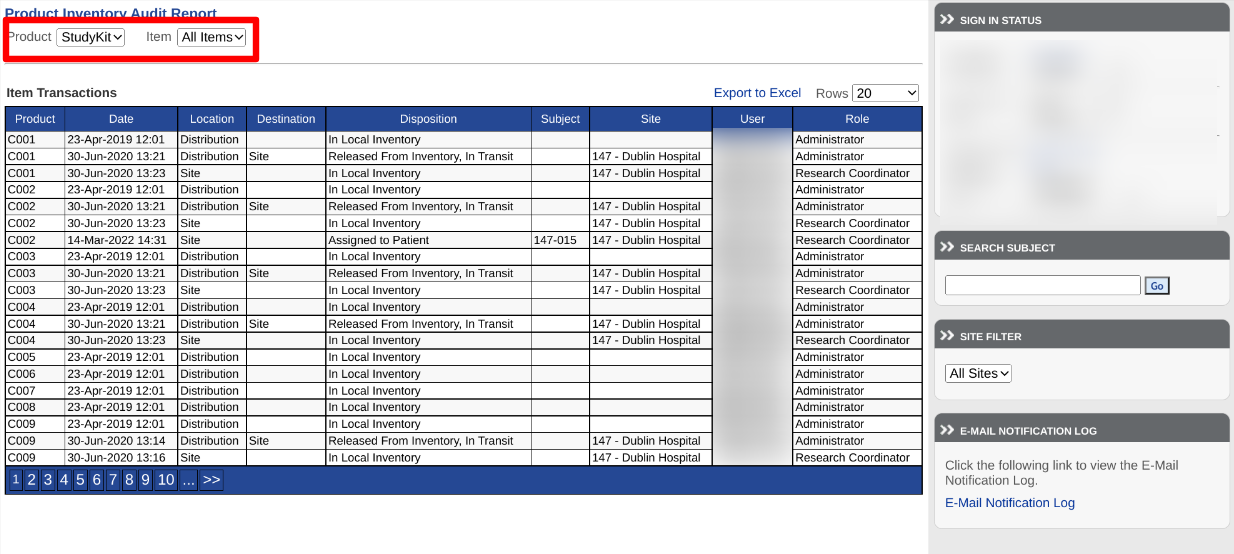
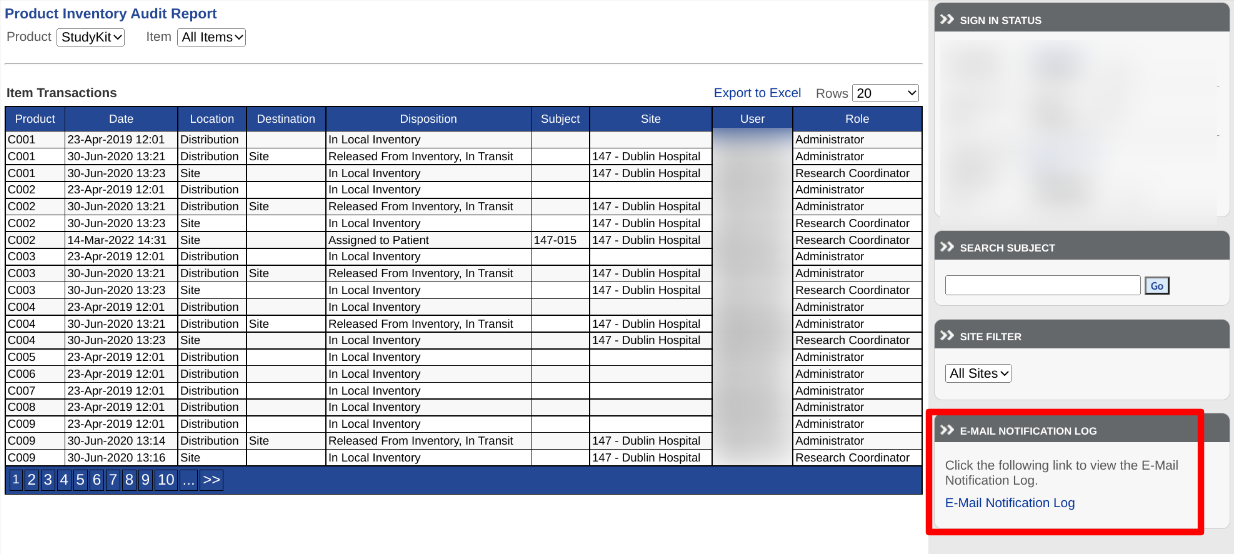
To track the email notification log as a way of verifying the system is sending proper notifications, access the Inventory audit screen as shown below.
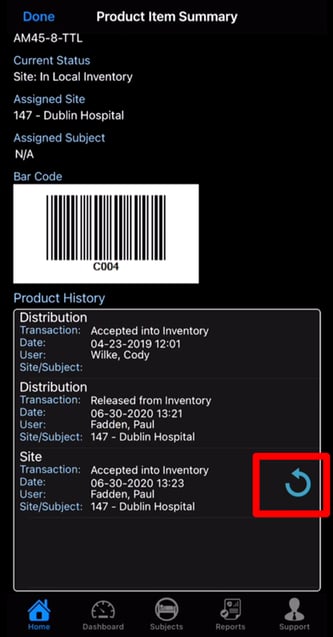
Viewing an Item's Details
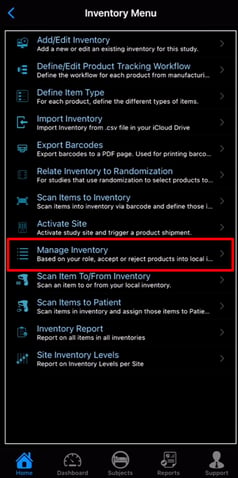
Open the "Inventory Report" or the "Manage Inventory" option, and then tap any item in the list to see its details:
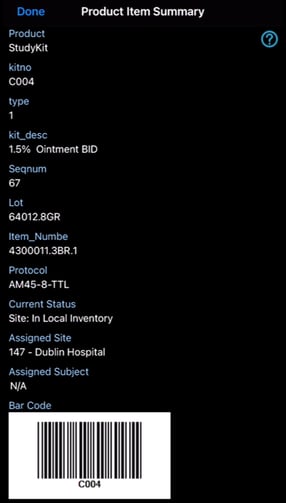
Rolling Back the Last Action Taken on an Item
Scroll down to the bottom of an item's details screen to see the history.
Prerequisite: User has access to Rollback/Undo Item Transaction
Deleting an Individual Item From Inventory
This function can currently be performed only on the mobile application.
To completely remove an item from the inventory list, the item must exist at the first workflow level. For example, if a site needed to send back a damaged item, it needs to be released from the site and accepted at the distribution level. The user performing the delete must also have access to the first workflow level.
To Delete an item, open the “Scan Items to Inventory” screen. swipe from right to left on the item to delete.
Barcodes
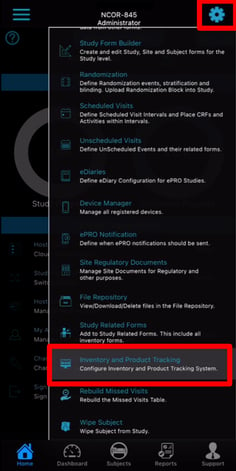
As an added option, Administrators can print barcode labels directly from the inventory list. From the Inventory menu on the Mobile App:
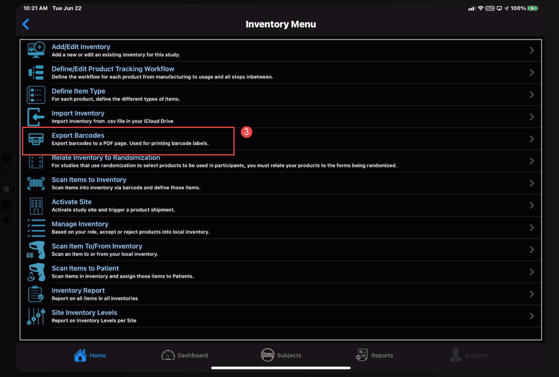
This will give an option to export the file to PDF in a format that matches an Avery label sheet with 10 labels down a page and 3 labels across.
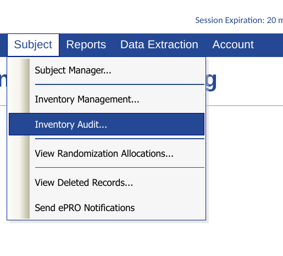
Inventory Audit
The inventory, like all other study data, is fully audited by the system. Every item that passes through inventory can be tracked with a recorded history.
The inventory audit report makes it possible to see this information. Access to the inventory audit is based on the role of the first workflow level in the inventory configuration.
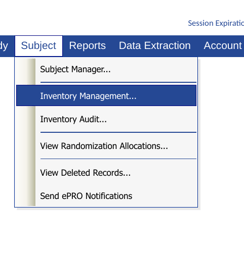
It can be accessed from Subject menu on the Web Browser:
Select the inventory and a desired item ID to see its history, or export all to Excel as shown below.