Creating, Viewing, Responding to, and Closing Queries
Query creation, routing, and closure are key components to drive the success of data collection. These processes help identify errors and provide more accurate data for reporting. This article covers how to interact with queries, how the routing works, and how to manage queries.
Use the following links to jump to a desired section:
Commenting/Posting a Message to a Query
Prerequisite: The user must have permission to manage queries.
Query Basics
Definitions
Manual queries must be manually closed by a user with permission to do so.
Automatic (system) queries will automatically close based on data being corrected.
The Standard TrialKit Workflow of Queries
1. A query gets created - either by the system due to data entry or manually by a user. These will have the status "Attn: Site" and appear Red in color.
2. The query has a message posted by a user
3. The query is closed
Visibility (Distribution)
Queries are only visible to a user if one or more of the following is met:
- The query is deployed to their role
- They have permissions to view all queries within the Queries Report
Query Distribution is unique to each query, but follows a default setting configured by the Study Administrator. Read more about redeploying queries below.
How the System Routes Query Status
When a query is created either by the system or by an Administrative type role, the status of that query will be Attn: Site
When a site type user comments on a query, the status will update to Attn: Issuer
Viewing query status from the casebook
When looking at the record status icons in a subject's casebook, the icons will indicate if there is at least one open query on the forms.
- The icon will be RED if there is at least one query to the site's attention.
- The icon will be GREEN if the only open queries on the form are to the issuer's attention.
- No query icon will display if all queries are closed
Commenting/Posting a Message to a Query
Queries are the optimal way to handle contextual communications that pertain to study data, without the need for email or other external methods.
Prerequisite: User role has access to Query management
The query dialog window can be opened by tapping any query icon on the eCRF as shown below. Queries can also be accessed via the Queries Report.
Web Browser:
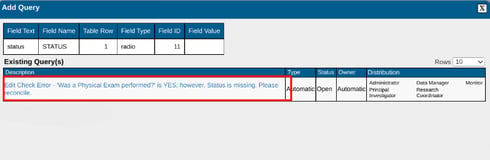
In the table that opens, there will be one or more queries listed, along with details of each, including which roles it was distributed (visible) to.
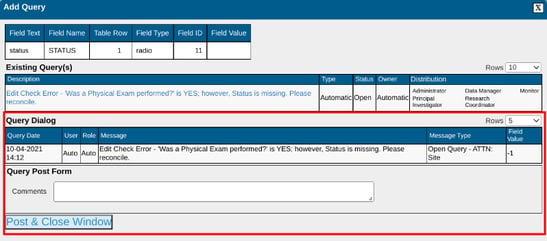
Tap the query link to open additional details as shown below.
Comment as needed to add a message to the query, then tap the SAVE button at the bottom.
Mobile App:
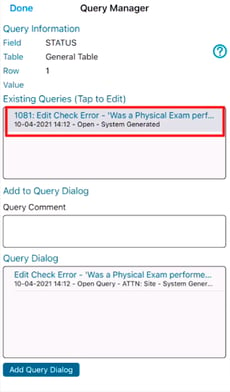
The same process applies on the mobile app after tapping the query icon next to a field on the form.
This process can also be done from the Queries Report, which makes it easier to address all queries in one place without navigating individually to each form where the queries exist.
Adding a Manual Query
Prerequisites:
- User must have access to Query Management, Create Query permission
- The form must be a saved record. New forms cannot have queries posted until they are saved.
- Workflow/Review has not been started on the form (I.e. only un-reviewed forms can have new queries added)
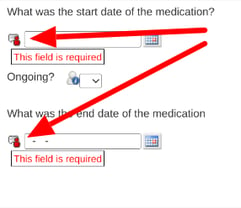
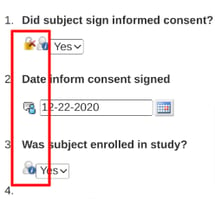
When reviewing a form, an icon like below will display next to each field on the form.

If the field is being SDVd or a query already exists, that can be tapped as well to open the query creation form as shown below.
Web Browser:
Mobile App:
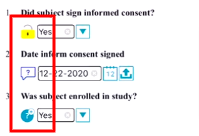
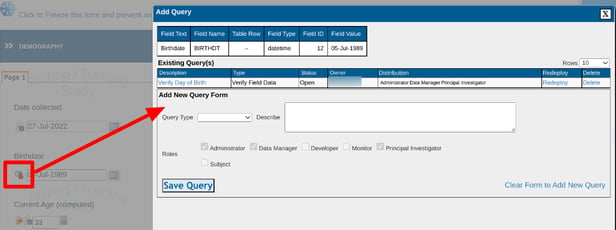
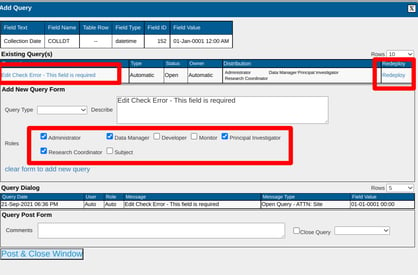
Following is an example where a query already exists on a field. Tapping the query icon opens the form to add a new one. Select the query type and use the description for the query message.
The Roles checkboxes indicate who the query will be visible to. This may be disabled depending on the configured study permissions.
Web Browser:
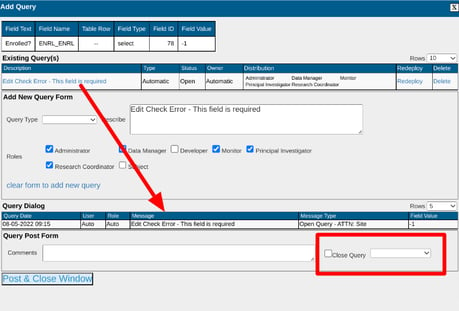
You can also select the existing query in the table at the top for viewing its details as shown below.
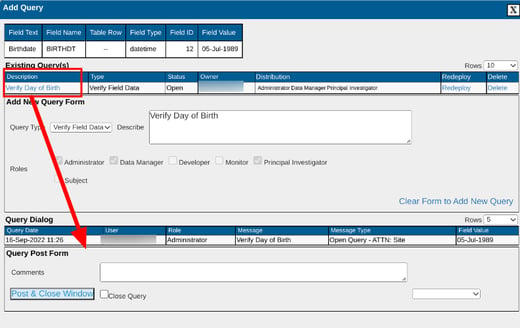
From here the query can be updated, commented on, closed or redistributed - depending on permissions granted to your user role.
Redeploying Queries
By default, all queries will be distributed to the roles defined within the study configuration. Roles not included in the distribution will not see the query on the eCRF or in the Queries Report.
If necessary, Queries can be re-deployed (redistributed), to different roles. This section covers how that is done.
Prerequisite: User role does not have the permission "Prevent editing role distribution" enabled within the Query Management permissions.
To redeploy a single query, open the query window from within a form, select the desired query, select the roles needed and then tap the redeploy button.
Web Browser:
Batch Redeployment
To redeploy multiple queries to a new set of roles, use the queries report.
Prerequisite: User has access to batch close queries
Closing A Query
Prerequisite: User must have access to Query Management, Close Query permission.
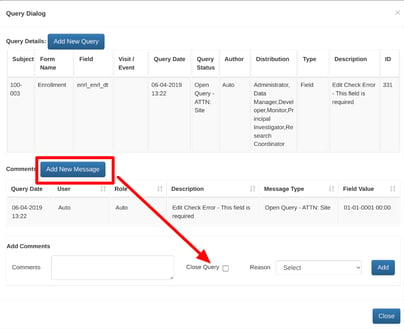
Open the query dialog window from the form or from the Queries report.
Select the query message and then check the box "Close query". A reason is required (for the audit trail). The reasons available to choose from are configured by the Study Administrator.
From the Queries Report:
Closing manual queries authored/created by other users might not be possible if your Administrator has prevented that right in the role permissions.
If you have the ability to batch close queries, the author user or role-based permissions will not be enforced.
Batch closing groups of queries can also be done from the Queries Report as in the Queries Report section below.
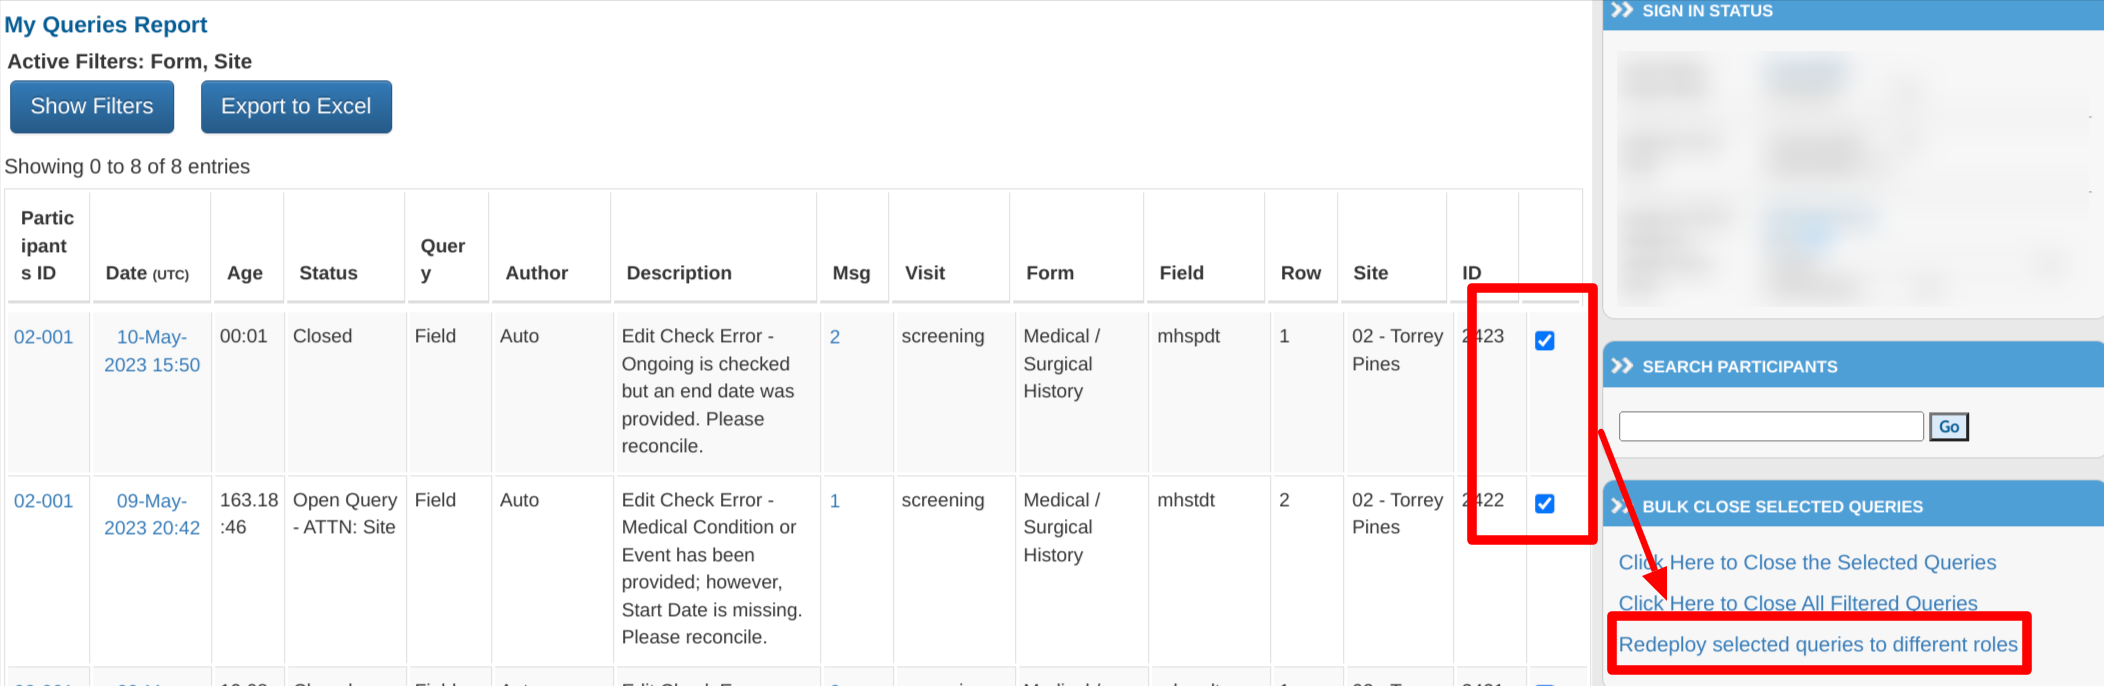
My Queries Report
This report serves as a central place to both view and work with queries.
Prerequisites:
- User has access to Query management and the My Queries Report
- User can only see queries that are:
- On forms that the user has view access to
- On fields that the user is not blinded to
- Deployed to that role
Web Browser:
Select the Queries Report option under the Reports Menu.
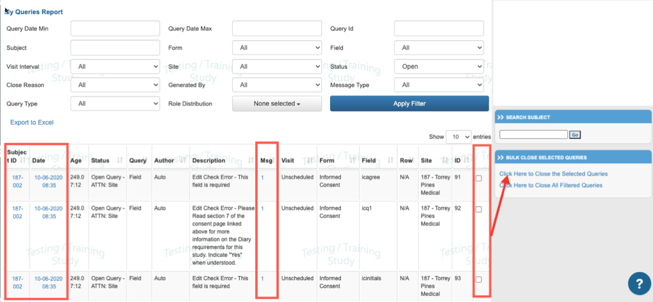
Column descriptions for the highlighted columns above:
- Subject ID where the query resides - This is a link to the subject’s casebook
- Date/time the query was opened - This is also a link to open the record where the query resides.
- Msg - Tap to open dialog window for posting message or closing (permission-dependent). The number indicates the number of messages currently posted on the query
- Batch close - Checkboxes to select for the purpose of batch closing the queries by using the action buttons on the right.
To batch close queries, the user must have the permission granted to Batch close queries.
The queries displayed in this report are based on two factors:
- Query is deployed to the current viewer's role
- If #1 is not true, the user must have the permission to Show all queries
- Queries will be hidden to the user if they don't have view rights for the form, or are blinded to the field where the query exists.
Queries Report Filters
There are several filters to drill down to any subset of queries. A couple points to note about how filters work:
- The list will only be filtered based on the queries that have been deployed to the viewing user's role
- The Author User and Role Distribution filters are limited to users/roles equal to or less than the current user's role
Query Summary Report
The query summary report is located under the Reports menu and provides metrics related to query statuses and ages.
Prerequisite: Access to Query Summary Report
The following metrics can be assessed from this report:
- Total open queries split by manual and system
- Total closed queries, split by manual and system
- Total queries, both open and closed across the study
- Total open and closed by the site (website only)
- Total open and closed by age across the study (app only)
- Total number of CRFs by the site to help show site performance alongside the query numbers
Query FAQs
Unable to See a Query on A Form
There are two possible causes for this, starting with the most common:
- The query exists on a data field that has since been deleted. This is typically a row within a table that was deleted - which can be verified in the audit history. Alternatively, it was a field that the study Administrator removed from the form. In either case, the query is only visible in the queries report and can be commented or closed from there.
- The user's role did not have the query distributed to it. If the role is normally supposed to see queries, the study configuration may need to be updated to include that role. Otherwise, queries must be individually re-distributed to the desired roles. This can be done by opening the query details by anyone who has the permission to edit query distribution.