Viewing a List of Studies on a Host Account and Making Copies of Studies Within the Host
The Study Manager screen shows all studies that exist on the current Host account, along with the production status of each one. It is also where new copies of existing studies can be created.
Table of Contents
Checking the Production Status
Updating a Copied Study Back to the First Version
Making the Study Publicly Available For Participant Registration
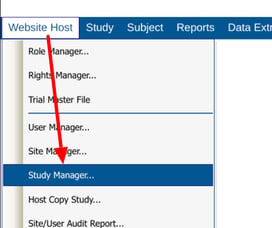
Accessing the Study Manager
Prerequisite to the functions covered in this article: User has host-level access to the Study Manager, along with add, edit, and delete permissions
Web Browser:
Mobile App:
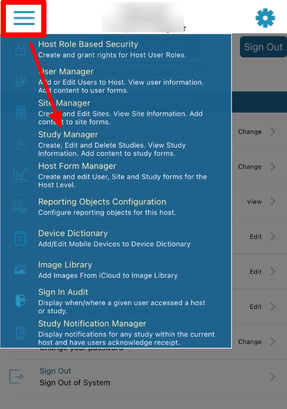
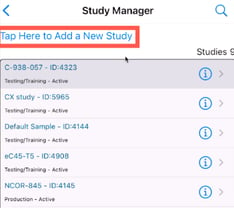
This will open the table of studies that exist on the current host, even if the current user is not a member of all studies.
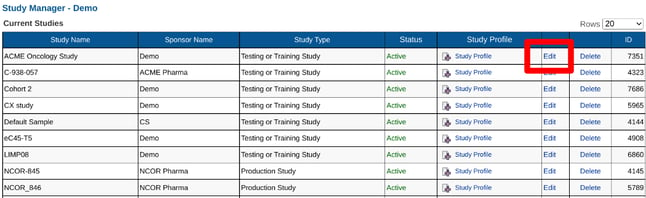
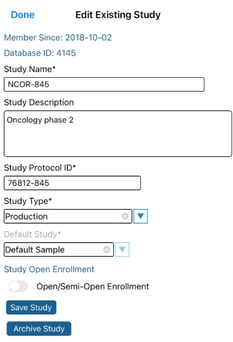
Editing A Study Name
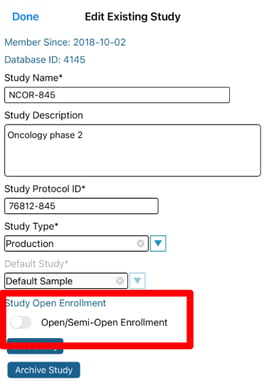
Within the list of studies, tap the edit button, or if one is not present tap the study name to edit its details. This will allow for changing the study name, sponsor name, and study type.
Web Browser:
Mobile App:
(after tapping a study to view the details)
Checking the Production Status
There are two study types: Testing and Production. An example is shown in the table above under Editing a Study Name.
Only production studies can have the status updated to "Live". Study types are managed by Crucial Data Solutions based on licensing.
Active vs. Archived study: If a study has been archived for long-term storage within TrialKit, the status will read as "Archived".
Creating A New Study (Enterprise Clients Only)
Copying A Study
Web Browser:
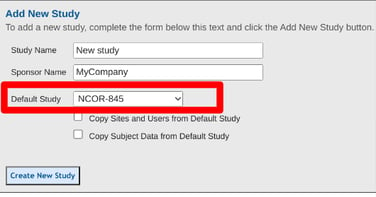
Fill out the form with a study and sponsor name as shown below. These can be changed later. The important part is choosing the Default study or the study that will be copied from as a template.
Mobile App:
TrialKit comes with an initial study template consisting of a common eCRF library, 21 CFR Part 11 study configurations, and standard user roles and permissions.
From the template, you can simply begin registering subjects to look at the study workflow.
If this is not the first study, the default study selected (source study) will be what gets copied. This includes all forms and study settings from the source study.
The following elements are not copied:
- Randomization tables
- eDiary configurations
- Inventory configurations
- Informed consent configuration
Updating a Copied Versioned Study Back to the First Version
When copying a previous study that already contains multiple versions, the new copy will end up with those same versions in place. This section covers the steps for reversing the versions back to a single one, where that single version is the most recent version of the source study.
- From the Form Builder, export all the most recent versions of forms to the new form library. This step can be skipped if the first version of the forms is sufficient - in which case steps 3 and 4 is all you need to do.
- Open the scheduled visits configuration and take a screenshot of the visit design. This will be used later to verify the visit schedule does not lose any forms.
- Open the Version Manager page and Un-include all sites from all versions
- Open the study configuration and un-publish/delete all versions of the new study in reverse order. Continue to do this until you are down to the first version, which should be "In Development". Stop here if the later form versions were not needed. All forms in the form builder will be back to version 1.
- If the later versions are needed, go to the Form Builder and delete all existing forms. This is easiest on the mobile app with the batch delete option.
- Import the forms back into the form builder that were exported in step 1
- Use the screenshot from step 2 to reference setting up the scheduled visits with the forms that are now back in place.
Making the Study Publicly Available For Participant Registration
Setting up a study for public participant enrollment can currently only be configured on the mobile app Study Manager. This feature makes it so the study gets listed for public visibility on the TrialKit app when Participants are signing in.
If enabled, a security code (alpha-numeric) can also be defined. This prevents undesired registrants. The information for study signup and enrollment code can be provided via any means, such as an external public web page.
Mobile App:
When this is enabled, users on TrialKit will see this when signing in as Participant users:
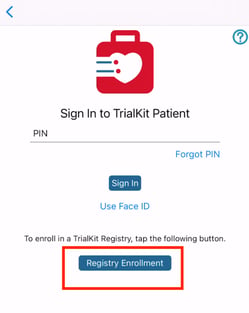
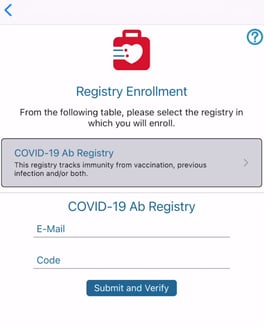
The Participant will be created as a new Participant ID on the first Provider site (the Provider site with the lowest DB ID). If no Provider sites exist, the Participant will not be able to verify their registration.
The system verification email can optionally contain any attachments for instructional purposes of the study (e.g. Registry synopsis or instructions for next steps). To do this, simply upload a file within the Study Documents which contains the text “Instructions For Use” within the file name.