Understanding the Steps Involved in Setting Up a Study to Support Tracking of Investigational Products (IP)
Inventory, or "Trial supply" - (also referred to as IRT or RTSM) is a function of TrialKit function for tracking and managing investigational product (IP) used within the study.
This is a helpful tool to used when study subjects are receiving a specific product, device, or drug at any point during a study. Among its various functions, it primarily allows sites to get assigne IP as part of their normal data entry workflow on forms, based on the products they currently have in their local inventory.
This article details how the inventory is setup.
Inventory User Roles and Permissions
At a minimum, for most scenarios, two user roles need access to Inventory:
The Inventory Administrator (should be unblinded if the inventory will be tied to randomization)
The site user, like a Research Coordinator, who accepts items into the site’s inventory and assigns items to participants
Optionally, other user roles can give visibility of the entire inventory without the ability to perform any actions within it.
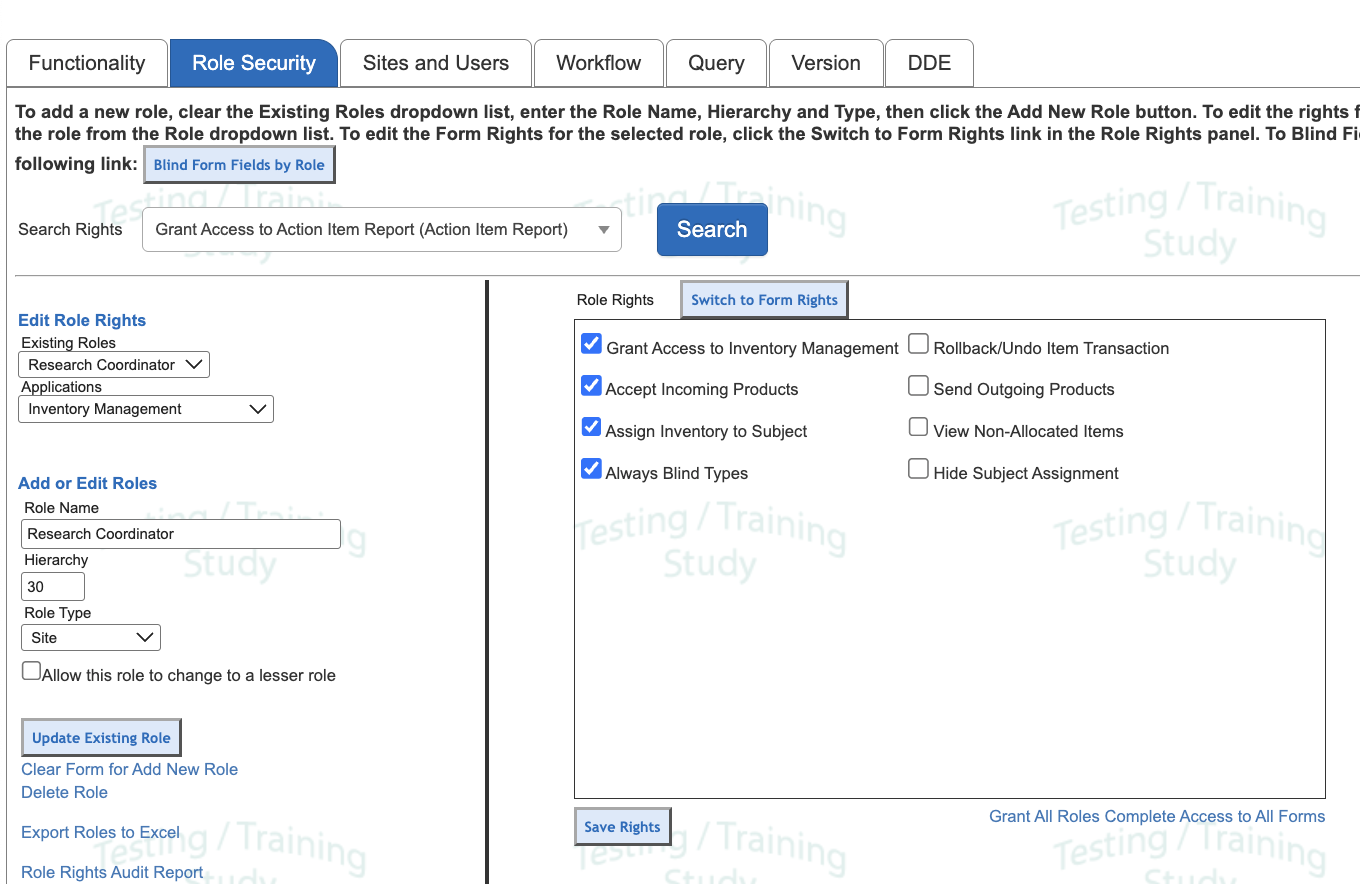
Here is an example of the role permissions commonly granted to a site level role:
Configuring An Inventory
Prerequisites:
Study is enabled to use Inventory within the functionality settings
User has access to Inventory Administration in the role permissions
The first step is to fill out a study form within the study documents titled "Inventory Configuration". The form is available by default, or can be imported from the public form library titled "Standard site/study forms".
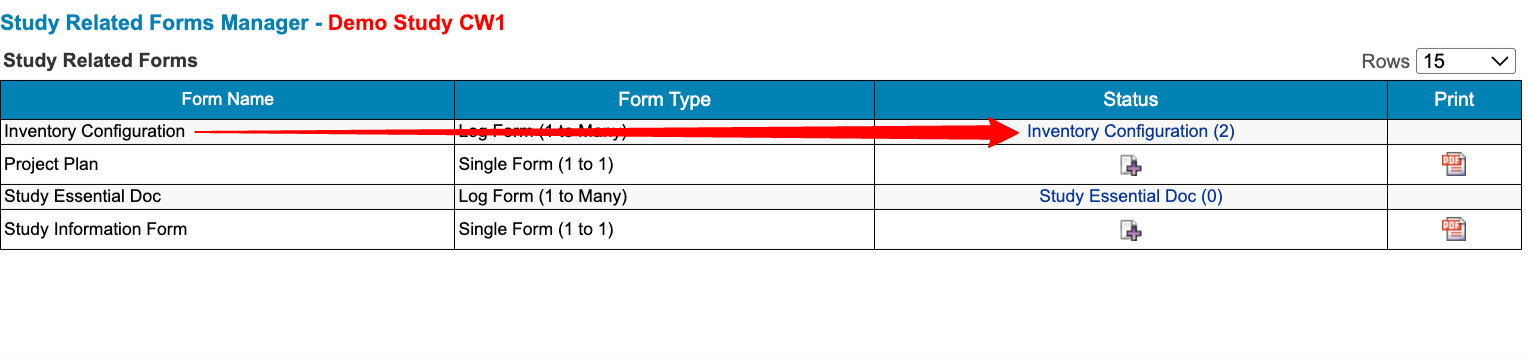
Any number of independent inventory lists can be configured. Fill out one form for each of those lists. It’s normally only one or two master lists being managed.
Below is an example of an inventory titled "Study Product" for a package of IP that will be getting distributed to study Participants.
One of the key factors being defined in this step is the inventory file (CSV columns) that will be uploaded later. At minimum, it needs to contain:
The first column serving as the unique identifier for each row in the file, and;
The second column to differentiate product types, even if there is only one type.
All other columns in the example below are optional, but it’s recommended to also include similar columns to this example.
Item - Unique identifier of each item in inventory, like a serial number. It should be a text string, even if the actual Item IDs are only numbers.
IPType - The type of product in case the products are broken down into types. for example, differing concentration of a drug, or differing builds of a medical device which are allocated based on randomization assignment. This should be a number value.
SequenceOrder (optional) - A simple numerical sequence starting with 1 that will make it easier to reference for each product type, rather than relying only a long random Item number
LotNumber (optional) - for reference only if one exists
Description (optional) - for reference only within the inventory report, rather than deciphering product type value.
Category (optional) - This is required only if the inventory will later be configured to map to an external variable. In other words, if the inventory needs to assign based on some subject-specific identifier like weight group.
Expiration (optional) - This will be used by the system when product is automatically allocated. If an expiration date has passed, it will not be allocated.
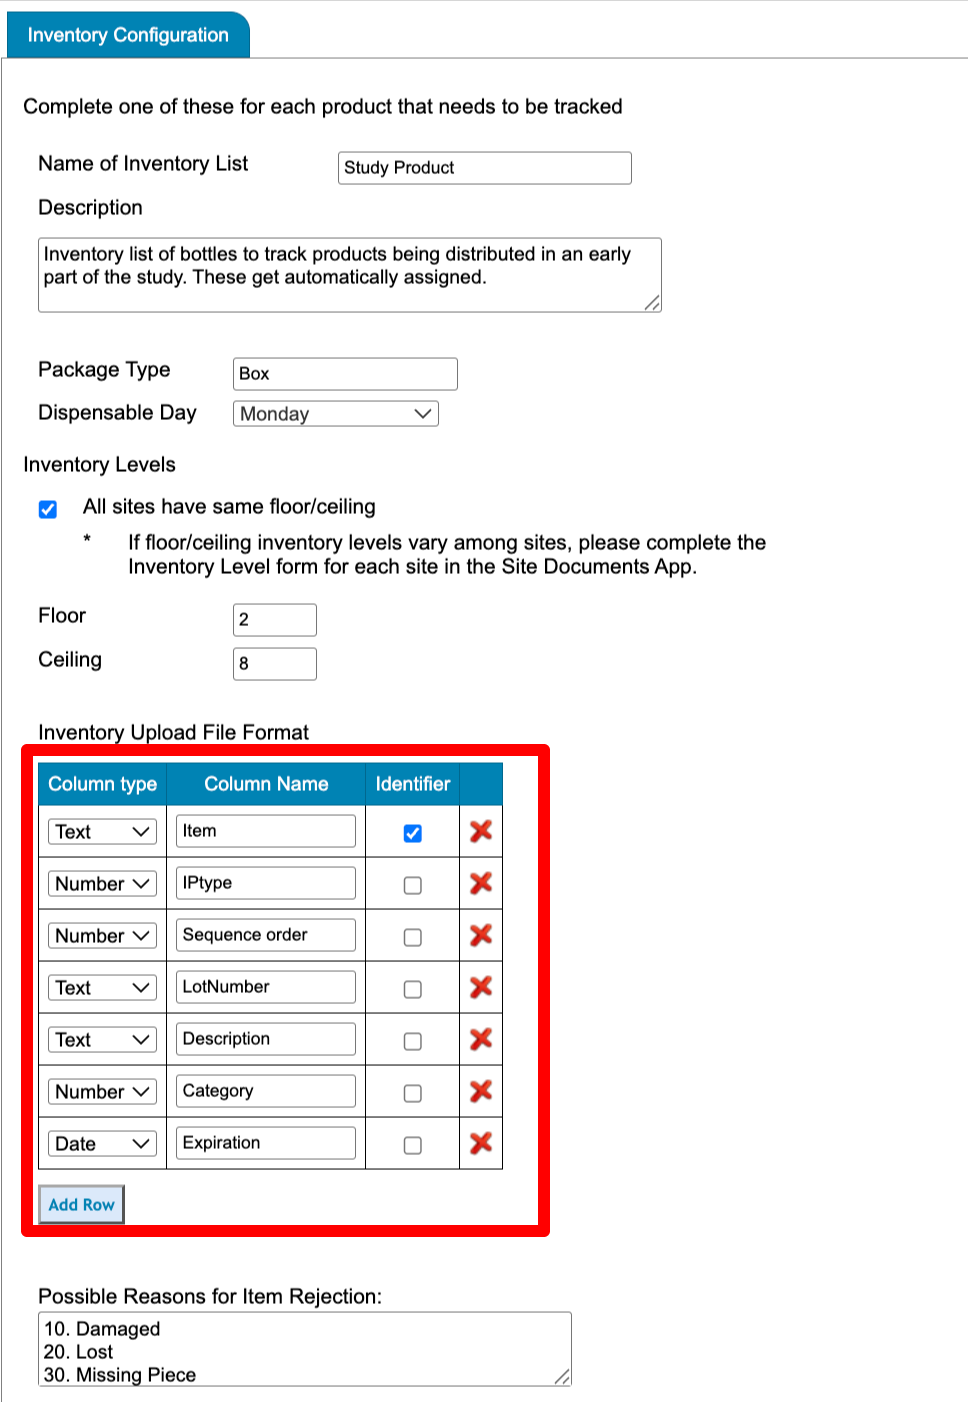
Add a new row in the table for each column that will exist in the uploaded inventory file.
Reserved names that should not be used in the file column headers:
Item_id
Item_disposition
Item_status
Item_site
Item_subject
Item_retired
Item_date
Barcode
"Type" Column
If the products will be associated with randomization allocation, the “IPType” value should correspond with that value referenced on the randomization allocations screen.
In this example randomization, product with IPType "3" should be a placebo product in the inventory list:
.png "image(879).png")
If randomization is not related to product, or randomization is not being used at all, set each product type as "1".
Floor and Ceiling
The inventory levels that should be adhered to for each site and product type if automated inventory distribution is being used. These can be adjusted over time if needed.
In the example above. If site 'Acme' reaches 2 items of IPType 'A', the system will refill Acme site up to the ceiling level of 8 for ALL product types.
Floor and Ceiling Will Not Always Be Enforced
Floor and Ceiling are only enforced by the system for automatic IP allocation. In other words, the site has been activated and the inventory is connected to either randomization and/or a subject category.
Reasons for Rejection
These will be the possible coded reasons a site can indicate for rejecting an item that has not yet been accepted into the site's inventory.
The choices here must be in the format "X. Reason" - where X is any coded number value, period, single space, reason text. This is how the system will know which choices to display when a site is rejecting an item they received.
Defining the Product Workflow, Contact Information, and Product Types
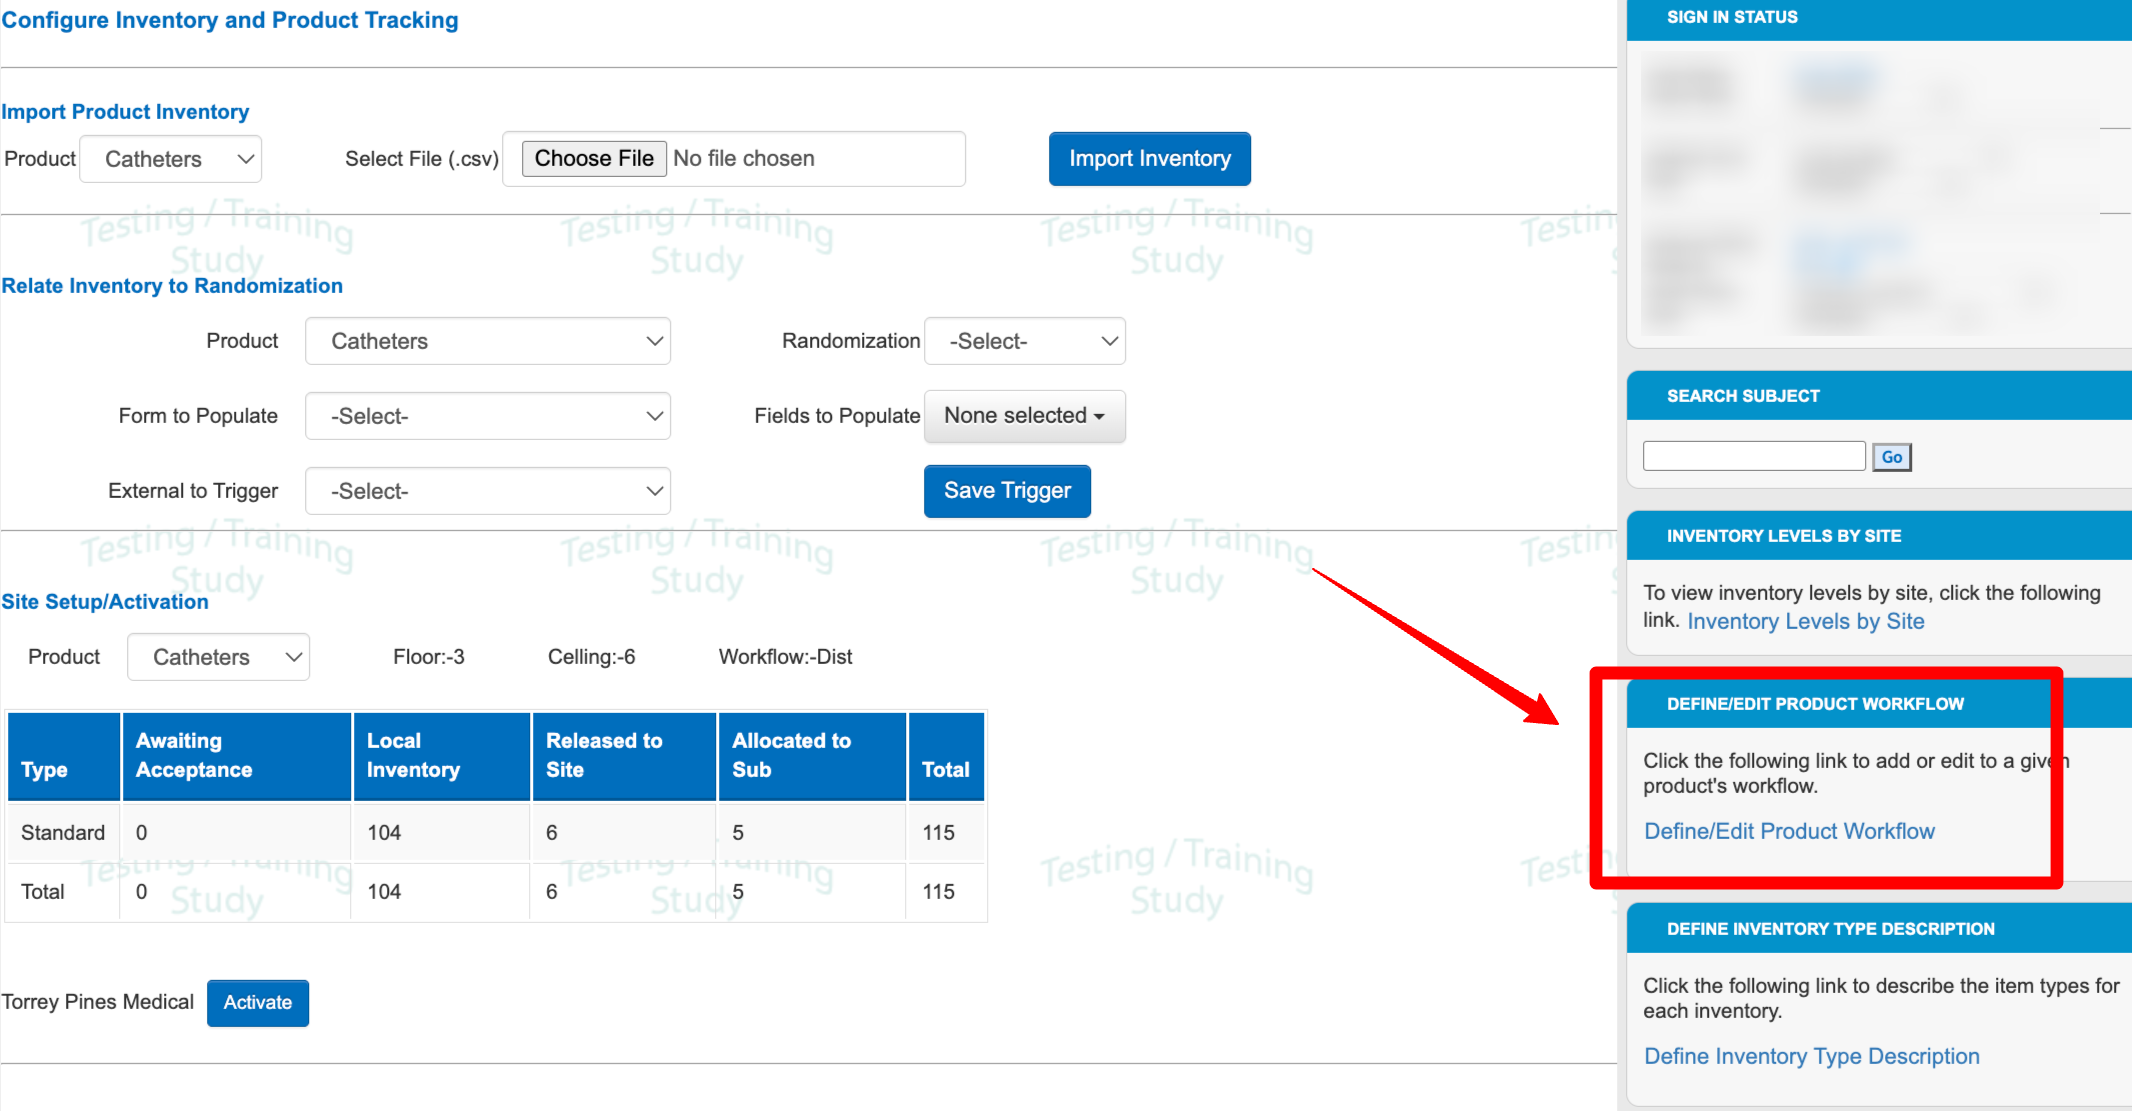
The inventory workflow is necessary to tell the system how each item will flow from a starting point to a final destination and dictate which user role is responsible for each of the levels an item passes through. This is needed before uploading an inventory file. It can be accessed from the Inventory Configuration screen:
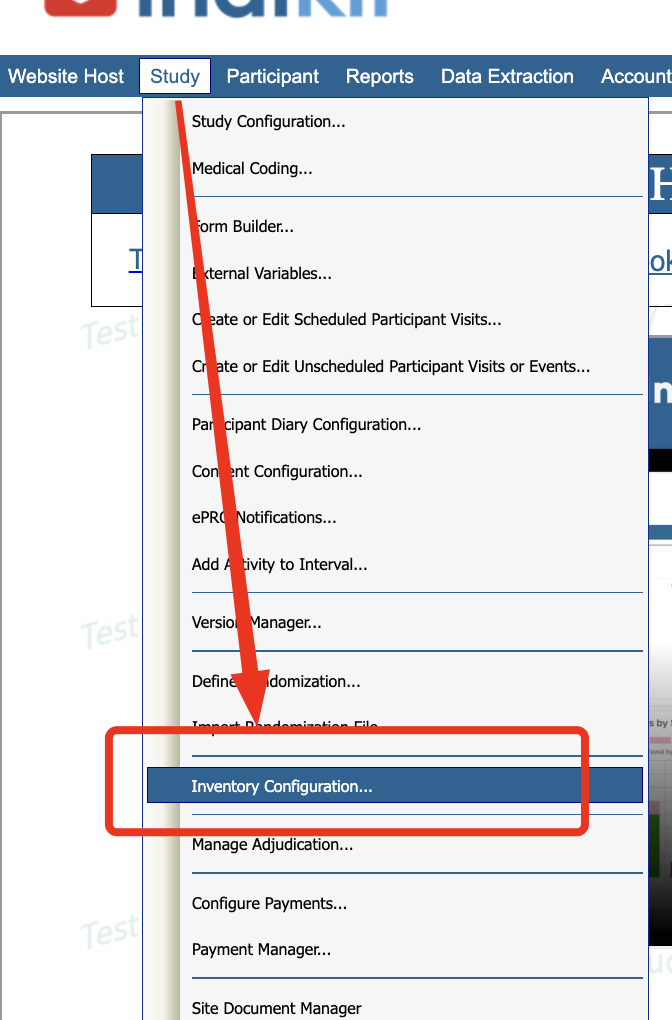
Select which inventory configuration (Product) to create a workflow step. Each step created will be added to the table below.
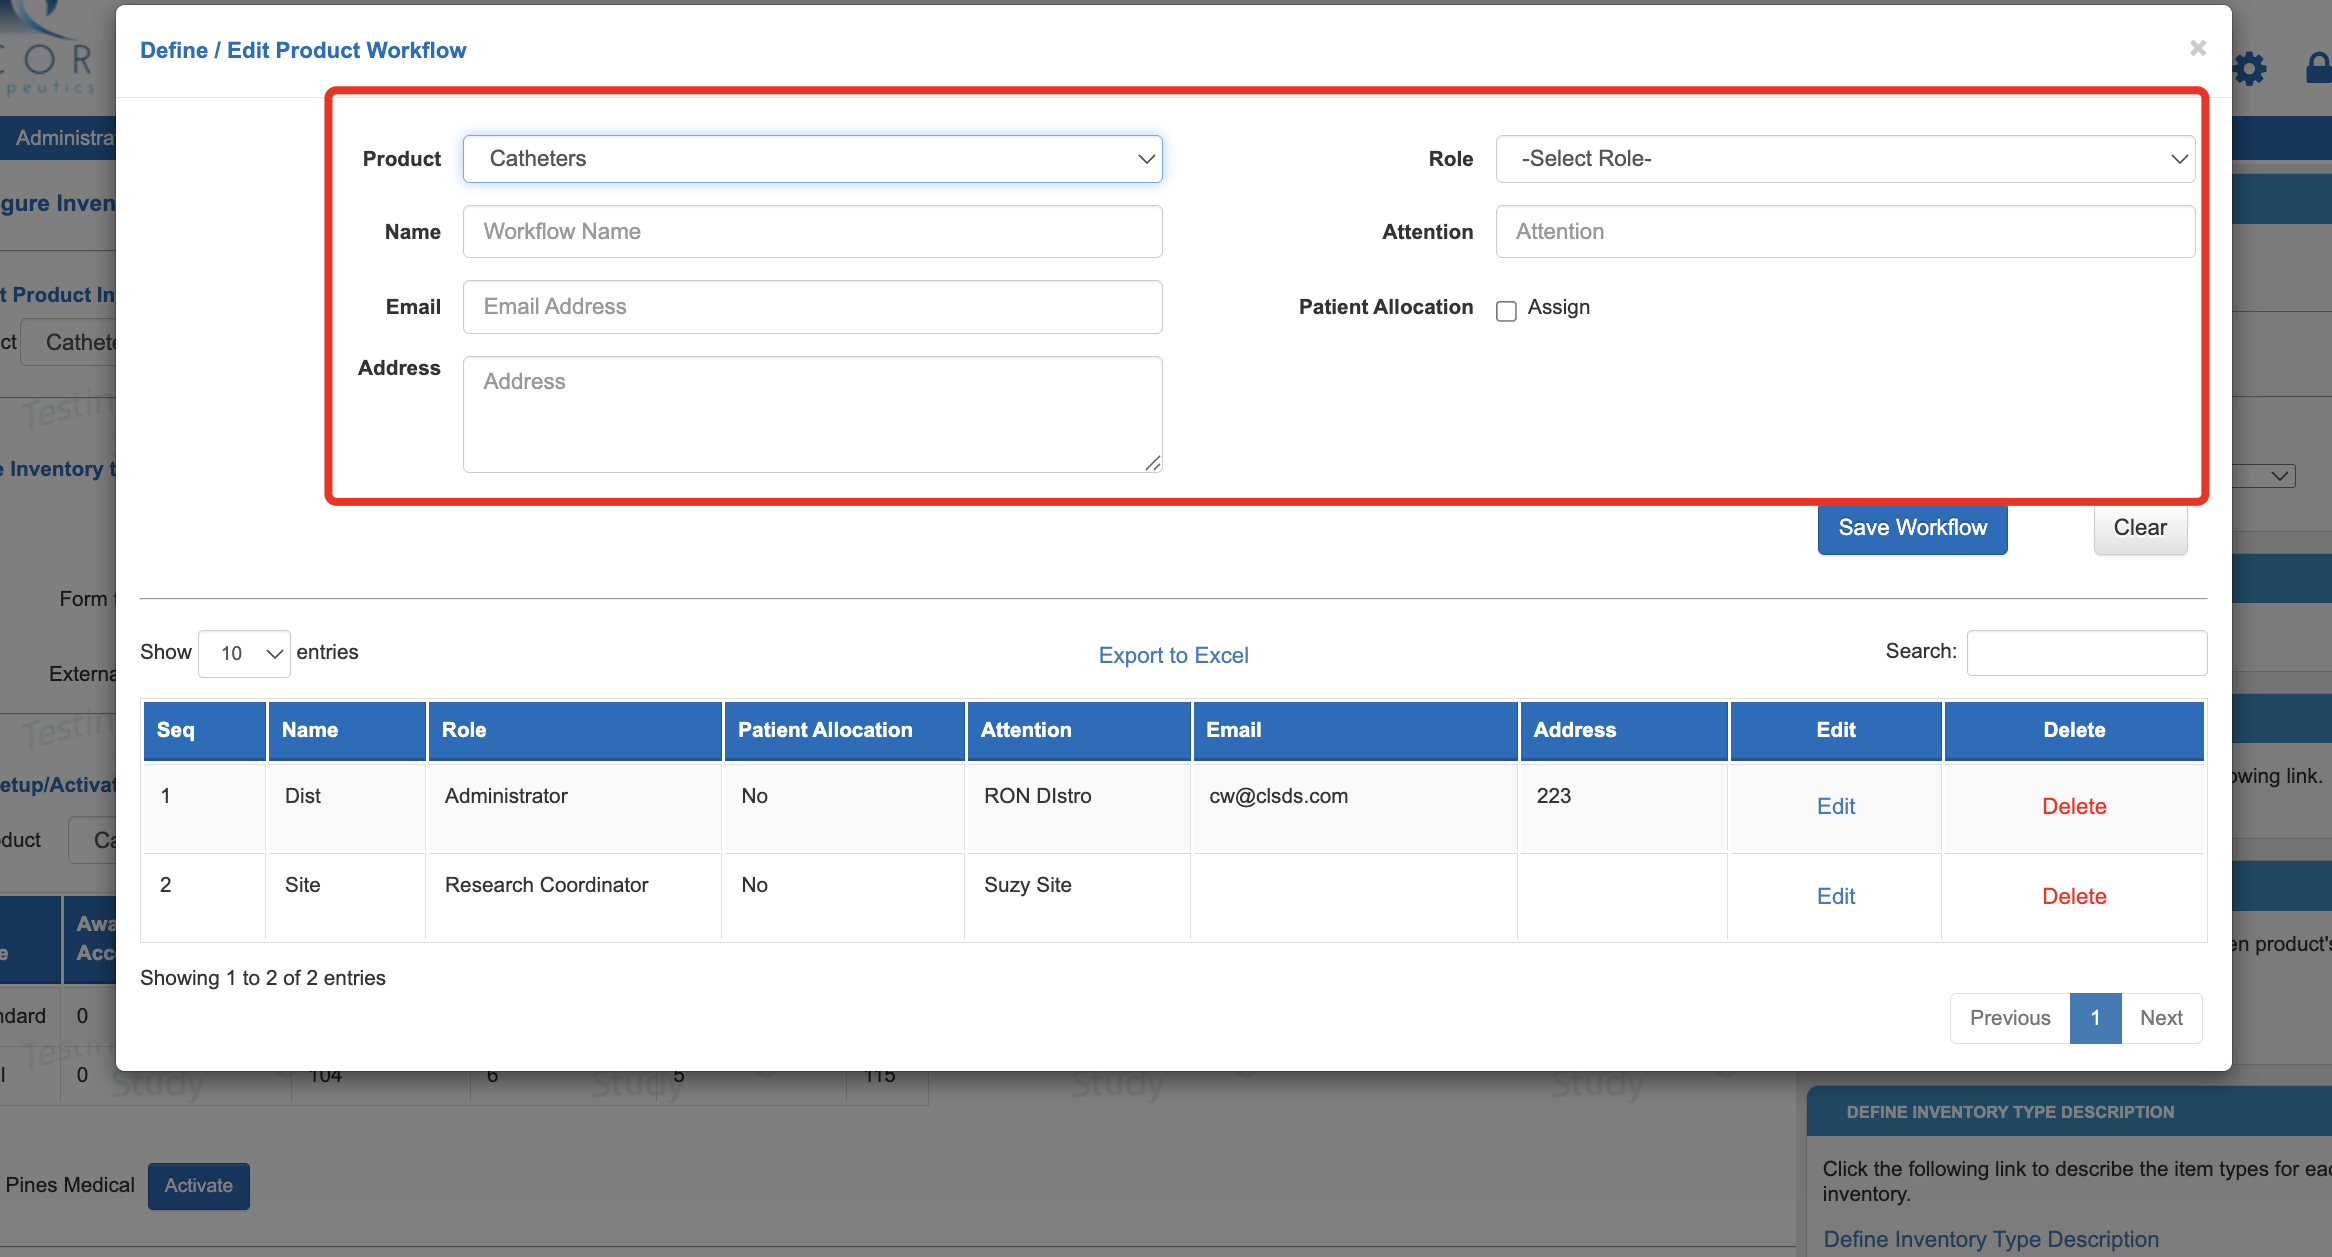
A Few Points to Consider
Items with site-specific visibility need to be Site type roles, which are defined in Role security.
If using automated inventory, the name/email/address at the first workflow level will be the contact person who receives the shipment notices from the system. This can be an external contact that never accesses or utilizes TrialKit. The role defined in the first workflow level will also get copied on these notices.
The site-level workflow contact information is not needed because each site will have its own contact. The site contact is named in the site "Inventory Contact" form within the Site Manager under the website host menu. If that form does not exist in your Site Manager, it can easily be imported from the Inventory Forms public form library. The key fields in that form must be named "site_contact", "site_email", and "site_address".
Site Contact Information
It's important to complete the appropriate contact information for both the Distributor (described above) and each site that will be part of the study. The system will notify those parties regarding inventory activities. Primarily when new items are shipped or items are rejected.
To complete site contact information, use the Site Contact form within the Site Manager.
Define Product Types
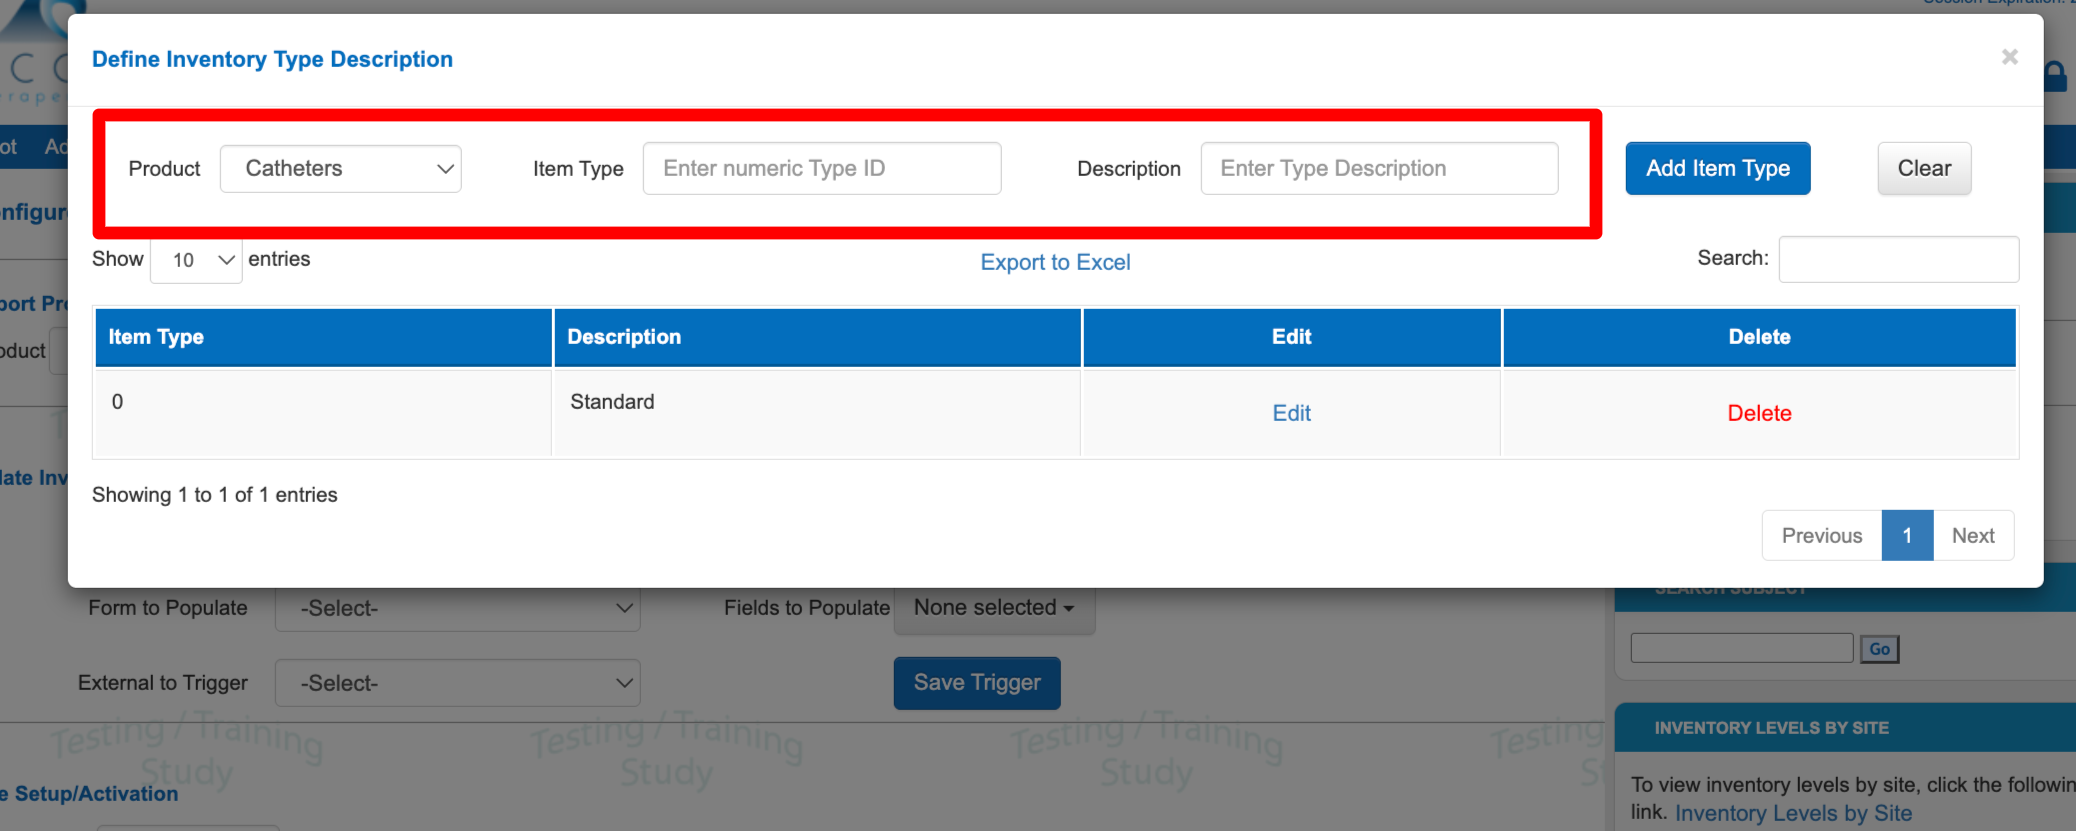
It is necessary to give a name to each type of product, even if there is only one type like below. The types will be displayed in various reports.
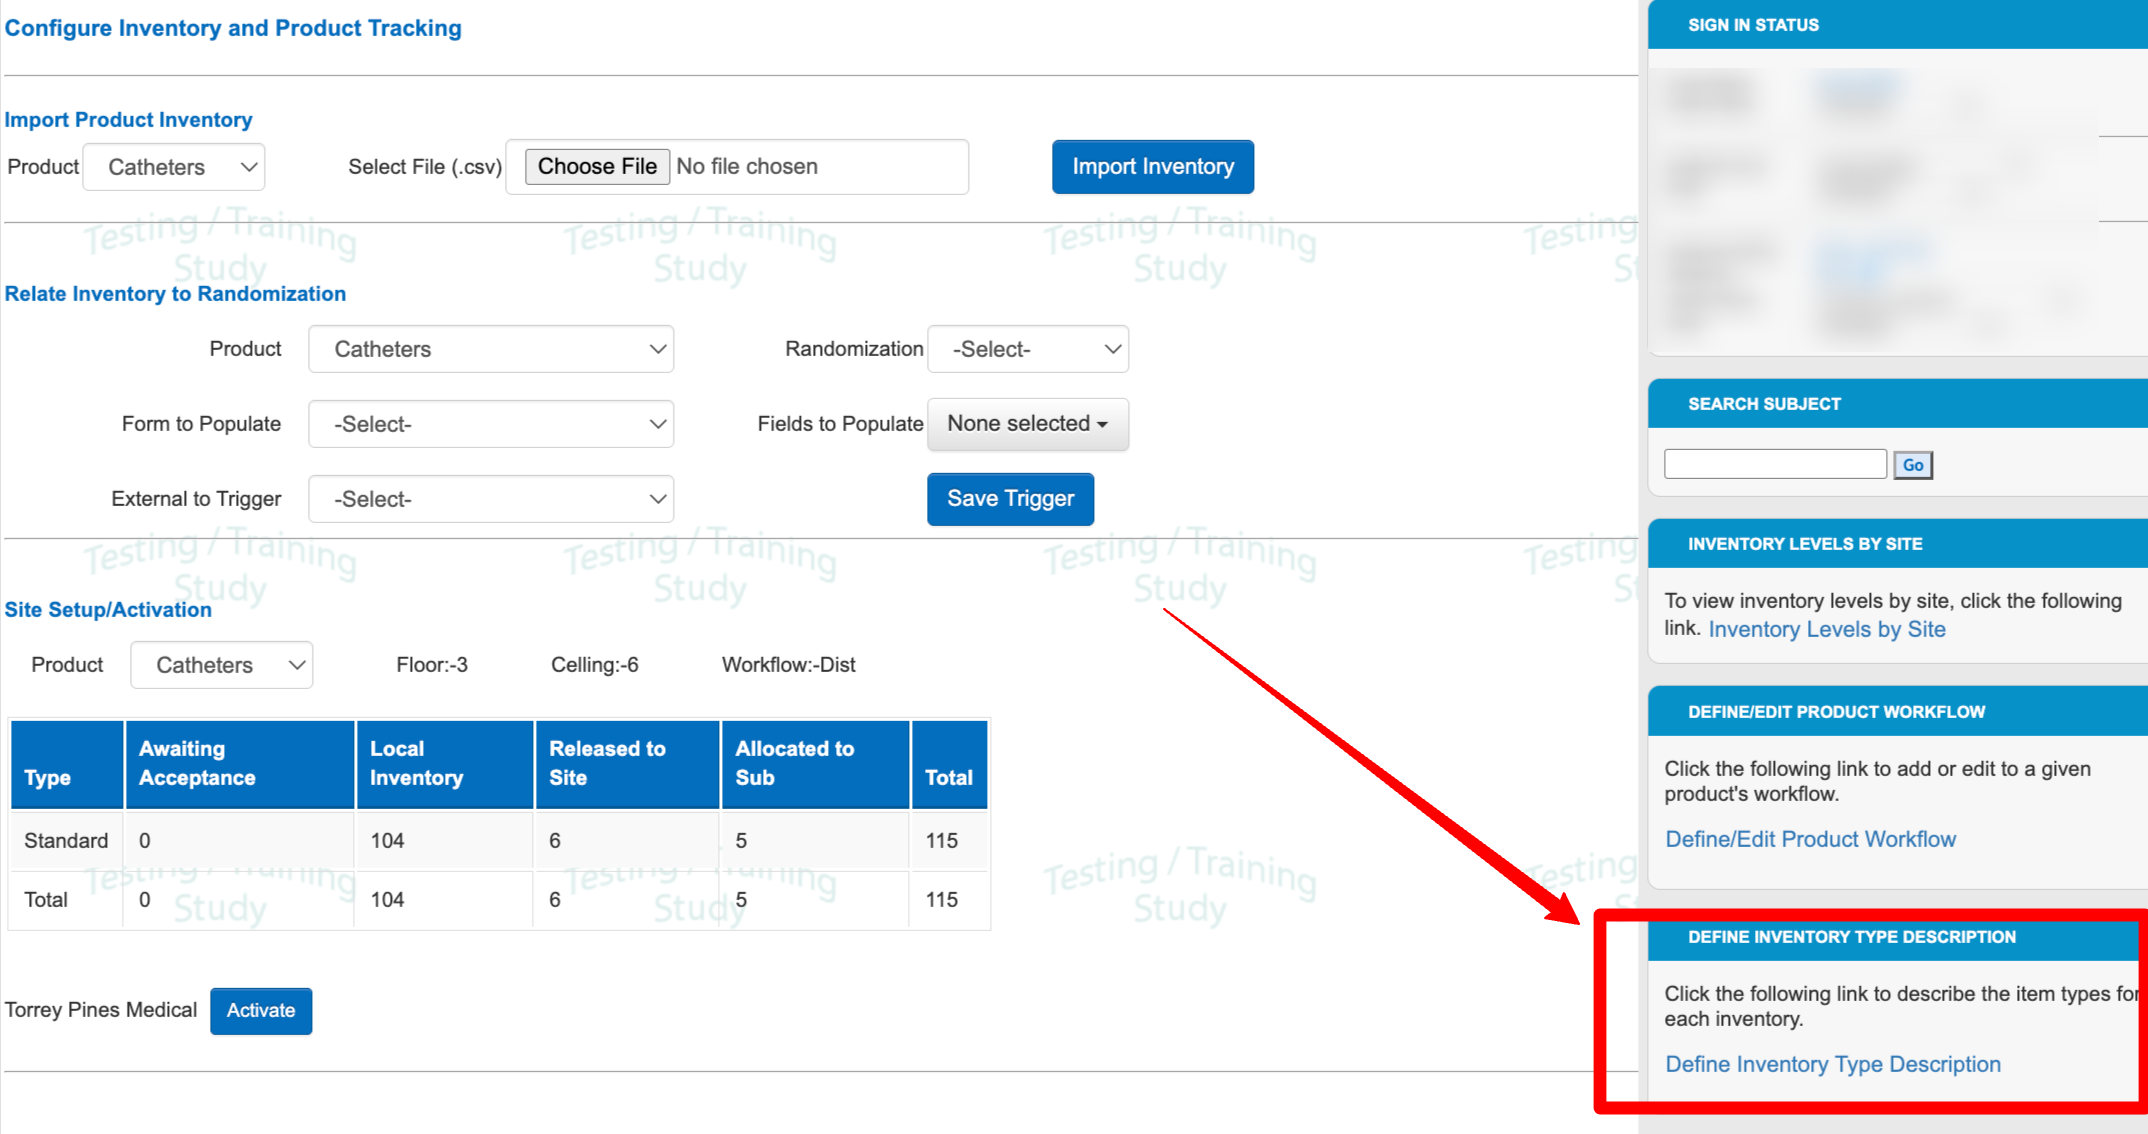
Select the inventory to define types for, and then use the form to fill in the text definition of each as shown below.
Importing An Inventory List
To import a CSV file containing an inventory list, open the Inventory Configuration screen.
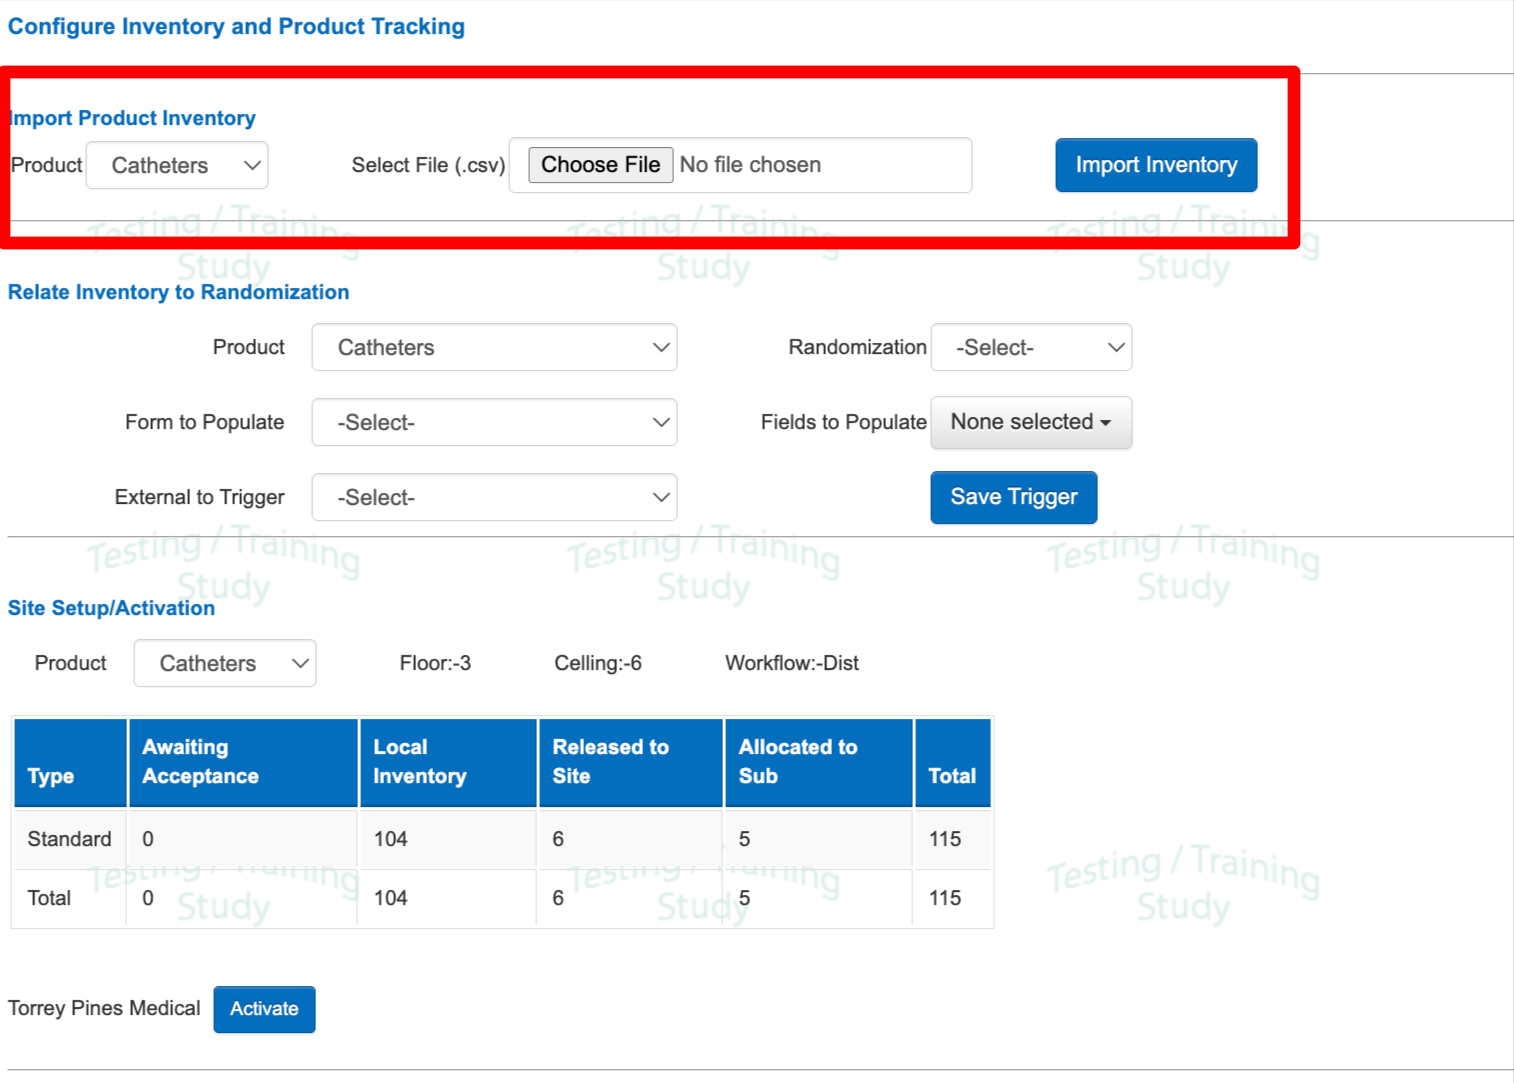
Here's a sample file to use for practice based on the example configuration detailed above. Note, if date is used in the file, it needs to be formatted as M/D/YYYY
After uploading, the list can be seen in the Inventory Manager.
Updating an Inventory List
As the study progresses, new items can be added to the list by simply updating the CSV file that was originally imported. The system will append those new items onto the existing master inventory list without affecting pre-existing items. In other words, existing item details cannot be updated. To update existing items (still not allocated to subjects), there is an option to delete non-allocated items to re-upload with the new/corrected details.
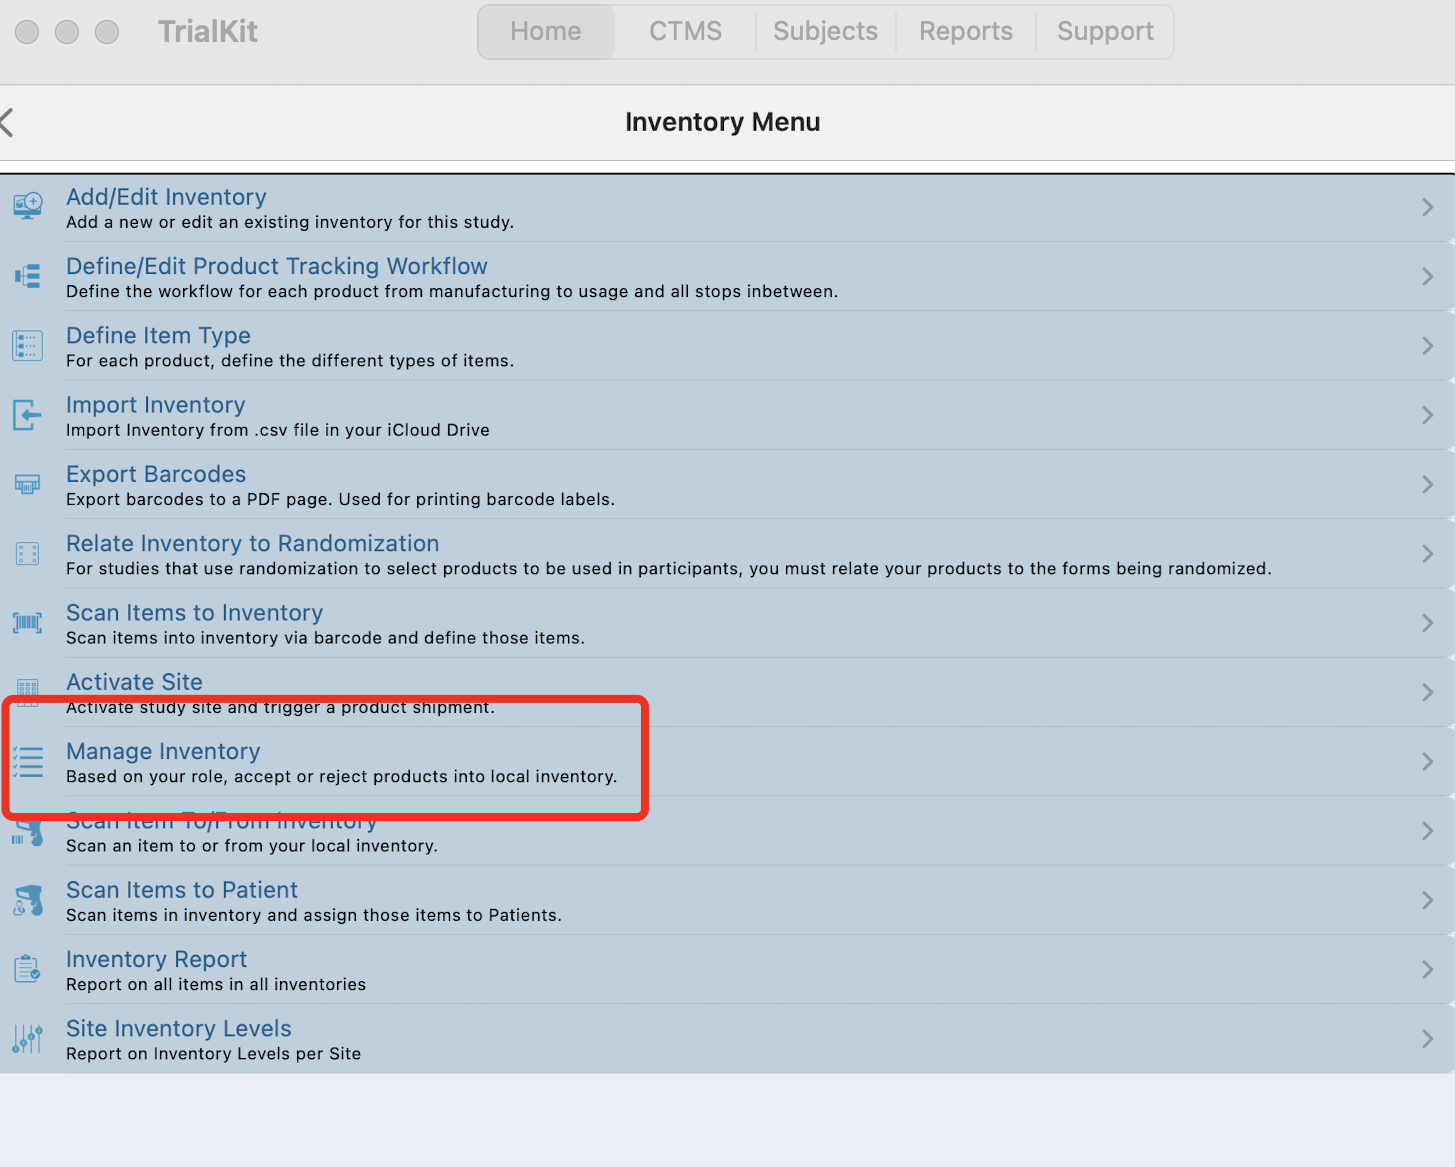
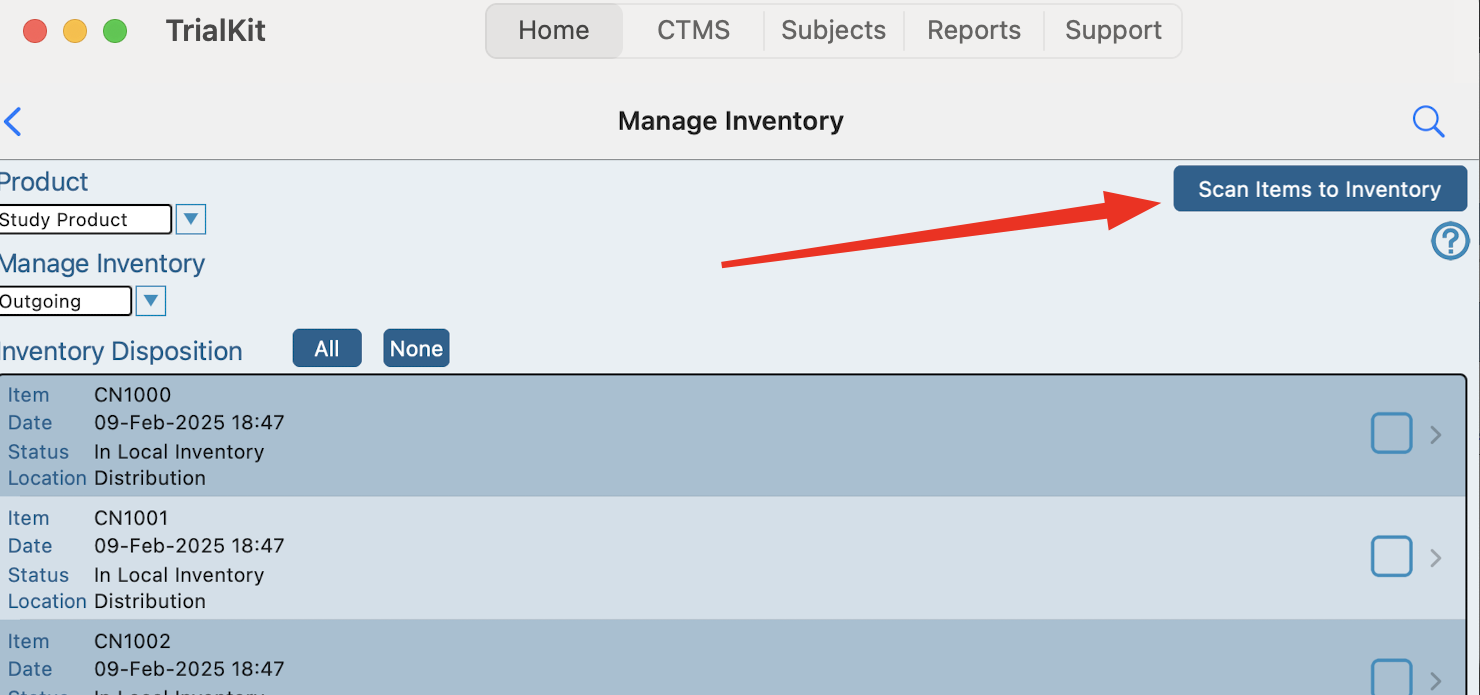
Scanning Items into Inventory
Using the TrialKit mobile app, items can also be individually scanned directly into the inventory if they have a barcode. The system will populate the identifier column with the barcode ID automatically and allow the user to fill out any other details which were defined in the import configuration form.
Setting up a Form for Assigning Products to Participants
Somewhere within data collection for Participants, a form needs to collect which items a Participant is receiving. This can be done either manually, where a user at the site selects which item they are assigning to the subject, or it can be done automatically where the system will automatically fill text field(s) on a form based on either randomization or some external variable.
This section will cover both methods.
Setting up a Form for a User to Manually Select a Single Item
Add a dropdown field to the form where the site will choose items from their local inventory. Do not add any choices. The system will dynamically populate choices during data entry, based on the site's local available inventory.
Map the field special type to the corresponding inventory list as shown below.
Setting up a Form for a User to Manually Select More Than one Item
Add a multi-select field to the form where the site will choose items from their local inventory. Do not add any choices. The system will dynamically populate choices during data entry, based on the site's local available inventory.
Map the field special type to the corresponding inventory list
.png "image(887).png")
Setting up a Form to Automatically Populate Inventory Based on Randomization Allocation
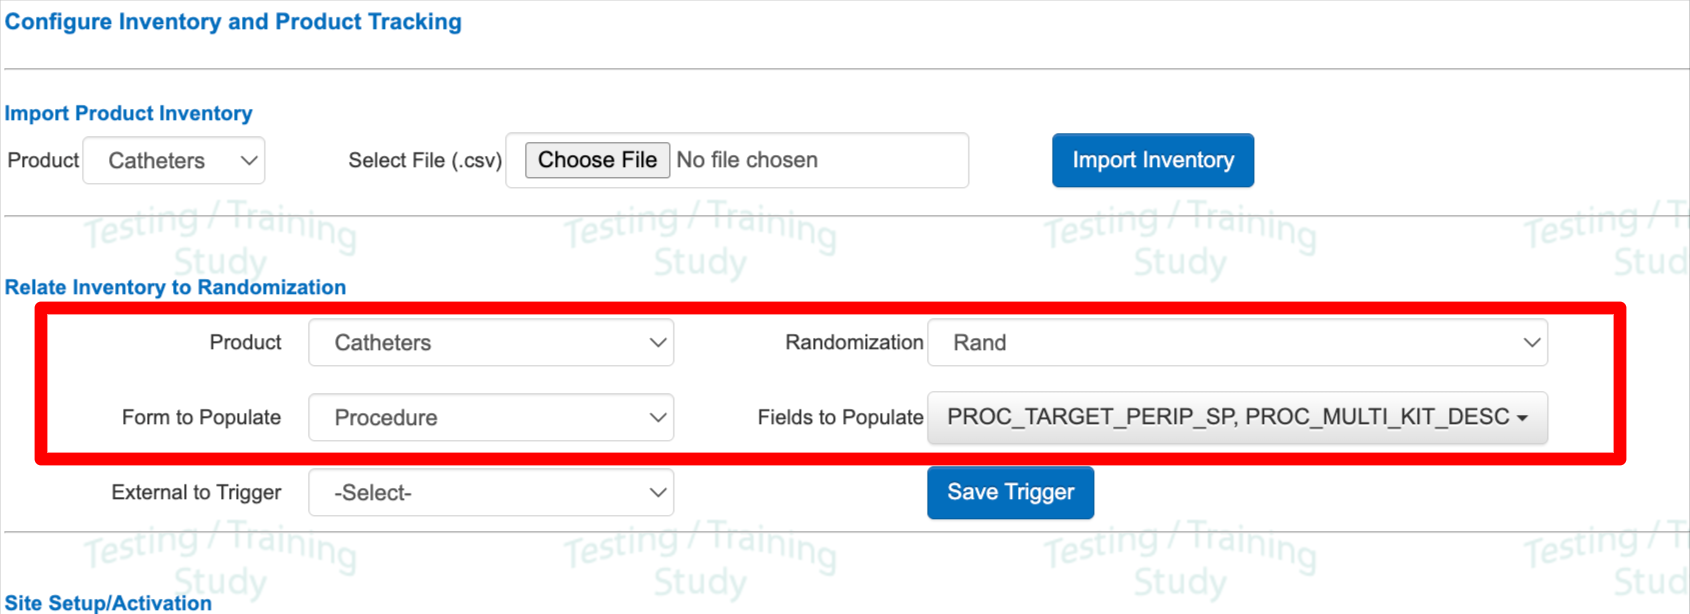
Items can be auto-assigned by randomization allocation (IWRS). In that case, add TEXT field(s) to a form. Each field will autofill one item from the inventory.
Then within Inventory configuration, map the inventory to the randomization and to the form and field(s) that need to be populated with product.
Determining the number of allocated items
The number of text fields added to the form should depend on the Maximum number of items that could possibly be allocated. Conditional action Hiding should be used to determine how many of the text fields to fill on a per-subject basis. The system will only fill fields where hide conditions are not being met.
When a user saves the form under a Subject, the system with match the TYPE value to the randomization allocation of that subject to determine which item(s) to pull from inventory.
Setting up a Form to Automatically Populate Inventory Based on an External Variable
Similar to how randomization-based triggering is defined above, text field(s) need to be added to the form where the inventory needs to be dispensed (populated). Then within inventory configuration, map the inventory to the external trigger and to the form and field(s) that need to be populated with product.
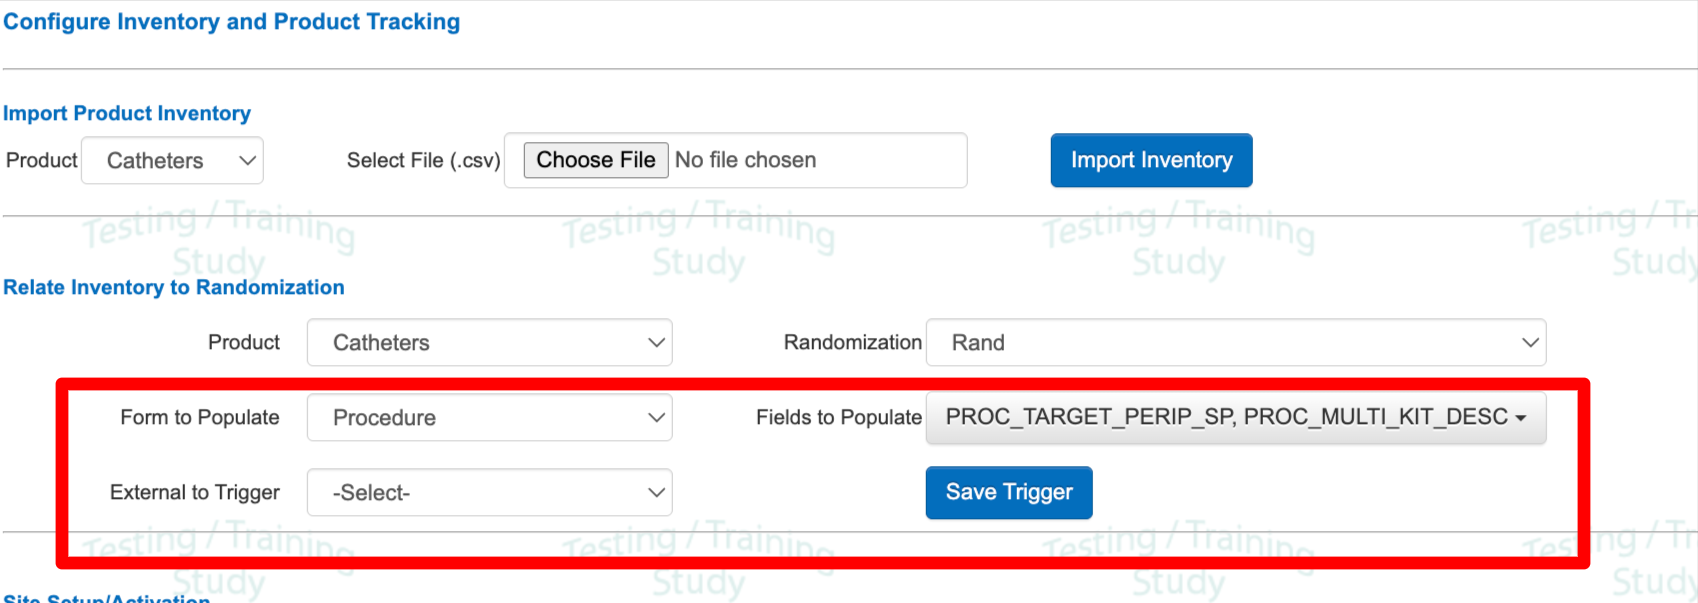
When a user saves the form, the system will match the “Category” column (described in an earlier section) to the external value to determine which item(s) to pull (dispense) from inventory.
Deleting Inventory
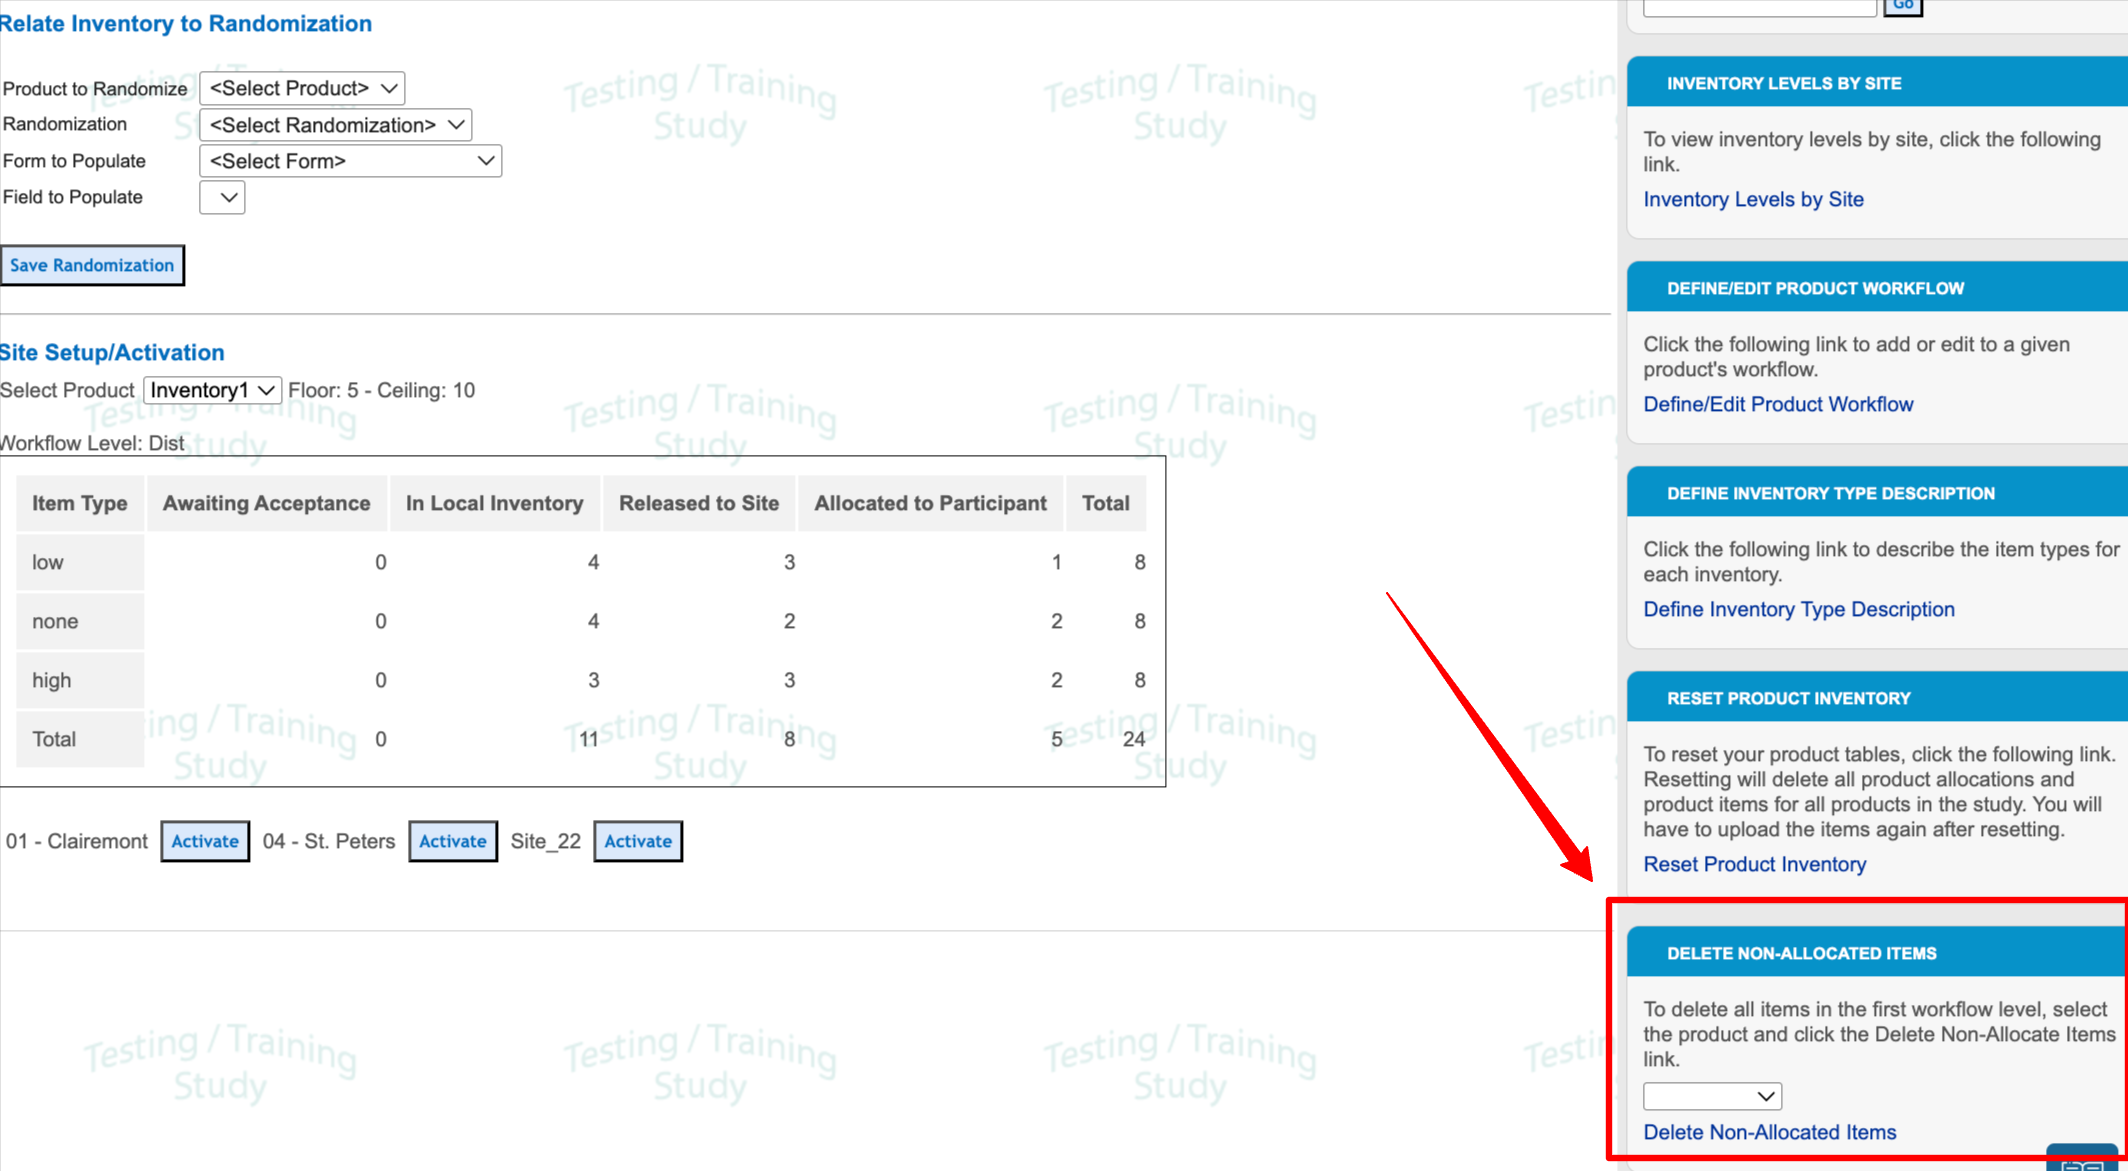
To remove items that are not yet allocated beyond the first inventory workflow level, use this option within the inventory configuration screen:
Precaution
Before deleting items, download the full list from the inventory management screen. This will be especially useful if some of the unallocated items need to be imported back to append to the allocated items.
Resetting Inventory
Prerequisite:
User has access to Inventory Administration > Reset Inventories
Only used for testing or UAT purposes when an Administrator would like to reset and clear the inventory completely without losing the configuration. This permission should be disabled when the study is live to prevent accidental reset.
.png "image(889).png")
Read more about Inventory Administration.