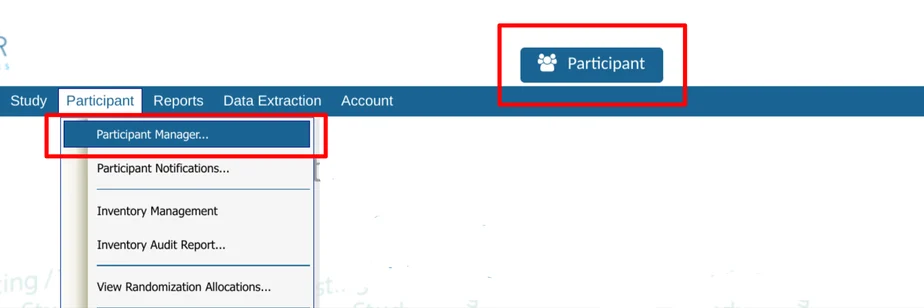
Participants are registered from the Subject Manager screen, accessible from the main navigation menu or the top of the home screen.
Web browser:
App
.png "image(15).png")
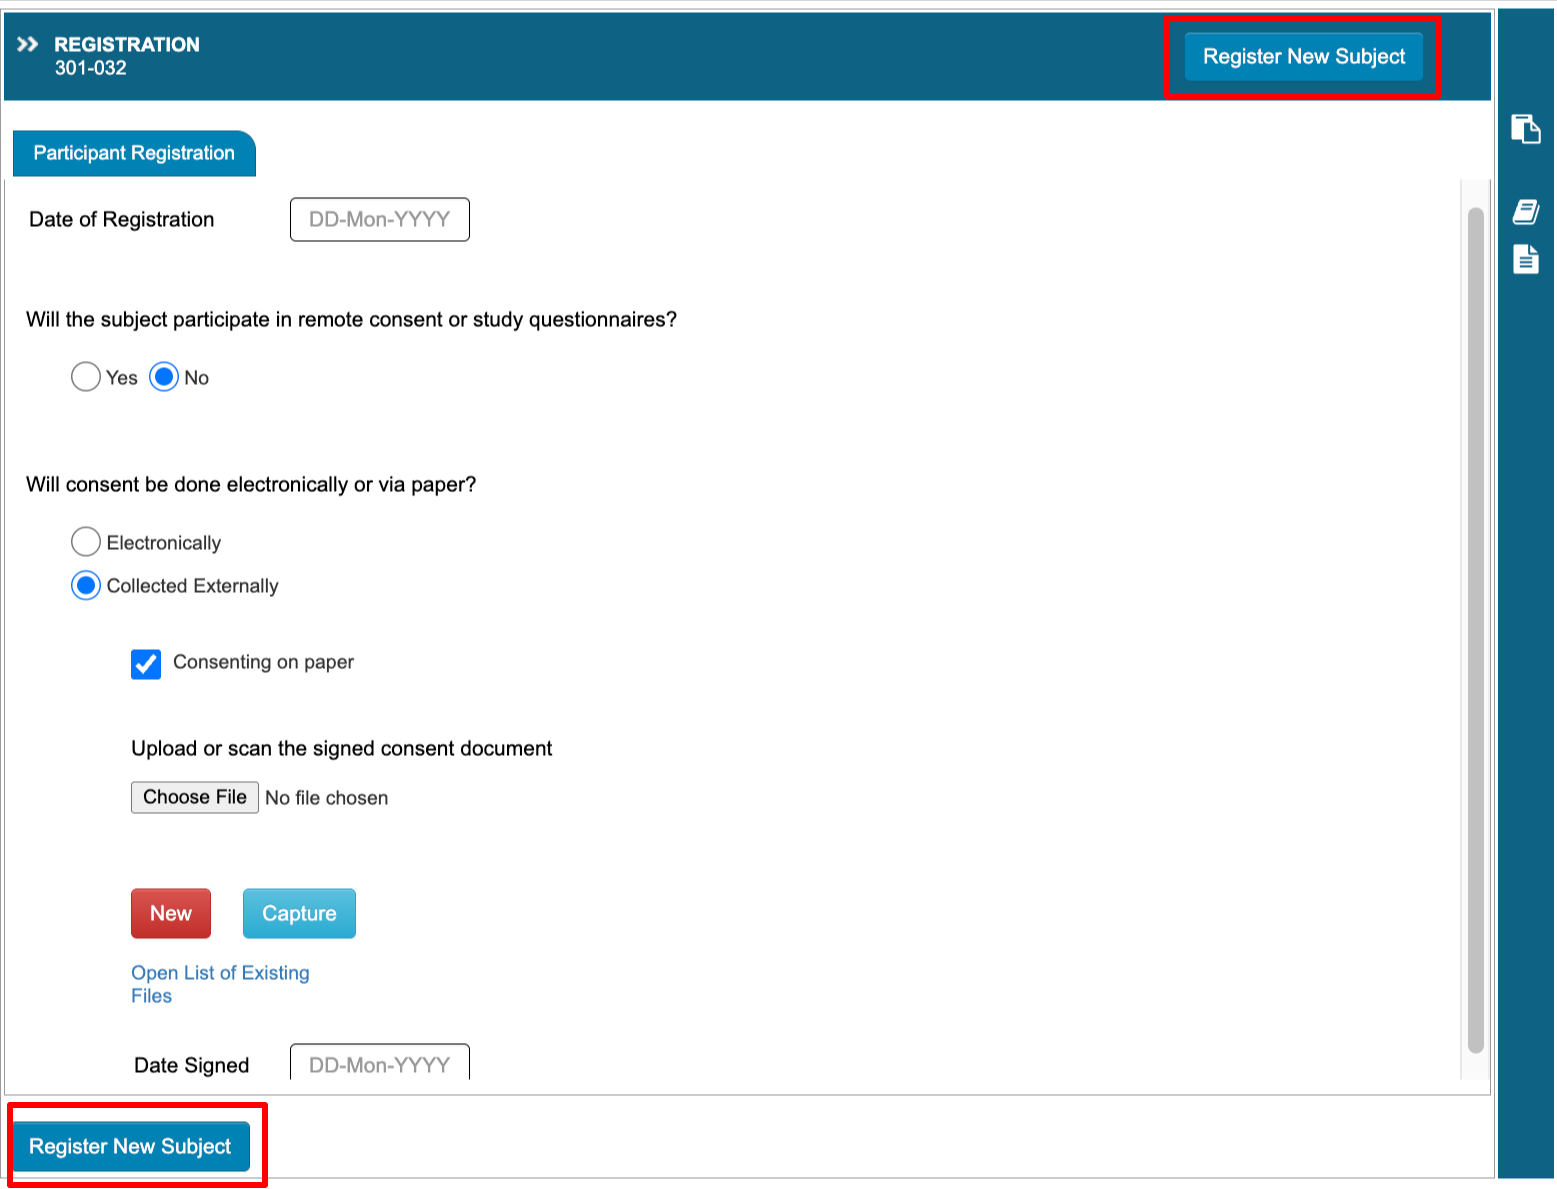
Registering a new Subject
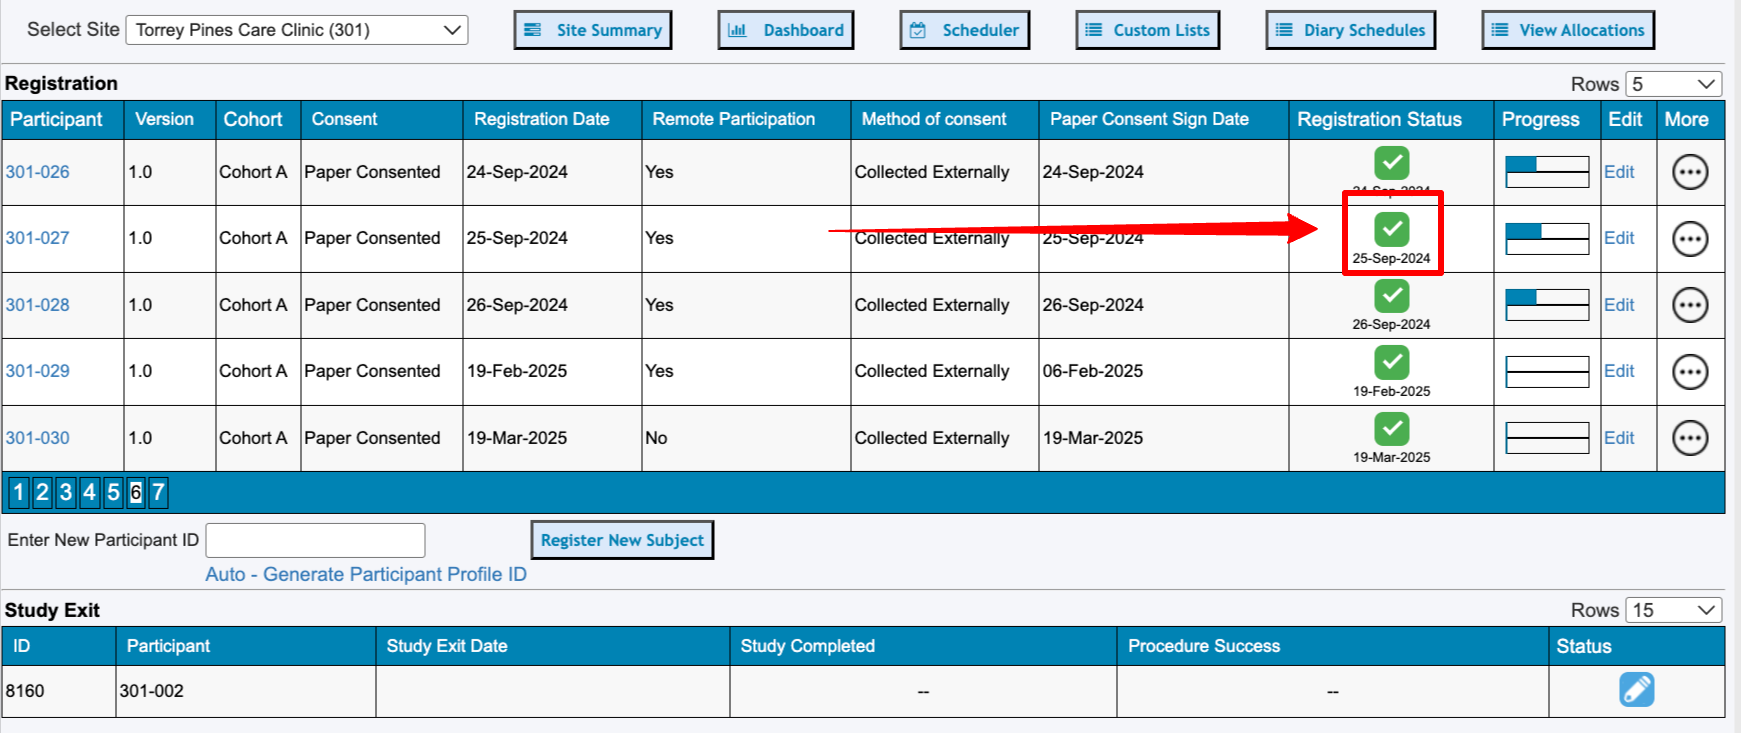
Depending on how the study has been configured, subject IDs are either automatically generated when a new registration form is saved, or manually entered prior to filling out the registration form.
In this example, the system displays an option to generate a new Subject ID, but some studies may do that automatically when a subject is added.
Web Browser:
.png "image(16).png")
App

When adding a new subject, a form will open that needs to be completed. This form varies based on how the study was designed. In TrialKit, the form that is used to create a new subject ID is generically referred to as the Registration form.
After filling it out, there is button at the top and bottom of the form to save it.
Example from the web:
After completing the registration form (actual name of the form may vary), you can return to the previous page where the list of subjects is displayed for the current site. Tapping on any of the subject IDs will open the casebook for that subject.
Opening up a subject's casebook after the registration form has been saved is dependent on first completing the subject registration form without any errors on the form. Only then can a subject be opened up for further access.
Accessing an Existing Registration Form
To get back to the registration form for an existing subject, tap on the registration form icon on either the web or the mobile app, see below.
Web Browser:
Mobile App:
Tap the status icon. Tapping anywhere else on the row will open the casebook for that subject.
.png "image(19).png")
ePRO Studies - Registering Participants to Access Their Own Forms
If the study is registering Participant users to access their own forms for data entry (ePRO), the registration form will contain a field collecting the Participant’s email address.
Submission of Participants’ Email Addresses
The email address must be one that the Participant has access to receive emails. If not, they will not receive sign in information or notifications of forms as they become due.
Only enter email addresses for Participants that have provided permission for involvement in the study and the TrialKit platform. Fictional or inactive email addresses that bounce will greatly degrade a study’s ability to deliver email notifications to all of its users.
When an email address is saved, checks are in place to verify the email address is not:
Already another subject in the same study
A non-participant/Clinician user in the TrialKit system
The email address entered may be blinded to other users in the study based on the study configuration.
Patient email FAQs
Does TrialKit need the Patients real email address since it might contain PHI?
The TrialKit platform maintains compliance and high standards on global regulations for user identification and privacy. Entering an email address into a study will not put that email at any risk, but there are a few rules:
The email address must belong to the Participant. It is not necessary to be identifying (e.g. could be an alias).
If the email address does not belong to the Participant they will not receive any information or notifications from the system. If the Sponsor is comfortable with Participants not receiving notifications, the study Builder should be sure all notifications for the study are disabled so the system does not attempt to send the Participants an email. If an email is attempted, it will fail.
The main rules are simply that the email must exist and be unique per subject if notifications are to be used.
Create an Alias address for an email
Here’s a quick guide to creating aliases on the most common email providers.
Gmail
Method: Use the
+sign or.in your address.Example: If your email is
johnsmith@gmail.com, you can use:johnsmith+news@gmail.comjohn.smith@gmail.com
Notes: Both will deliver to your main inbox. You can then set up filters to organize them.
Outlook (Outlook.com / Microsoft 365)
Method: Add aliases directly in your Microsoft account.
Steps:
Go to account.microsoft.com.
Select Your Info → Sign-in preferences → Email aliases.
Add a new alias (choose a new @outlook.com or @hotmail.com address).
Notes: True aliases here can be used to sign in, unlike Gmail-style
+tricks.
Yahoo Mail
Method 1 (Disposable Addresses):
Settings → More Settings → Mailboxes → Disposable email address.
Create a base name and then append a keyword.
Example:
basename-keyword@yahoo.com.
Method 2 (Yahoo Plus Mail):
Paid users can create multiple permanent aliases.
iCloud Mail
Method: Use “Hide My Email” or iCloud Aliases.
Steps:
On iCloud.com, go to Mail → ⚙️ → Preferences → Accounts.
Add up to 3 aliases.
Choose a name and label for each alias.
Hide My Email: If you subscribe to iCloud+, you can generate unlimited random aliases for signups.
✅ Quickest method overall:
Gmail: just add
+somethinginstantly.Outlook/Yahoo/iCloud: need a one-time setup through account settings.
Alias Format Cheat-sheet
Provider | Quickest Alias Method | Example Alias | Where to Manage / Create | Limits & Notes |
|---|---|---|---|---|
Gmail | Add |
| No setup needed; just use it | Unlimited variations, but some sites reject |
Outlook | Add alias in Microsoft account settings |
| account.microsoft.com → Your Info → Email aliases | True aliases (usable for login & sending). Limited number allowed |
Yahoo Mail | Disposable addresses ( |
| Settings → More Settings → Mailboxes → Disposable email address | Free users: 1 basename, many keywords. Paid users (Yahoo Plus): multiple permanent aliases |
iCloud Mail | iCloud Mail aliases or Hide My Email |
| iCloud.com → Mail → ⚙️ → Preferences → Accounts | Up to 3 aliases. iCloud+ gives unlimited “Hide My Email” random aliases |
Withdrawing or Exiting a Subject
This is done by filling out the study exit form. The name of that form can vary as it is defined by the study Administrator. If an exit date has been submitted on the study exit form, TrialKit will prevent new data entry beyond the study exit date for the corresponding Subject.
In ePRO studies, Participants will lose access to their forms when a study exit form has been submitted either by a Clinician or the Participant.
Edit Participant ID / Subject ID
Permissions Required
Subject Record Management > Edit subject ID
To edit the Participant ID, tap the “Edit” icon in the subject manager table. This will enable the ID in the left column for editing.
.png "image(88).png")