How to Create a New Form or Edit an Existing Form
Table of Contents
Defining a Visit/Transaction Date
Creating New Forms
Prerequisite: User has access to Form builder > Add new form
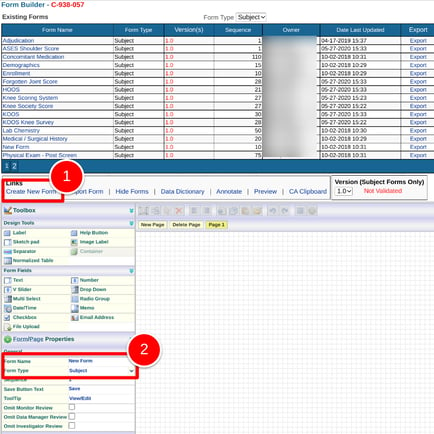
Create a new form by selecting the “Create New Form” link from the Links section.
Then name the form and designate the Form Type.
Web Browser:
Mobile App:
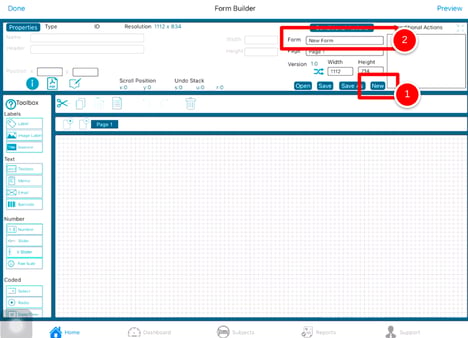
On the app, tap the properties button at the top left of the form to open the properties panel for accessing the form type.
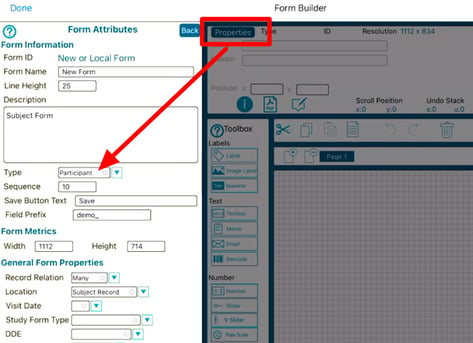
Forms will default to be Subject (also called "Participant") type forms since these are most common. The form types for Study level forms are Subject, Site, and Study. The form types for Host level forms are User, Site, and Study.
Defining a Visit/Transaction Date
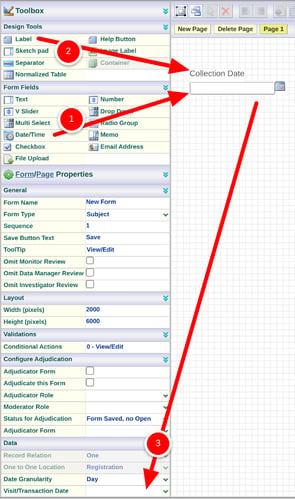
Every form must have at least one data field before it can be saved. For subject type forms, there must be a date field and it must be set as the visit transaction date.
Drag a date type field onto the form and give it field name and reporting label. This normally makes sense to be something like the "Date of Collection" if it will be identified as the form's transaction date.
Mobile App:
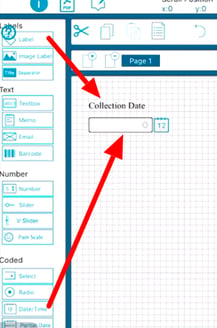
Lastly, access the form properties and define the form's Visit/Transaction date field. This step is only required for Subject type forms.
The Visit/Transaction date is used by the system to determine if the form was collected within its defined visit/time window. If other dates are collected on the form, such as historical event dates, it does not typically make sense to use those dates as the form's Visit date.
If the visit window depends on hour granularity, make sure the Visit/transaction date is a Date+Time field.
Saving: Be sure to tap the save button to commit any changes. The form builder does not auto-save.
How to Auto-Populate a Visit Date to Prevent the User from Having to Enter it Manually
Since the Visit/Transaction date usually makes sense as the form's collection date, it helps to automatically populate it for the data entry users. Do this by setting up a simple Populate Conditional action where the condition is IF current date is not blank AND VisitDate is Not Blank.
Text Labels
While not required, labels are important to indicate instructions about each of the data collection fields. TrialKit treats labels as independent objects from the data collection fields. They can optionally be associated with a given field to follow the behavior of that field (blinding/hiding rules).
Before getting started adding labels, consider the default font properties that are defined for the form. This will ensure you don't need to go back and edit formatting for each label later on.
Read more here about using Label objects on forms.
Editing Existing Forms
Prerequisite:
Access to Form builder > Save Changes to forms
Form level "View" permission for the form that needs to be updated
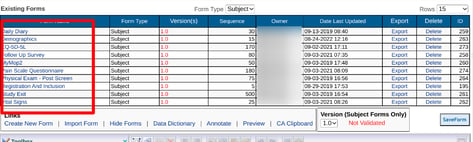
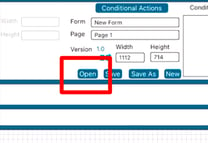
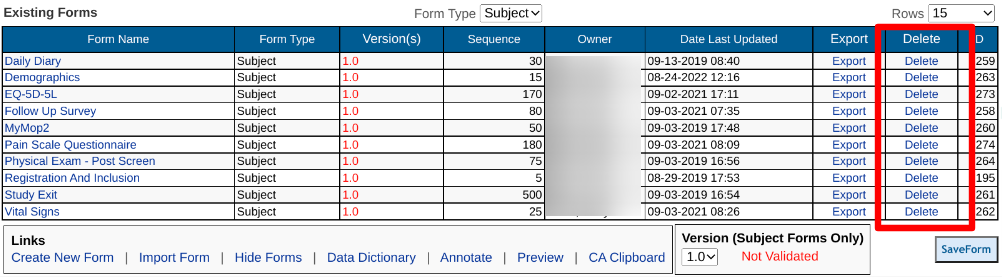
To edit an existing form, first open the desired form from the Form Manager table by tapping the form's name. These are listed by default in alphabetical order.
Web Browser:
Mobile App:
Once the form is open, make the necessary modifications, and then save the changes before exiting or opening a new form.
If the form needs to be edited on a version that is already published, the save option will not be available unless the user has access to Version Override. It is normally recommended to group all changes together under a new study version. Read more about Version Management.
Editing Child Forms
Child forms should only be modified to adjust layout or visual objects.
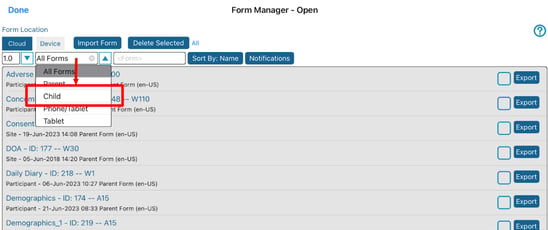
Adding fields, deleting fields, or adding conditional actions should be done on parent forms only. If that is done and a child form exists, the child form needs to be deleted and recreated. To quickly reference child forms, use the available filter in the form manager.
Web browser:

If a child form is viewed on the web form builder, it cannot be saved. The purpose of child forms is to create alternative layouts for mobile, so can only be modified using the mobile form builder.
Mobile app:
Deleting Forms
Prerequisite: User has access to Form builder > Delete form
Deleting can be done only on forms that do not contain subject data.
Subject data can be removed from a form if the form version is in development and the data only exists in Administrator sites.
Web Browser:
Mobile App:
Swipe left to delete.

Import Forms From a File
Forms can quickly be created by importing a CSV file of specifications. This helps save time with dragging and dropping fields out onto a form in the form builder and manually naming each field. Instead, a spreadsheet can be configured to contain all the basic field properties. After that the form can be modified within the form builder.
Click through the demo below to learn how to import a form from a CSV.
The first step is to setup a CSV file. Here's a template to start from.
The only three required columns are Form name, field type, and field name. Any other columns/field properties are optional and will be set with a default value if nothing is defined.
Here are a few other points to be aware of:
- Most properties exist as checkboxes, such as "Required". For those, use True/False or 1/0 for checked/unchecked respectively.
- For numbers the valid range property can be set with two values separated by a dash ("1-10"). If only one value exists, it will be assumed as the minimum only.
- Choice fields ("Select", "Radio", or "Multiselect") can include field choices and coded values in the last set of columns as shown in the example file linked above.
- Date fields will be set as 'Date Only' type by default. If another type is needed, use the "time_type" column with one of the following:
- 1=Date+time (minutes)
- 2=Date+time (seconds)
- 3=Time only (minutes)
- 4=Time only (seconds)
- 5=Partial date
- One CSV file will only create one form, with the form name in the first data row being used as the form name. If the form name changes on a subsequent row, the system will continue adding fields for the first form only.
- The form will be created as a log form with a record relation of Many. After the form is imported, be sure to either set at least one field to Show in log, or remove the log form property and place the form in a scheduled visit.
- The first date field on the form will be assumed as the visit/transaction date on the form. This can be manually changed if needed after importing.
Lastly, send the file to TrialKit support to request the form to be uploaded. At this time it must be done by a support representative.