Managing Inventory at the Site Level and Assigning Items From Inventory to Study Participants
The Inventory Management screen is where a Site level user with access can:
View the inventory list for their own site(s) and the status of each item
Accept items into local inventory when they are received
Release items back to Distribution if needed
The inventory Manager is accessible from both web and mobile app.
Web | App |
|---|---|
|
|
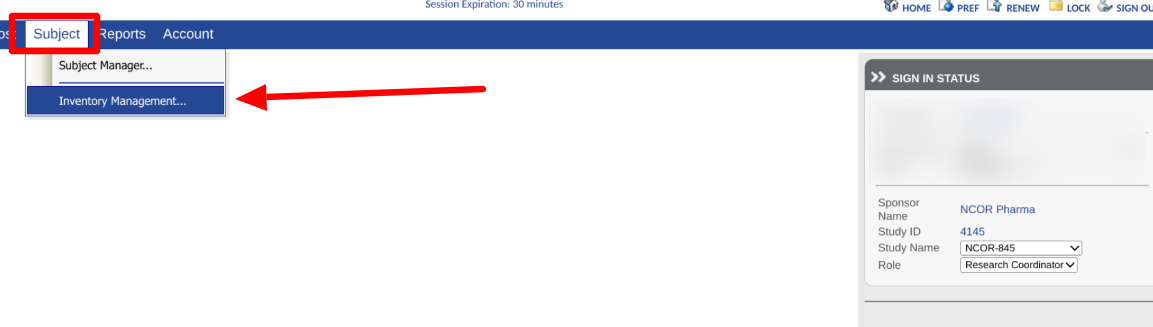
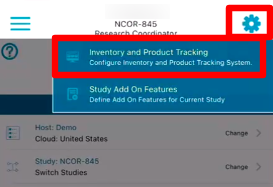
Accepting or Rejecting Items
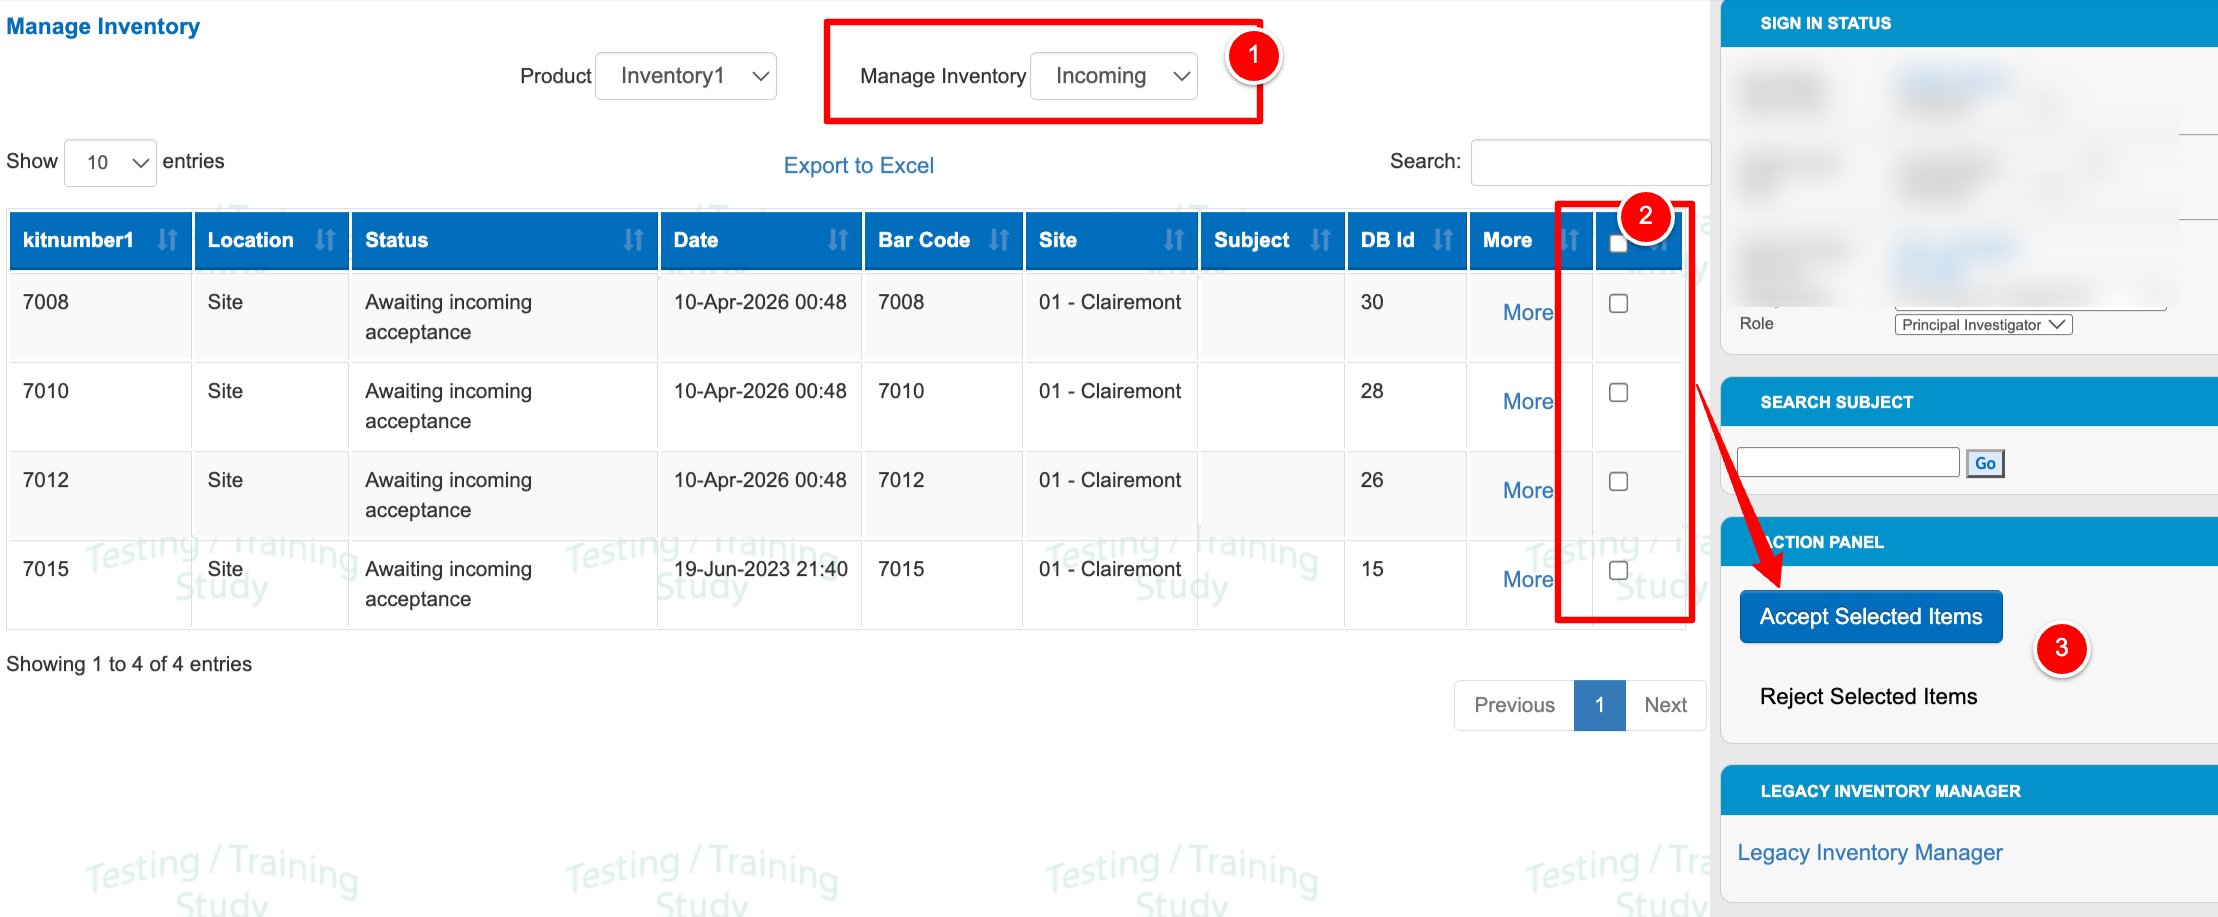
With the list opened, use the dropdown at the top to filter categories of items. Categories are:
Incoming Items - Items that are awaiting acceptance or rejection. Accepting items into local inventory will make them available to be used by study Participants.
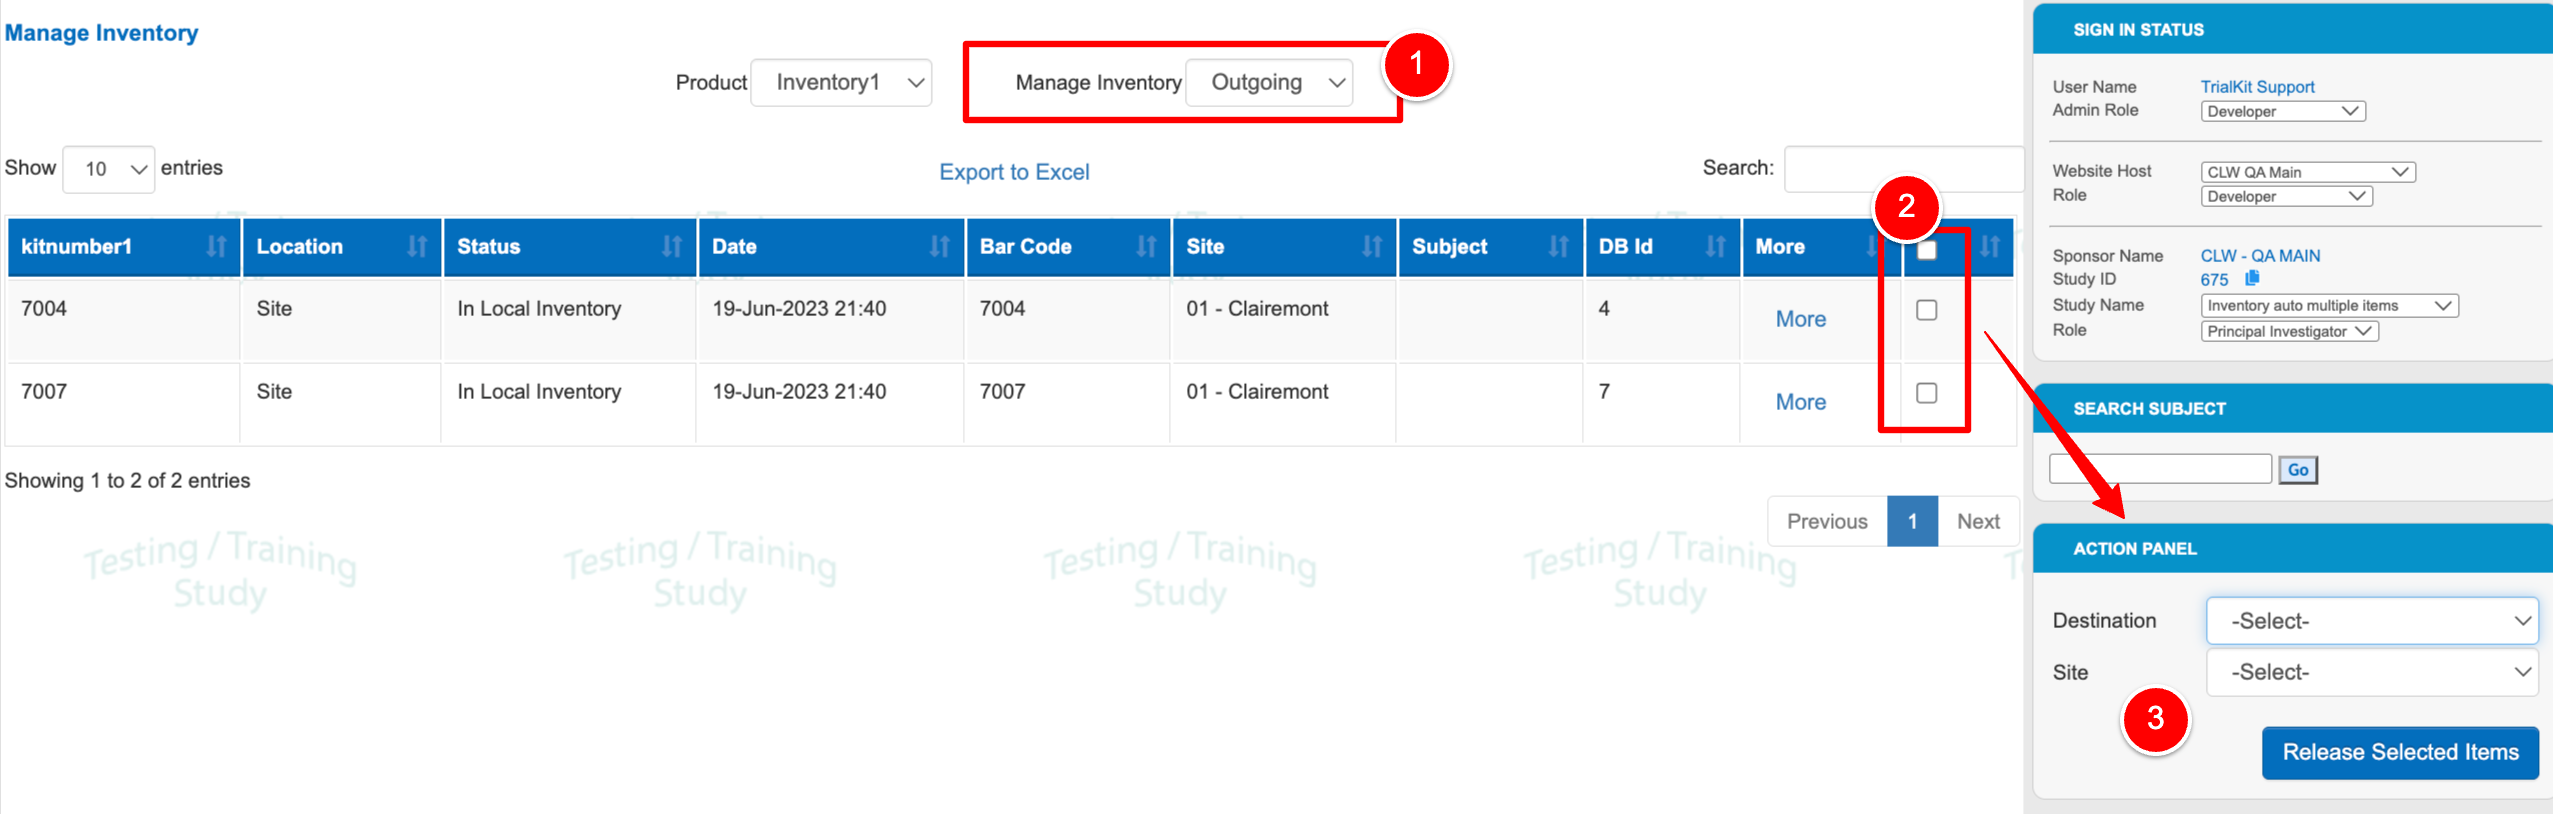
Outgoing Items - Items that are already in the site’s inventory
In this example, the list is being filtered for Incoming products. These are products that are distributed to the site’s level, but not yet accepted:
Mobile App:
.png "image(244).png")
For convenience, as an alternative to manually selecting Item IDs from the list, the mobile app can also scan items using the device’s camera as a method of accepting items. This alleviates possible error of checking the incorrect box.
.png "image(245).png")
This will open a scanner. Simply put the camera over the barcode label of the product being accepted and it will automatically do the work.
Releasing Items After They Have Been Accepted
If an item has been accepted to local inventory and it needs to be sent back out, it can be released. Read more about that below.
Rejecting Items
There may be times items are received but should not be accepted into local inventory because they shouldn't be assigned to a study Subject. Potential reasons for this could be the item was damaged or failed the temperature requirement. In these cases, the item needs to be rejected along with a reason why it's being rejected. If the reason you need is not available, contact your Study Administrator.
Items that are awaiting acceptance will be the only ones that can be rejected.
Automatic Site Refill Trigger
If automatic site refill is being used in the study, rejecting an item will trigger a refill if the site’s floor level is reached.
Assign Items to Study Participants
Items are normally assigned to subjects within a form. Based on how the study is set up, it might be done automatically when the form is saved. Otherwise there is a field on the form that will present the Item IDs to manually select. This section will cover both methods.
Prerequisite
User's role has Access to Inventory management and Assign Inventory to Subject
Automatic Inventory Assignment
There will be a form within the subject casebooks where a text field automatically populates a product ID from the available inventory on site.
When an item gets assigned to a Participant, the system will check site levels and perform a refill if necessary/
Here's an example on a randomization form where the Participant is randomized and the system auto-fills the product ID into a field on the form. This only happens when the form is saved.
.png "image(246).png")
After an item is assigned, the inventory report will reflect the assignment to that subject ID.
Manual Inventory Selection
The study will have a dropdown or multi-select field somewhere on a form where one or more items can be selected from an inventory list. Here's an example:
Web Browser:
.png "image(248).png")
Tapping the info icon next to the field may show additional details if the study has included them:
.png "image(249).png")
Scanning items to a Participant
Similar to scanning items into inventory, using the app camera, Trialkit can also attach items to study Participants quickly. This should only be used if the study expects the site to manually attribute inventory to the study subjects.
.png "image(252).png")
To use it, select a subject from the dropdown and then place the camera over a barcode. It will automatically capture the code and assign it to the subject if the item exists in inventory. If the item does not exist the item and product info will remain blank as shown here:
.png "image(253).png")
Releasing Items
Items can only be released only after they have been accepted. Common reasons for this are because the item has been used and is now ready to be returned to the Supplier, or the item was accidentally sent to the wrong site and needs to be returned.
Only items that have been accepted, but not yet assigned to a Study Participant, can be released.
If automatic site refill is being performed by the system, releasing an item will not trigger a refill if the floor level is reached at the site. It will be up to the Administrator to manually allocate additional items if needed.
Web Browser:
Select the option to Release items from the right side, check the necessary box(es), and tap the button to release them. The Supplier will then see them in their end as awaiting acceptance.
App:
.png "image(255).png")