Article Summary: Making Controlled Changes to the Study After it is Live
TrialKit has a powerful versioning feature to make controlled and tracked changes to a study without needing to pause data collection. Version control is used to create new versions, test the changes in an Administrative site, and then migrate live subjects - either individually or by site - to the new version.
Prerequisite
The study is enabled to use Version Control and the user has access to Version Control
Note
Minor changes can be made to published versions. Read more about this under Version Override.
Creating and Editing Versions
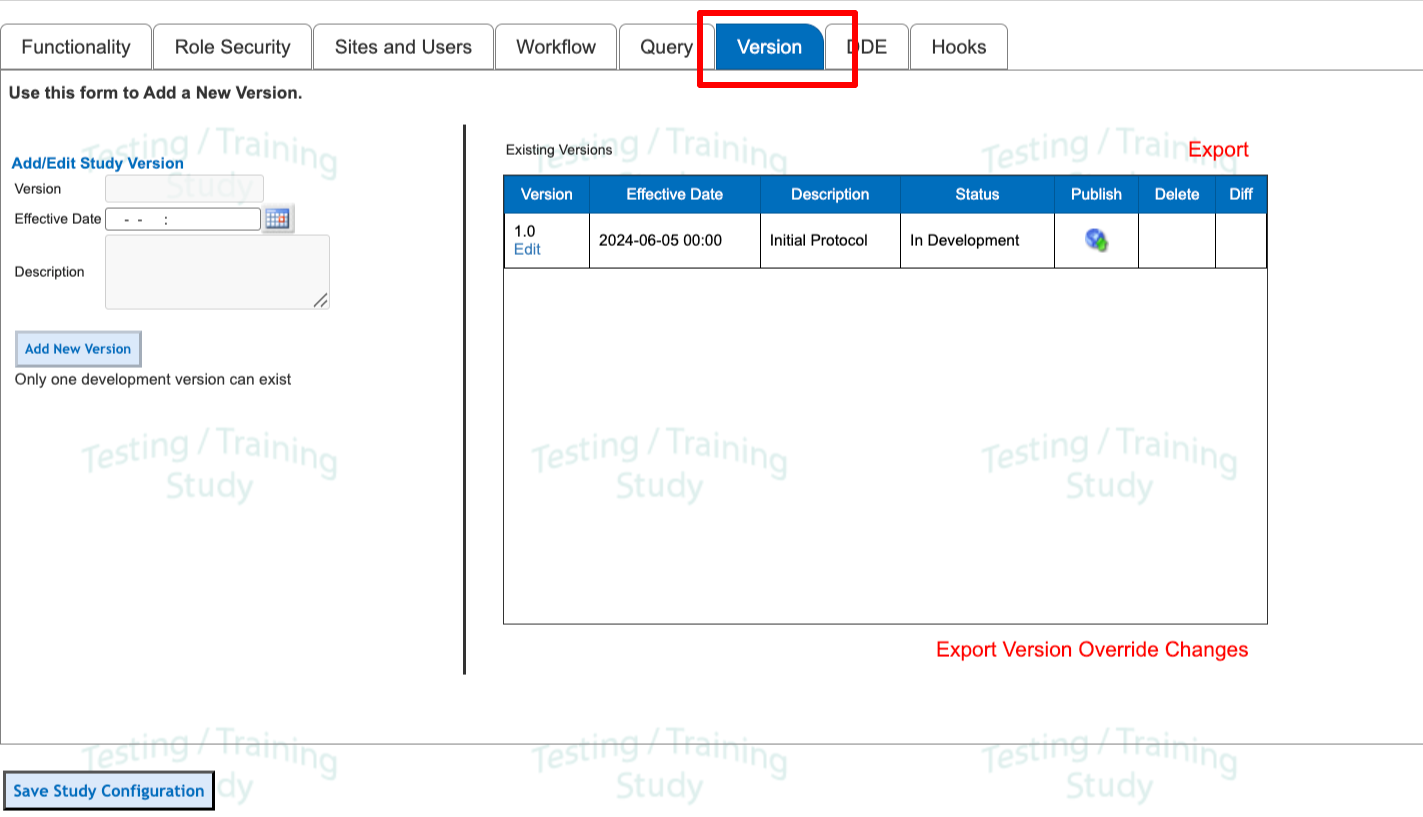
A version tab will appear within the study configuration options. New studies will automatically have the first version in place with a status of "In Development" - unless the study was copied from another one that had multiple versions.
There cannot be two development versions at a time
To add a new version fill out the form with a date and description, or summary of what is changing in the new version.
Web Browser:
App:
.png)
Deleting Versions
Only the most recent version can be deleted if it is not yet published. If the version has already been published, any subject on that version needs to be migrated off of the version before the version can be unpublished.
In the following example, there is no delete button because the latest version contains data, or because the there is a site set on that version (or both).
.png)
To remove a site from the version, use the version manager. After removing all sites from that version, the version itself can be deleted.
Export the versions summary
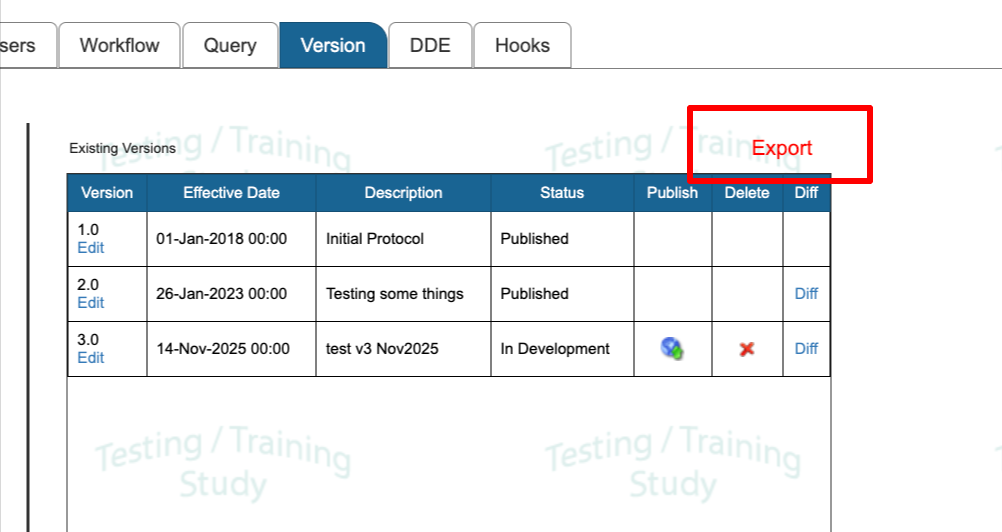
To get an exported file of all version and summary details including the date that each version was published (after Dec 1, 2025), use the export link at the top of the table.
Making Changes To Forms
When a version is in development, changes can be made at any time and tested on test subjects within an Administrative site that exists on the corresponding version.
Making changes to forms after a live study involves important considerations. For example, deleting a field to replace it with another would delete any data that existed in that location. However, adding a choice to a choice field or renaming fields would not have any impact.
For studies not using version control, changes can be made and applied instantly. Meaning, when a change is made to a CRF in the form builder and saved, it immediately propagates on the live study. This article focuses on studies that use version control and the steps to follow in making changes.
Generally, forms should only be changed in a development version. When a version is in development, the red message below will not appear when that version is selected.
.png)
If the highlighted area in the image above has no development version available, you will need to create a new version as covered earlier in this article. Any changes made on a development version will not affect subjects until such time that the newer version is published and subjects are migrated to it.
As long as the version is only in development, form changes can be tested on any Administrative site.
Version Override
Prerequisite
User has access to Form Builder > Use Version Override on Published Form
Version override is an added function that allows builders to make changes to a published study version that is currently live in the study. For example, perhaps some fields just need to be moved around or resized, or a spelling error needs correcting. Version override is intended for these types of minor changes.
Web Browser:
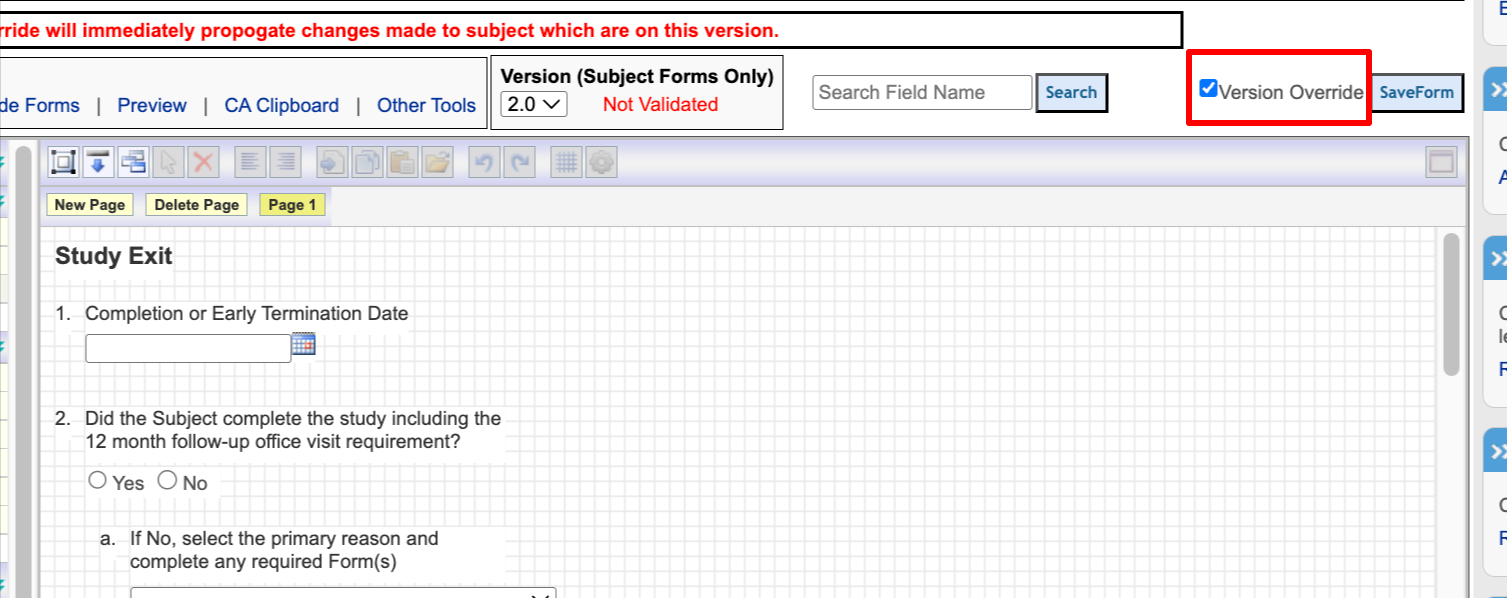
Check the box in order for the save button to display. Saving will prompt for a reason to document summary of changes.
App:
Tap the icon shown below in order to save a form on a published version.
.png)
When the version override is enabled, a message of caution will display indicating that any changes made will immediately propagate on the live study.
Important Note
Changes made in override mode should also be made to subsequent versions separately if later versions currently exist, or if there is any chance that subjects will migrate to those later versions in the future.
Additionally, while the system allows flexibility to change conditional logic and choices in choice fields, it is imperative to understand how making those types of changes will impact existing data or forms which may have already been validated.
Version Override Audit
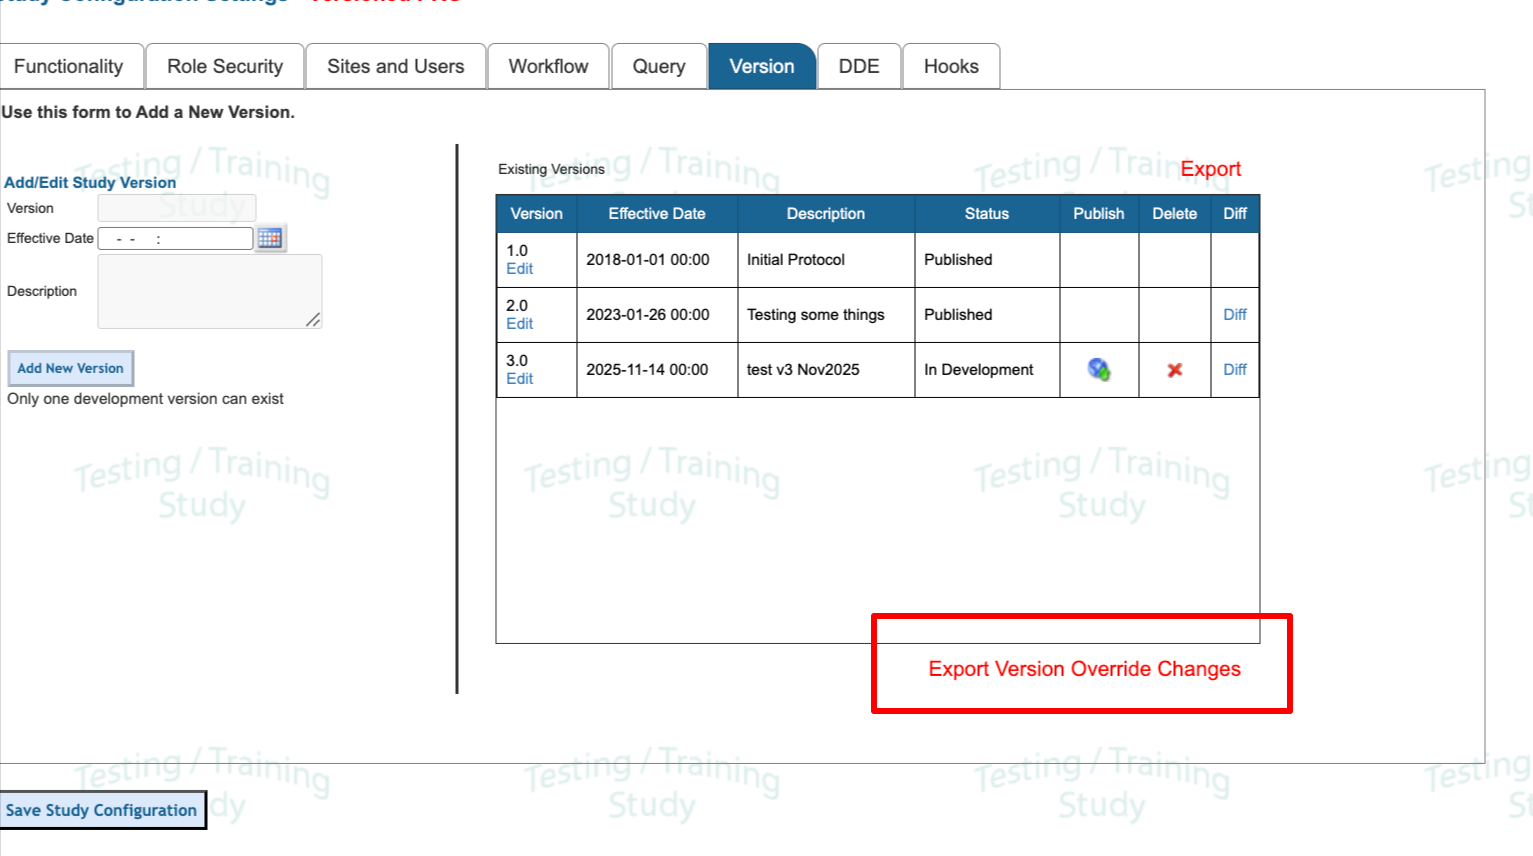
The version override audit captures every change and saves made when in version override mode on a published study. The list of changes can be made from the version settings:
Publishing a Version
When the study has been built and validated, the study version is ready to be published. Publishing a study prevents the forms from being edited further on that particular version (unless using version override).
Before publishing, remove any unwanted forms as those cannot be deleted on a published version.
Publishing a study does not automatically give sites the ability to begin registering new subjects. That part is controlled by the study status and making sure sites are activated with users having been given access. Lastly, the site must be enabled for the respective study version.
To publish a study, select the icon highlighted in the image below.
Web Browser:
.png)
Mobile App:
Swipe right to left to access the Publish button.
.png)
Editing a Version Name or Date
Tap the version in the table or use the Edit link to change the name of the version, the effective date, or the description of changes being made in the version. This will have no downstream impact on other functions.
When creating a new version or setting the effective dates, be sure dates progress chronologically based on version order. If not, the system can interpret version "2" as being prior to version "1".
Once a version is published, it cannot be deleted unless it is first unpublished. To un-publish a version, there cannot be any data on it.
.png)
Un-publish Study Versions
The most recent version can be unpublished as long as there are no subjects on that version and no sites are part of that version (this can be checked in the Version Manager). If those two rules are met, a link will appear like the one highlighted below.
.png)
Deleting a Version
Deleting a study version may be necessary, particularly on a copied study where a builder may wish to begin back on a previous one. The delete link will appear as shown below if there are no subjects in that version, no sites are part of that version, and the version has been unpublished.
.png)
Managing Site Versions
The system limits studies to having one Development version at a time. As each version is published, a new development version can be created as described in the previous section. The Version Manager is used to control which sites and subjects are part of specific study versions. This is also where subjects are migrated from older study versions to newer ones as changes are made to the study design. The Version Manager is found under the Study menu as shown below.
.png)
Including or Removing a Site From a Version
Select which version of the study to manage. The choice made will indicate if it is a published version or a development version.
Check the box next to any site that needs to be included in the currently selected version. This will place the site on the new version moving forward (any new subjects added). Continue reading in the next section about migrating existing subjects.
.png)
Note
If the version is in development (not yet published), only Administrative site types can be included.
Once a site is included in a version and data has been entered on that version within the site, it cannot be removed from that version unless the data is removed first.
As sites are included in later versions, there is no need to go to previous versions and remove the sites from those earlier versions.
Subject Migration
To migrate existing subjects, click the “Migrate Subjects” link (Don’t worry - this will not perform any actions on the data yet).
.png)
A list of subjects will open for that site. From the table, specific subjects can be selected or All subjects can be migrated to the version which is currently selected on the right side of the screen.
.png)
Migrating All subjects will create a background job so you don't need to wait for the process to finish. You will receive a confirmation email upon job completion.
Migrating selected/specific subjects will require you to wait for the system to process those subjects. This does not take very long if conditional actions are not being run during the migration.
By default, conditional actions will not be run. If they are (box is unchecked), email notification CAs will be excluded unless that box is also checked.
Choosing to run edit checks with the migration will cause the system to perform a re-save on every record throughout the study so it can process the edit checks. For large-volume studies, this can be quite time-consuming depending on the total number of records across all subjects. It’s recommended to migrate all subjects without running edit checks or conditional actions. Once migration is complete, use the re-run edit checks function to choose only specific/new edit checks and computations that need to be run on the new version.
Form Change History Reports
When changes are made to forms, the system will track all changes made on subject-type forms. This is done in two separate reports depending on how the change was made.
For changes made within a version (via version override), export the change history as described here.
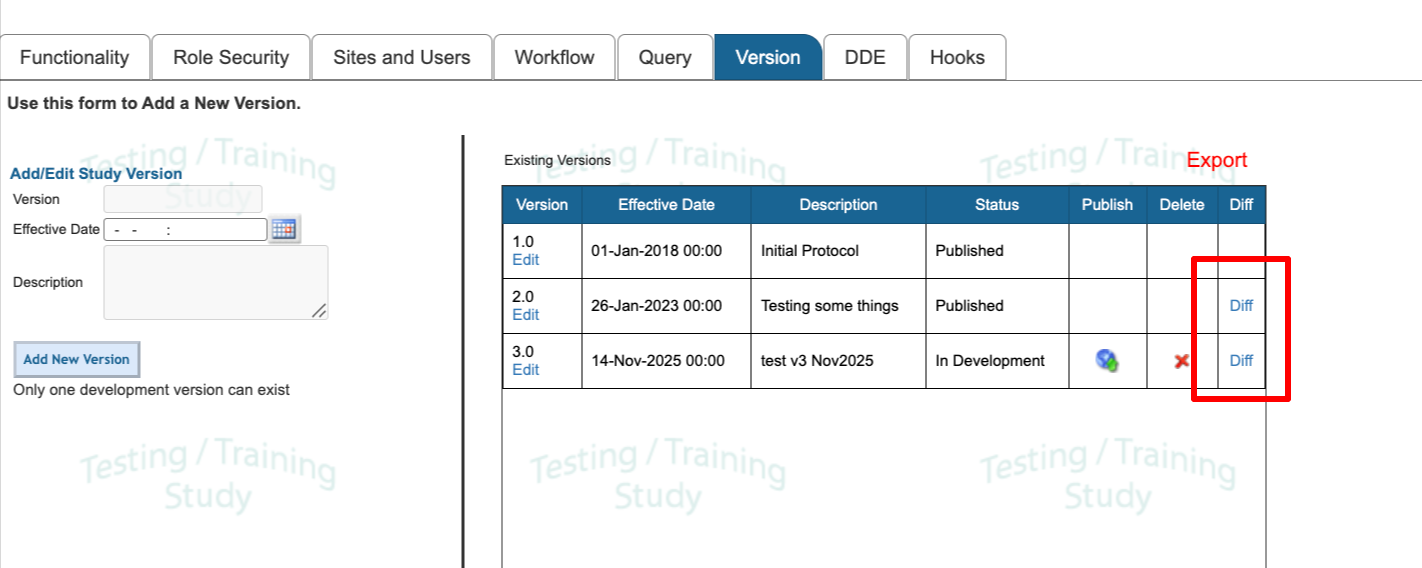
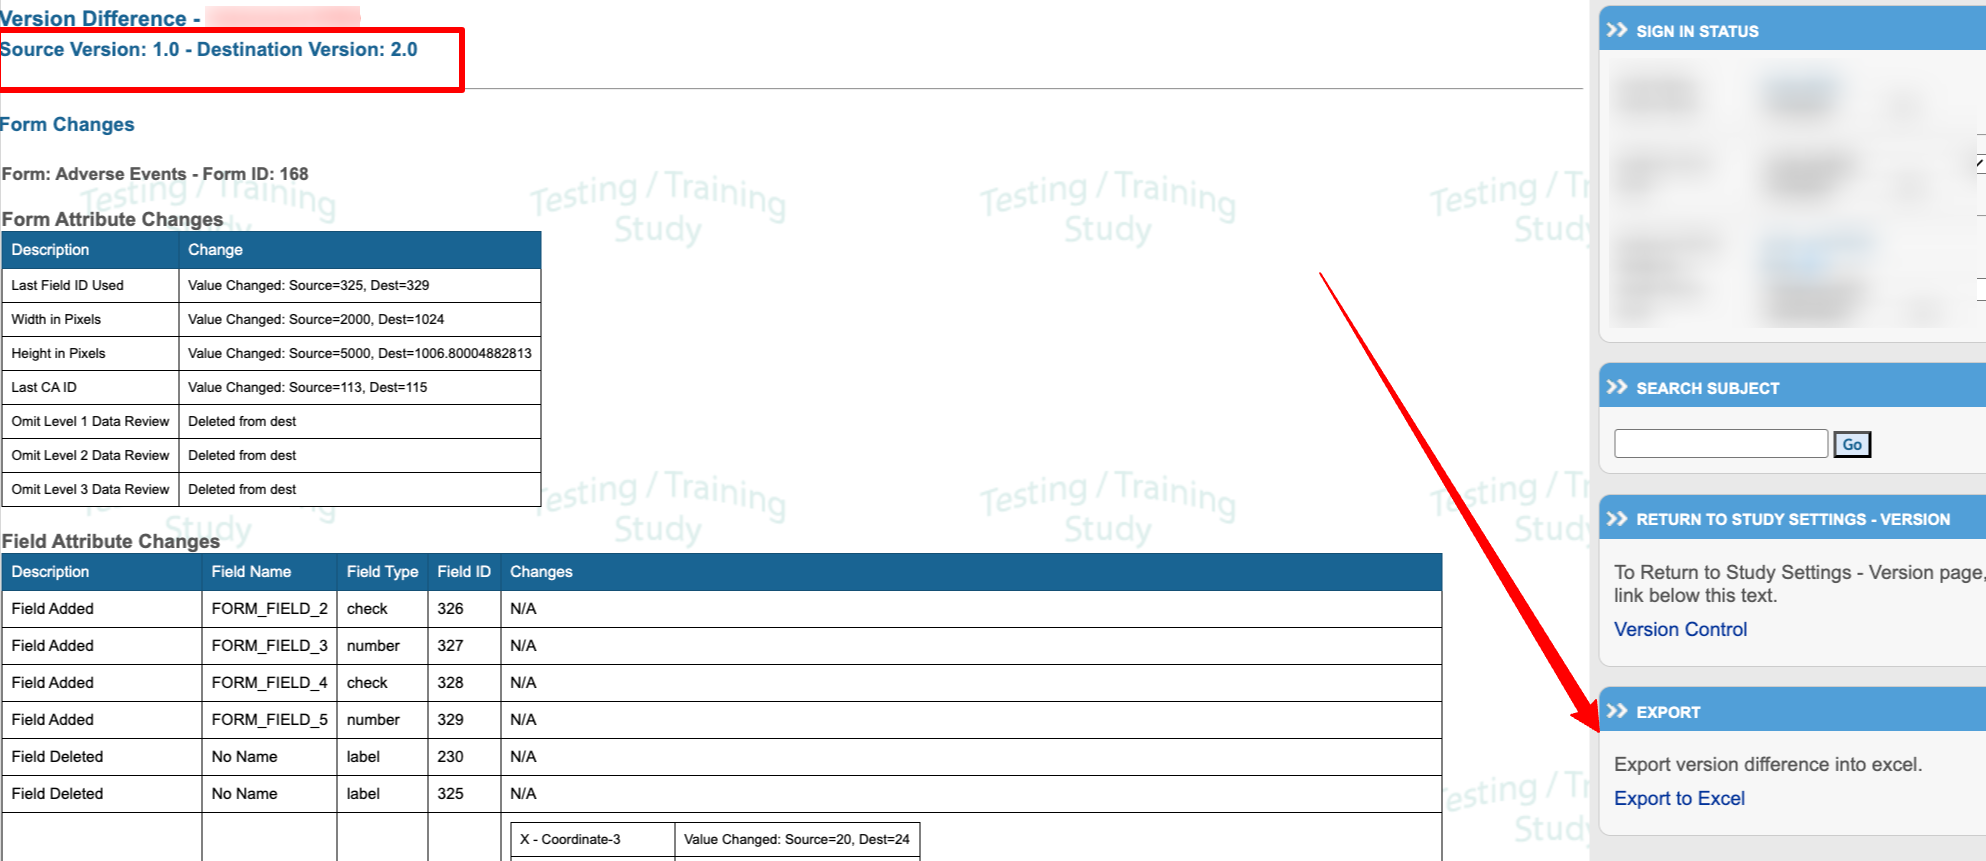
Changes made between versions can be accessed via the “Diff” link in the versions table. After opening the report, it is exportable from the right side of the page
