Site Document Manager
Collecting Information Related to a Site in a Given Study
Prerequisite: User has access to Site Documents
Purposes of Site Documents
Site Documents can be used for the following purposes, depending on user permissions:
Accessing Site Documents
Site Documents can be accessed from the Site Document Manager accessible via both the web and mobile app.
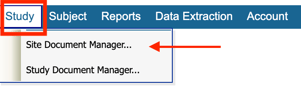
Web Browser:
Under the study menu:
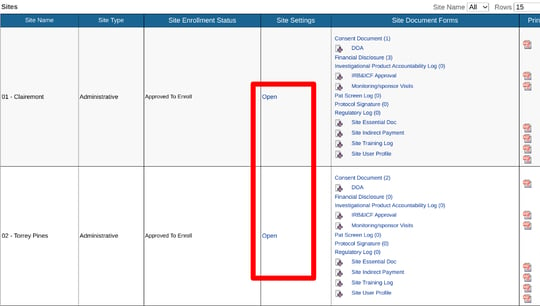
The resulting screen will provide access to applicable sites to which the user belongs.
-
Access site documents via the links. These documents and requirements vary by study base on what is configured.
-
Administrators can optionally define enrollment goals. Read more here.
-
Administrators can set which local lab applies to which sites. Read more here.

eLearning
If training is required prior to using TrialKit, the study Administrator will have a way to log that training was completed. The training log can be accessed in the list of site documents.
Mobile App:
Within the side menu:
This opens a list of sites to which the current user has access as shown below.

Tapping a site opens the list of site document forms for which the user has viewing permissions as shown below.

These forms can also be conveniently be accessed within the CTMS, along with other types of forms being collected.
Site Document Administration
Site forms are built using the
Form Builder, exactly like subject eCRFs are built. Once built, they can be set up as one-time collections or as log forms to collect recurring data from sites. Site users who have permission to access Site Documents will only see the forms for the site(s) they belong to, as shown above.
Defining Site Rules For Enrollment
If there are specific requirements that need to be met by a site before the site can register new subjects, TrialKit can help enforce that rule. With nothing set, the sites will be able to register subjects at anytime as long as the study is in Live status.
There are two options for enrollment rules:
- When all site documents are completed
- When a specific site document contains a date and checked box
It's not common that all site documents are needed prior to enrollment, so the more common option used in the second one above. With this an Administrator can have a form that only they have view access to - which can be used to enable individual sites for enrollment once they have reviewed the existence of necessary site documents (e.g. Training logs, CVs, IRB approval, etc).
To set it up, select the desired form, date field, and checkbox field to serve as the trigger as shown below.
An alternative to this is waiting to enable the site for the study version until a known milestone is reached.
Site Settings For the Study
Site settings allow for defining a few factors that can vary per site for the study. These include:
- Enrollment Goal - The target number of subjects for the site. This is only reflected within the Dashboard report Enrollment table.
- Enrollment goal enforcement - prevents registration of new subjects after the goal is met for the site
- Site Default Cohort
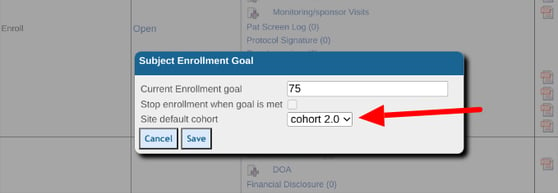
Defining Site Enrollment Goals
Enrollment goals are the targeted number of Participants needed for each site individually. The goal numbers are also reflected in the dashboard report when computing the progress of subject enrollment.
The goals can be defined within the Site Document Manager as shown below.
If a Limit is enforced on the goal, the system will prevent registration of additional subjects beyond that number.
Site Default Cohort
If the site default cohort is not set, it will use the study default cohort. If a cohort is defined for the site, all subjects registered at that site will automatically be placed on the corresponding cohort's visit schedule. Read more about cohorts and their purpose
here.
An application of this tool would be if a new study protocol dictates a different visit schedule, but not all sites are approved to use that new protocol visit schedule yet. Once a site gets approved they can be placed on the new cohort for subjects moving forward at that site.
In this example, the study is defaulting all subjects to cohort "1". Site 2 just got approved for the new protocol where the visit schedule will change for newly enrolled subjects. To update the Site 2 default cohort, open the Site Documents and tap on the Site Settings column.
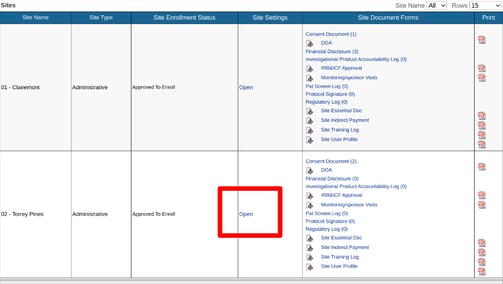
Then set the site to the desired cohort.