TMF Overview and Access
The TMF exists at the host level, so is not physically tied to any specific study database within the host. This allows folders to be created for different applications and workflows. For example, folders can be created for each study to house corresponding documents, and permissions can be granted to specific folders based on users in each study as needed. This way, multiple studies can be within the same TrialKit TMF, but each study can still have its own TMF.
Prerequisites for accessing the TMF:
Users who need to access it have been identified as “TMF user” in the host User Manager by an Administrator
The host level user roles have permissions to access the TMF
The user has view access to at least one folder (read about the folder permissions below)
Note to Study Administrators: In addition to the storage and management of these files, site and study forms can be collected electronically as well. Files can be directly uploaded on-site and study forms, but note that they will not be related to files stored in the TMF. Keep this in mind when choosing which tool best fits your requirements.
To access the TMF, read below. First it’s important to understand how TMF access is granted to users, which is described next.
TMF Users
Users who will use the Trial Master File (TMF) in any capacity should be given access by an Administrator as shown below. This will display the user as an option when assigning TMF tasks.
Web Browser
Access can be granted via the “More” option in the User Manager. TMF access will be indicated in the main user table:

Mobile App
Tap a user in the user manager to access the details, or enable the TMF User property when adding a new user.
.png "image(1002).png")
TMF Permissions
Permissions in the TMF are based on two things:
Host role permissions granted at the host level by an Administrator
Each user’s individual access to specific folders in the TMF, discussed next
Folder and File User Permissions
If a user’s host-level role has access to the TMF but the user has not been given access to any folders or files within it, they will see a blank screen.
User permissions are granted within the node properties. Read about properties further below.

When granting someone access, a prompt will ask if you want to give them access to the current folder only, or also give them access to sub-folders that might exist. This level of control ensures users can only access very specific folders regardless of how the folders are organized.

Tip
To give someone access to the entire TMF, use the master permission ‘grant access to all files and folders’ within the host permissions. This is a simple shortcut to giving full access instead of checking the permissions on every folder.
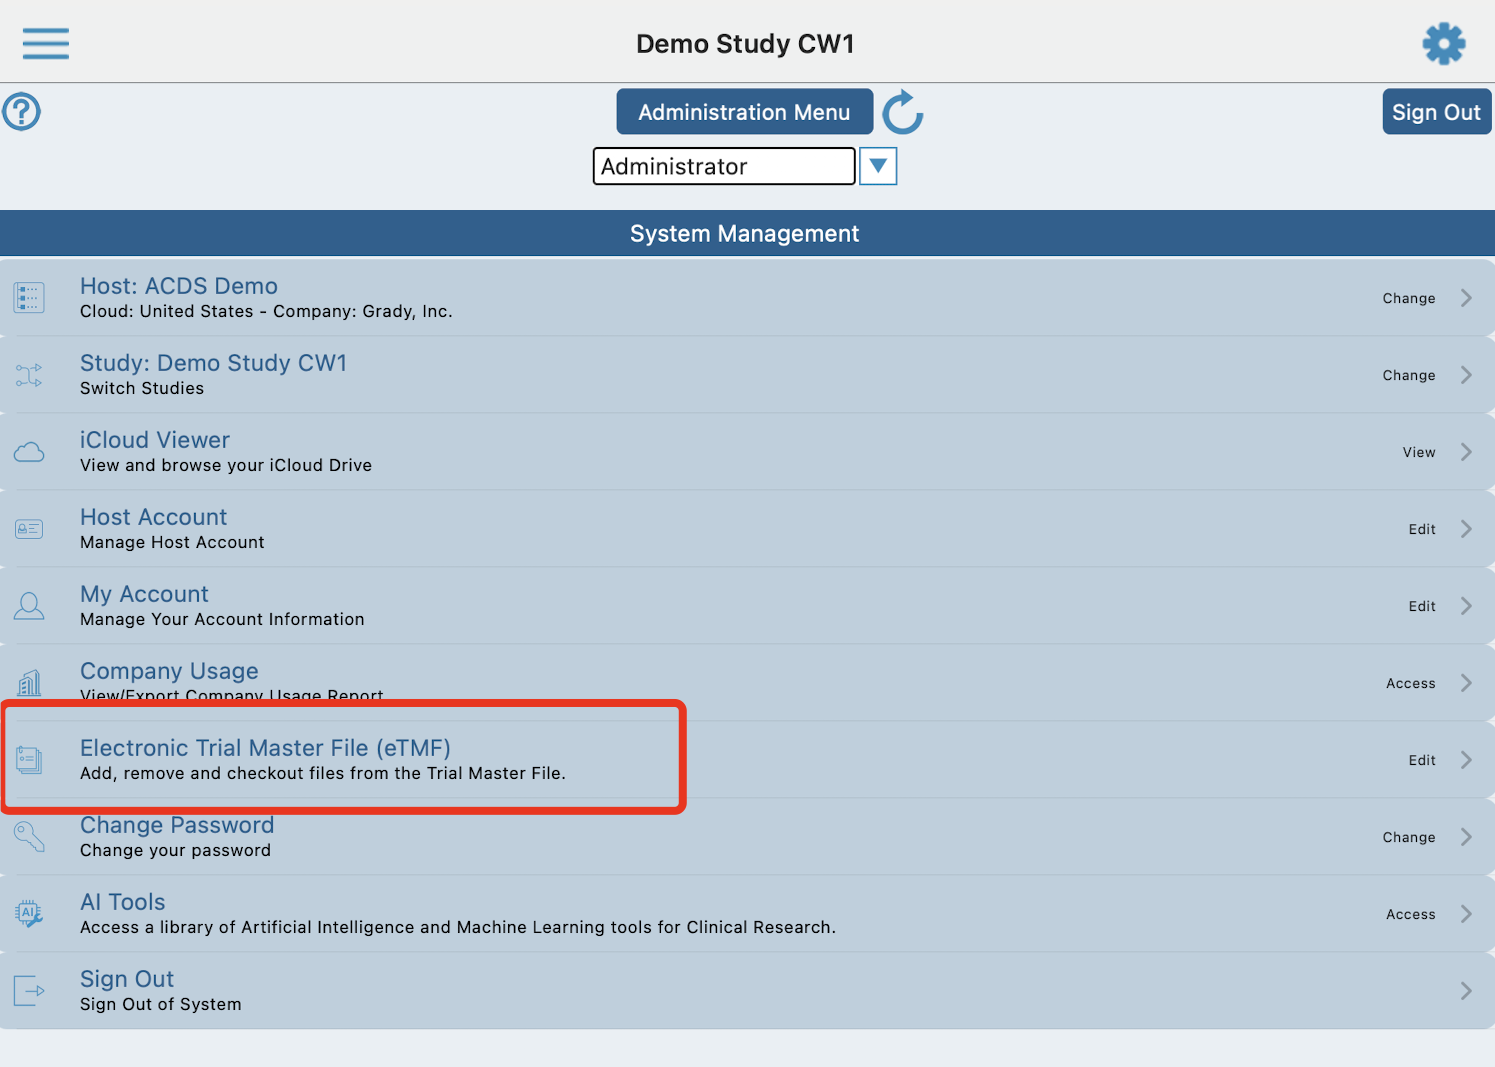
Accessing the TMF
The TMF is located under the Host menu.
If you have been granted permissions as described above, but don’t see the option, try logging out and back in.
Web | App |
|---|---|
|
|
.png "image(1004).png")
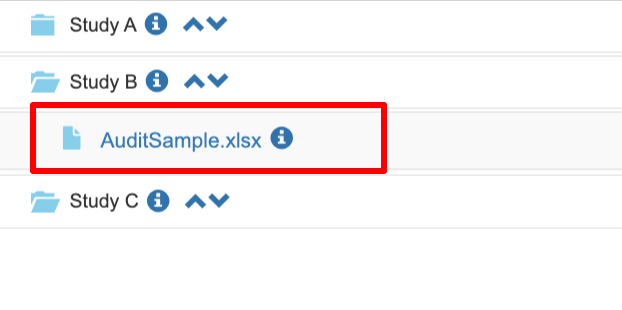
This will open the table of folders (“nodes”) that are available based on the view permissions granted to the current user’s host-level role.
Folder Expanding and Collapsing
There are two ways to manage which folders are expanded. The TMF will remember your last settings on a per-user basis.
Tap any folder to expand the contents of only that folder.
To expand/collapse all folders within a given node, use this icon: ![]()
.png "image(1006).png")
What are Nodes?
Files and Folders are referred to as "Nodes" within TrialKit and throughout this help document. This is because TrialKit has the advantage of being connected to a blockchain where each entity (folder or file) exists as a node in the blockchain.
Viewing Files
If a user has View permissions for a file, it will be listed in the TMF. Those Files can be previewed within both the web and mobile app without downloading.
On the web, tap on the file name to open the preview window. Most common file types are supported natively in the browser. If the file preview does not work, a download option is available to download so it can be opened separately.
Mobile app
On the app, tap the file row and then the Preview button at the top of the screen as shown below.
.png "image(1007).png")
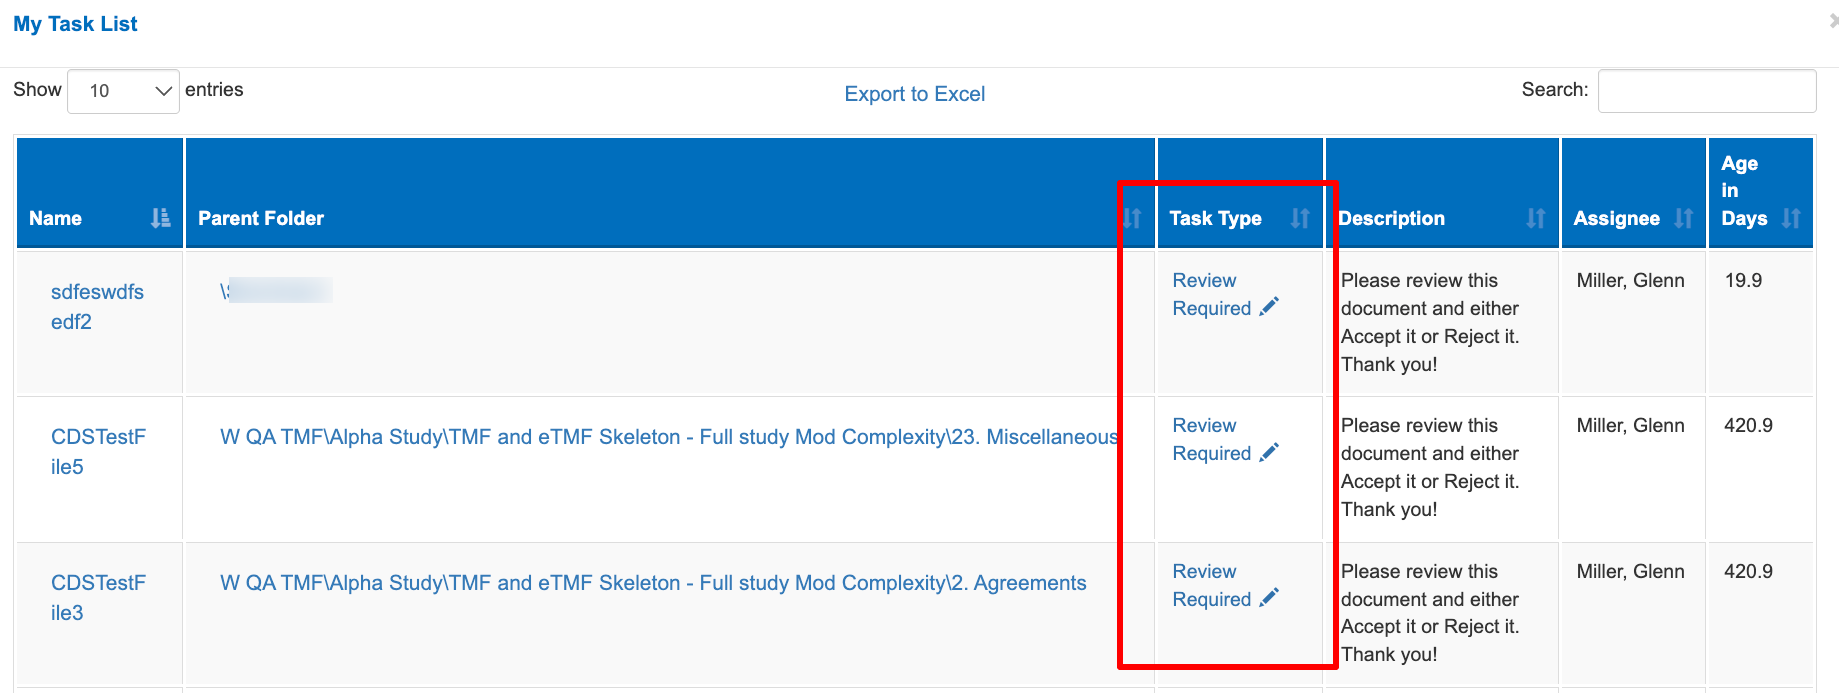
Tasks
The Tasks report will display any assigned tasks.
Web browser
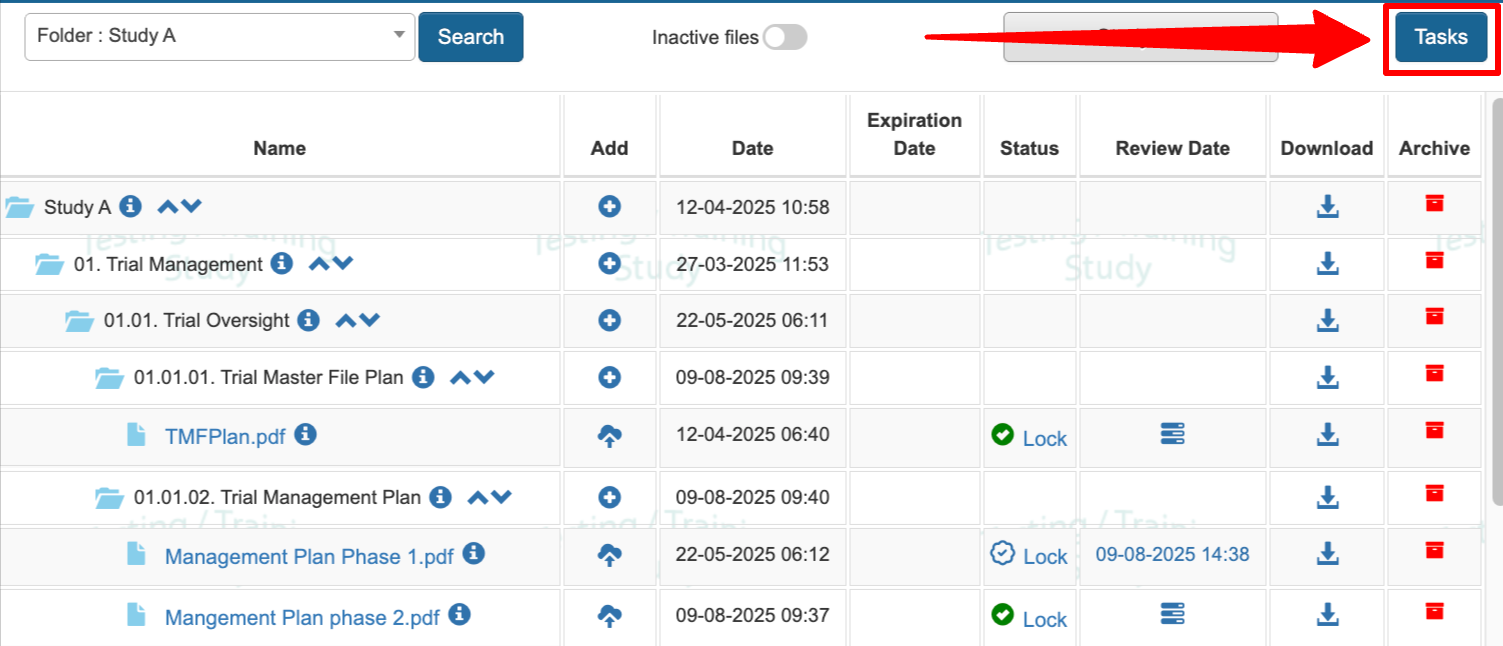
Tap the Task Type column link to execute the task
If the file exists, the name will appear as a link to open and preview
The Folder link can be used to navigate to the file’s location
Mobile app
Tap the reports button at the top of the screen, and then choose the Task list option in the popup window.
.png "image(1012).png")
Viewing All Open Tasks
Administrators may need to see all tasks for all users across the TMF. This is possible with the corresponding permission granted. This list can also be exported from the Tasks window, or searched for specific users or action items.
Adding Folders or Files
To add a new folder within another folder, tap the add folder option:
.png "image(1014).png")
The user who adds a folder becomes the folder "owner", which can be changed later by anyone with access to folder properties. Email notifications sent for files uploaded into that folder will be sent to the folder owner.
If the TMF has not yet been set up by a Host Administrator, by default there is only one “Root” folder which other folders can be created under. The folders and files shown in this article are examples. Every TMF will have different content.
Folder or file properties
Prerequisite
User must have access to folder properties to modify. Basic properties can be seen by the node owner without any special permissions.
Web | App |
|---|---|
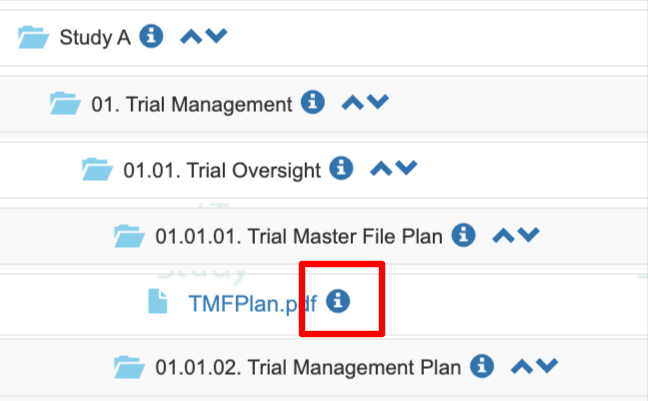
Use the info icon next to the file name:
| Use the button above the table after tapping the desired folder:
|

If a user has access to file properties, they will see several options to set various parameters about a file, including:
File name
Display name - Optional name to display in the TMF table instead of the original file name
Description of the file - For internal notes/comments
Effective date - The date the file was uploaded, unless manually changed
Expiration date
Expiration duration - This is a number of days since the last user reviewed the document
Active status
Filed at site
Site - List of sites (and the site’s country) that exist on the host
List of users and permissions
List of Reviewers
Node History (version history)
File URL
Properties cannot be edited on files that are locked.

Site Property
Allows for defining which site each file or folder is attributed to. The sites listed are based on the sites that exist in the Host level site manager - as determined by the account Administrator.
Visibility of this property requires full TMF access. Only an Admin user is able to set the Site property on folders and files.
Renaming or Copying Folders and Contents
Prerequisuites
Renaming and copying requires the user to have Edit and Copy permissions granted.
Folders can be renamed and structures can easily be copied for rapid recreation. For example, a study folder might contain a large number of sub-folders that need to be copied for another study or project. This prevents the user from needing to recreate all the folders manually.
What gets copied?
Copying folders will only copy the folder structure by default (no files included). However, there is an option to also include placeholder files when the copy is being done. Any placeholders that exist in the source folder(s) will be copied as well. This is useful for templates to be re-used and already have the expected placeholders ready in the new location.
To copy a folder and its subfolders, open the folder properties and tap the copy option as shown below.

Moving Folders
Prerequisites
Moving folders requires the user to have Edit and Copy permissions granted.
On the Web Browser, open the folder properties on the folder that needs to be moved. Tap the move option to enter a destination.

Get a file URL for sharing
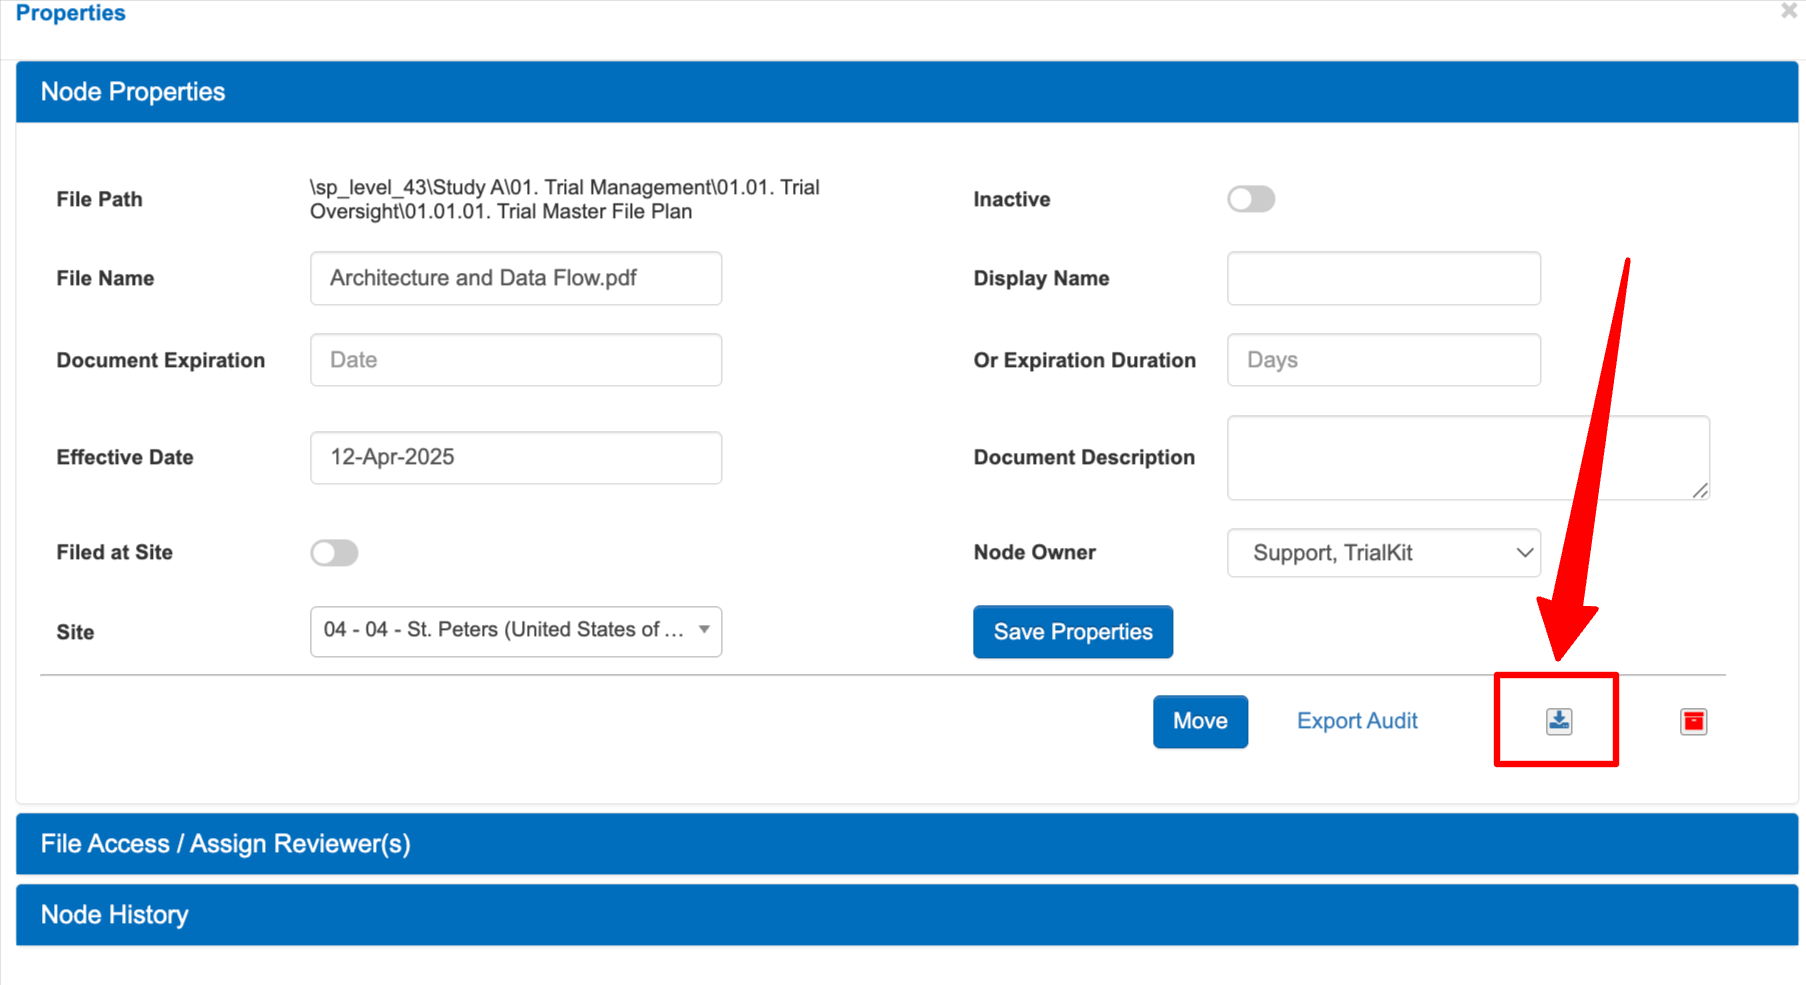
Each file can generate a unique URL for sharing with other members of the TMF who have access to that file.
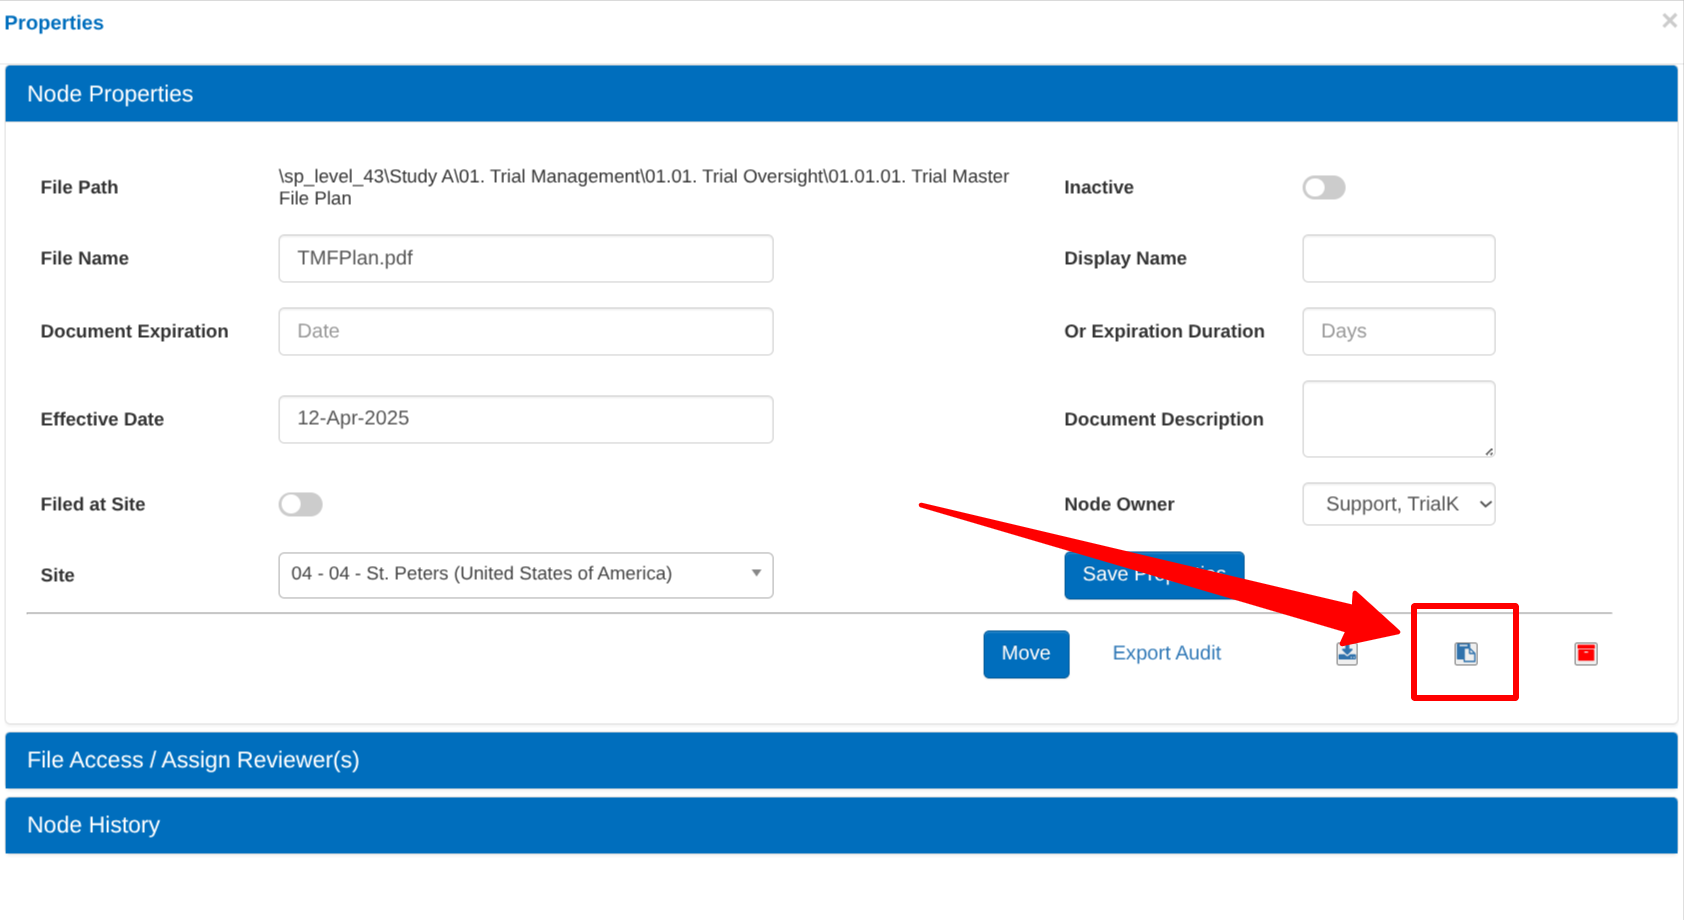
Downloading Files
Any user who has access to view files within folders will be able to download the file. Entire Folders can also be downloaded, which will download all the files in that folder into a single zip file.

When downloading a file, and the user has permission to change the file, the user will have the option to lock the file in the process. This can be helpful to prevent other users from changing the file while it is being edited. If the user only has view permissions, there will not be an option to lock the file.
In the App

Where Do Files Get Downloaded On iOS?
On iOS devices, downloading a file will download it to the device’s Files app > TrialKit app folder > eTMF Downloads
Downloading past versions of a file
The version history shows past versions. From there, files can be downloaded.
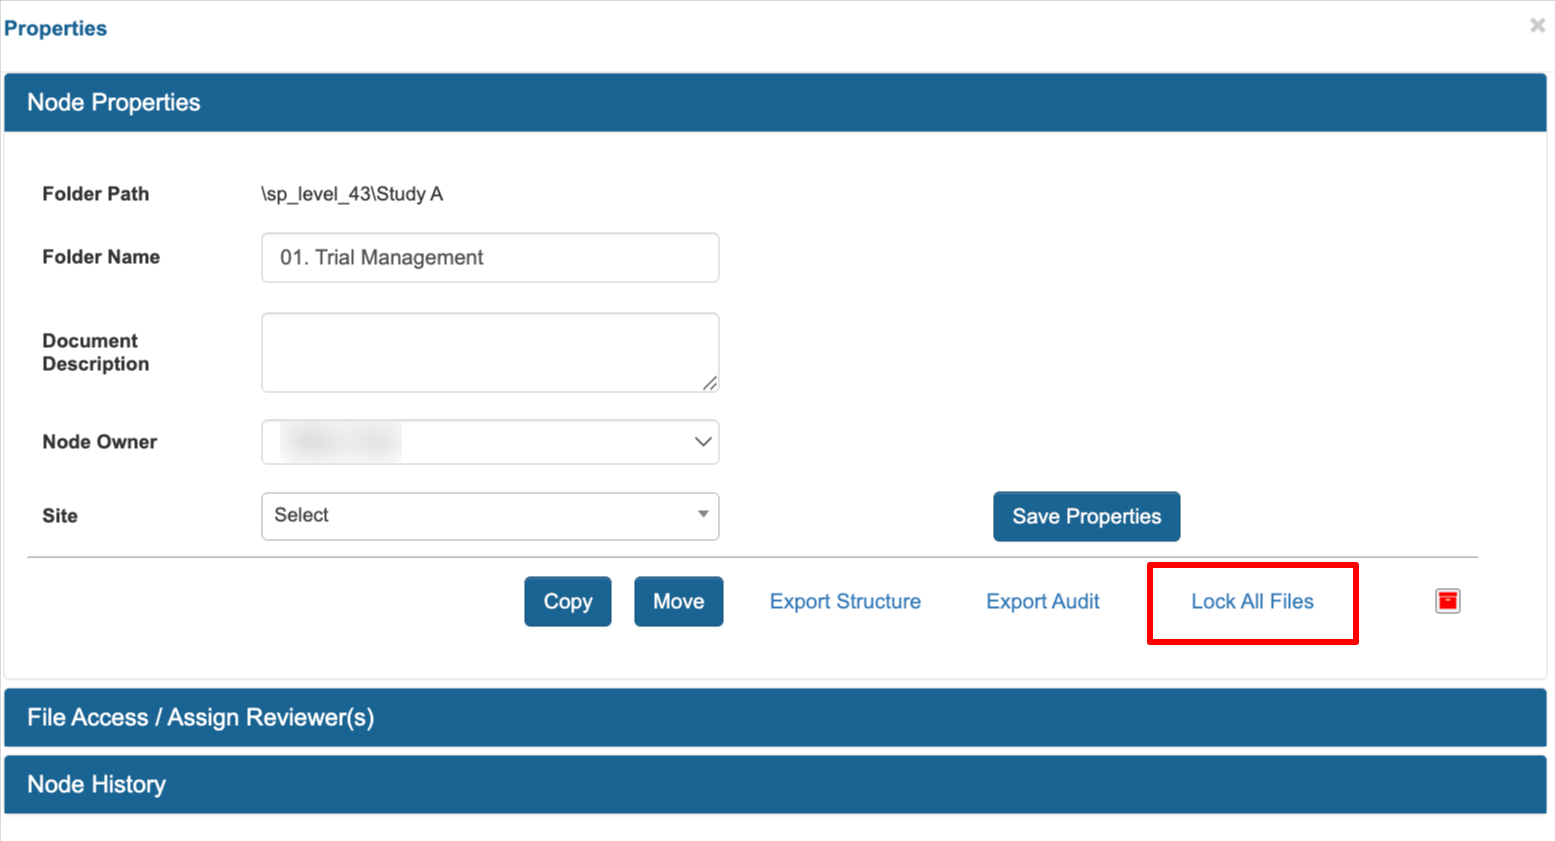
File and Folder Locking
Locking a file is not required as part of normal workflow, but is a helpful tool to prevent changes by users who have access to a file or entire folder
When a file is locked, other users can download it or view it, but cannot upload a new one to replace it until it has been unlocked.
When a folder is locked, it will lock all files in that folder, and prevent modification of the folder properties or adding additional files.
Note
A user who has Modify permissions on an individual file will be able to lock/unlock that specific file - even if they don’t have the master permission to lock folders/files in general. The permission for locking files only pertains to files that the user does not have permissions to modify.
Web browser:

Batch locking files
To lock multiple files within a given folder, either lock the folder as described previously, or open the folder and look for the option to lock all files. This method will lock the files without locking the folder itself.
Uploading Files
Prerequisite
A user must have the role permission to Upload files
Use the upload icon to upload a new file in a folder, or to upload over an existing file. If uploading a file to a folder, it will create a new file entity.

The user who initially creates a file will be the file's "owner" (as seen in the file properties), but this can be changed later on. The user who owns the folder where the file is uploaded will receive an email notification about the new file that was added.
The effective date of the file will be set based on date of upload, but this can be modified in the file’s properties panel after upload.
Uploading multiple files at once
Batch file uploading is supported on the Web Browser. From the file explorer on your computer, use the CNTL or CMD key to select multiple files. Note, the more files selected, the longer it will take to process.
There is a max size limit of 250Mb per file.
Here’s an example where 3 files are selected in the file explorer prior to uploading.


If adding a new single file to a folder, there is an opportunity to rename the file during the upload process, so it does not need to be renamed later on. The user who owns the file will always be able to edit the name, but not any other properties unless they have permission to access properties.
Uploading new file version over an existing one
Will replace and archive the prior version.
Will remove any reviewers if they existed on the prior version. Reviewers must be re-assigned to the new version.
Mobile App
Tap on an existing file so it is highlighted. Then tap the Upload button.
File Upload Notifications
When a new file is uploaded, the system will send a notification to the user who owns the folder where that file is uploaded. Folder ownership can be seen within the folder properties or in the folder structure export.
Review and Approval of Documents
Any node in the TMF can be assigned to individual users for review. Electronic Signature can also be required as an approval step. To assign reviewers, a user’s role must have the associated permission.
Only files can be reviewed. Folders do not have that option.
If review has been fully completed on a document (i.e. All assigned reviewers are finished/accepted), the last date of review will display in the table, and the status icon will display as shown here:
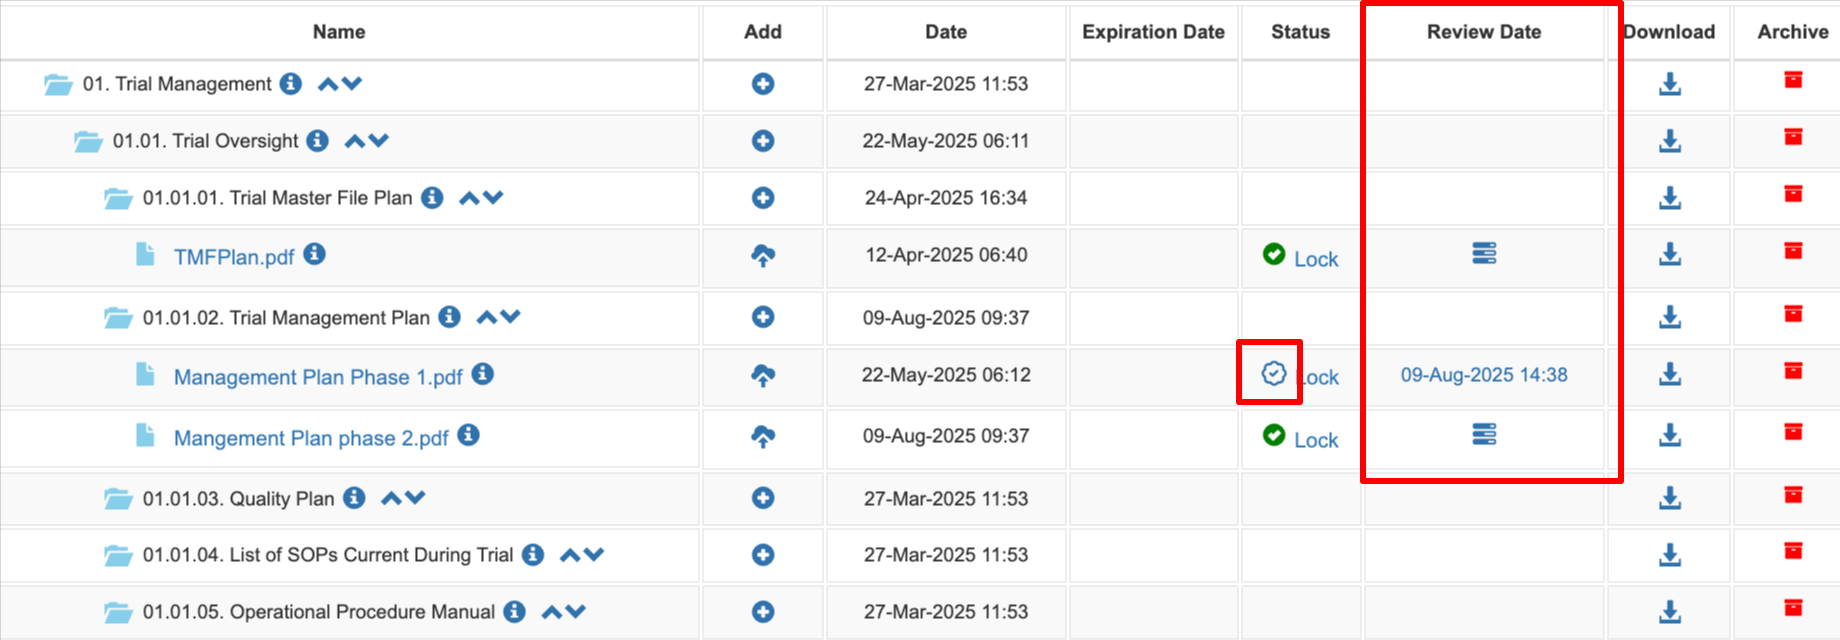
If the review date is displayed in RED, that means a reviewer has rejected the document.
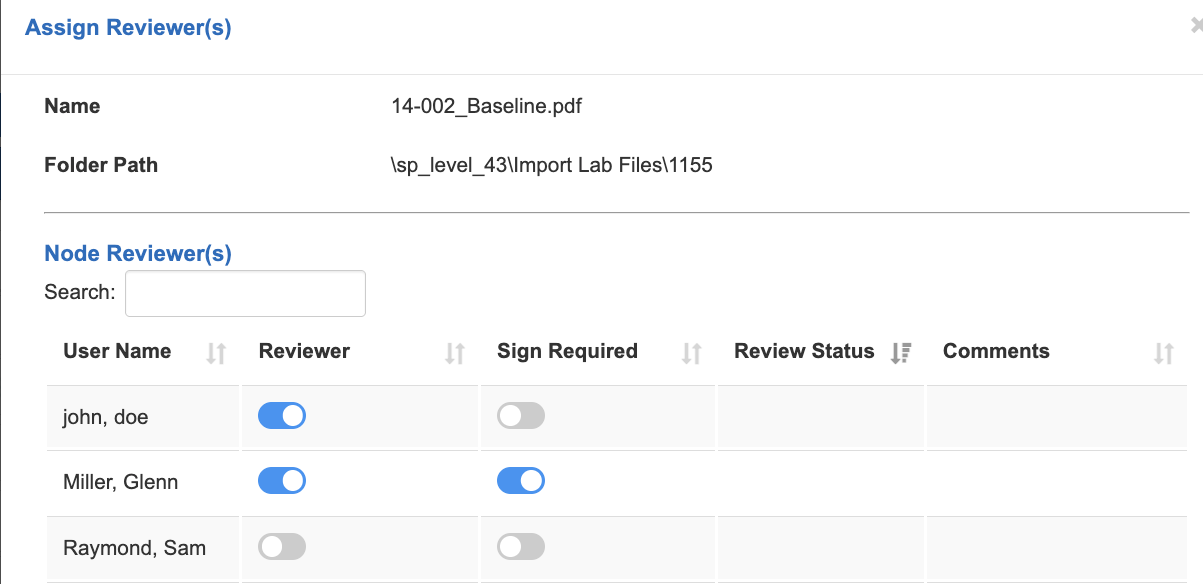
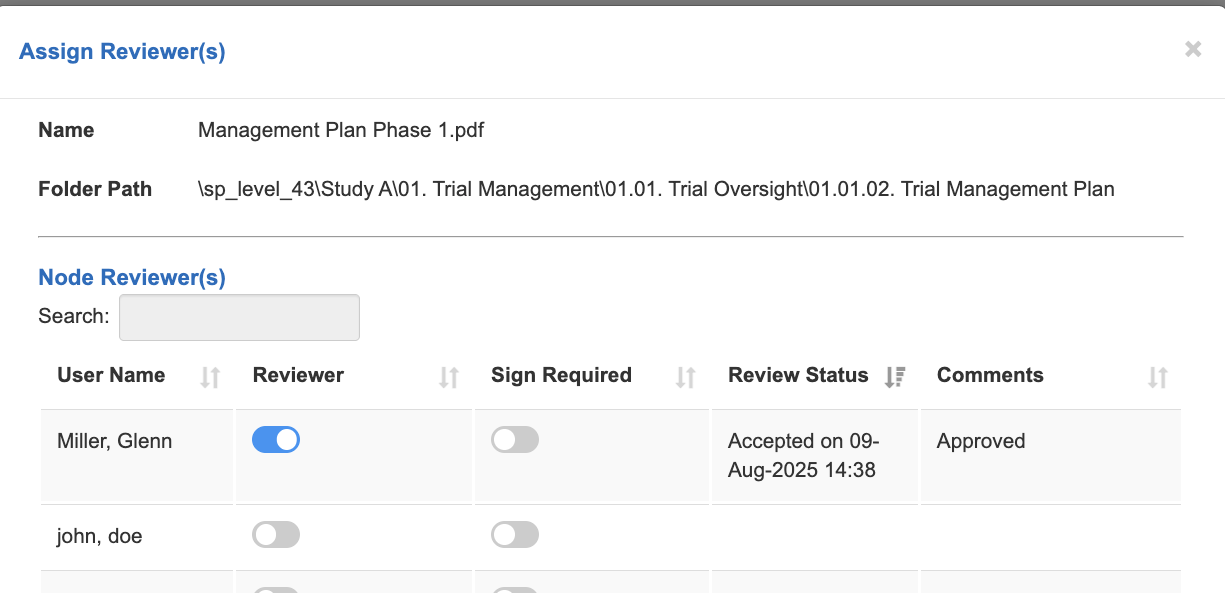
Managing Reviewers
If a user has the permission to manage reviewers, the ![]() icon will display.
icon will display.
Toggle the checkbox next to any reviewer and indicate if signature is required. Those users will receive an email notification letting them know about the new task. They will also see it in their tasks list.
If a user is assigned for review, but does not have access to the file, the system will provide a warning but still allow it. Users can preview anything they are assigned to, even if they don’t have access in the TMF.
Tip
Reviewers can also be assigned ahead of time on Placeholder documents. In this case they will not get notified immediately about the review task, but they will get notified once the file is uploaded.
Removing Reviewers
If a review has been completed, that reviewer can no longer be removed. A new file would need to be uploaded to overwrite the existing one in order to start the review process over again.
Reviewing Documents
To review an assigned file, open the Tasks report.
Tap the file name to open the preview window and view the file. After previewing, return to the task list to perform the review, by either accepting or rejecting the document.

After all assigned reviewers have accepted the file, its status will be updated accordingly, and a notification will go to the owner of the folder where the file exists.
A rejected review will immediately send a notification to the folder owner. If two or more reviewers are assigned, and all of them approve the document, the notification will not be sent until the final reviewer is finished.
Uploading a new file will remove the review status. Optionally, the file can be locked to prevent accidentally uploading a new version. File locking requires the user’s role to have permission.
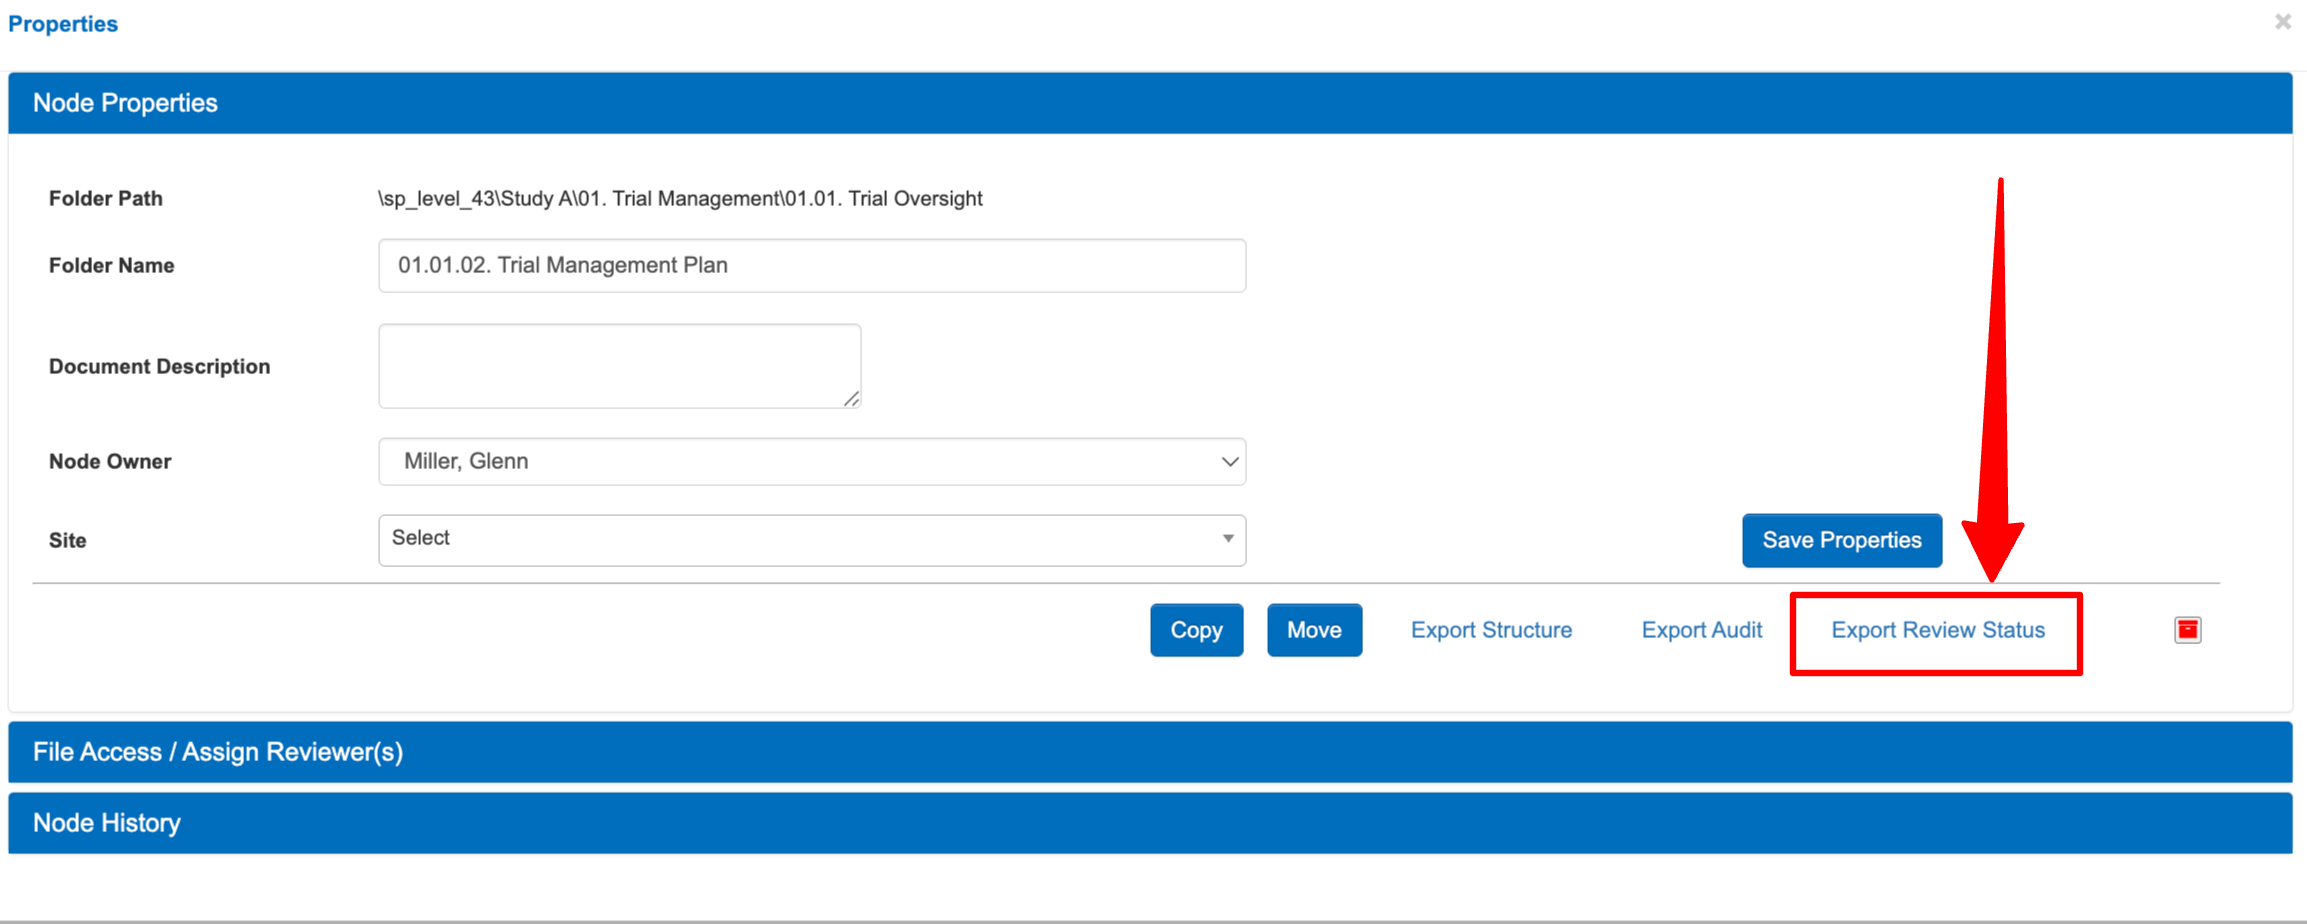
Full Review History
Document review is logged in a dedicated Review Audit report. This will display a current and historical listing of documents that are awaiting or underwent review/approval and what version it was performed on.
Web Browser:
To export the review history for the entire TMF, use the link at the right side of the TMF table:

To export the history for a specific folder, use the option within the folder properties:
App

Exporting File Permissions
To export and view all file permissions rather than opening each folder and file to see who has access, use the export link on the right. Note, this function is enforced based on access to the TMF audit report.

Placeholders - Assigning Tasks to Upload Documents
Sometimes files need to be collected from other parties who don’t necessarily have full access to the TMF. This is where the creation of “Placeholders” comes in.
To create a placeholder, the current user’s role must have both permission to do so, and the ability to modify the folder where the placeholder is getting created.
In this example, we need a specific user to upload IRB Approval. Tapping the ‘Add’ icon will present options as shown below.


Type in the Name of the placeholder and assign it to a user. All TMF users on the account will be listed.
The Description will be used by the system in the email notification that goes out to the assigned user as soon as the placeholder is saved. At this point, the user is notified and a task is assigned in the Tasks Report. That user can then access their tasks.
TIP
Reviewers can also be assigned ahead of time on a placeholder. Reviewer users will not get notified of their review task until the file has been uploaded.
Once the user uploads a document in place of the placeholder, the effective date will get set for the date of upload, but can be modified if needed in the properties
If the placeholder is set as “Filed at site”, then it will not display for the assigned user in their tasks. The system is assuming that it will not be an uploaded document. However, it can still be uploaded within the folder if needed.
Study Filter (Parent folder filter)
Since the TMF is user-defined, it can be organized with parent level folders being based on anything. Most commonly, parent folders are configured as studies. For this reason, to make the TMF easier to manage across multiple studies or projects, there is a parent level filter at the top of the TMF table on the web, which helps a user focus on specific projects at once.

Search For Files
The search function can be used to quickly type part of a folder or file name and jump to that node’s position in the TMF.
As search results are displayed, hovering over each item will display its full path.

File Expiration
The file properties allow for defining an expiration. There are two ways to define expiration:
By date
Duration - Based on the number of days from the final review. Once a file has been fully reviewed, date of expiration is stamped (Day of Review + Number of days until expiration)
The expiration date can be seen in the main table:

Once that day is reached, the file will be made into a task for the file owner.
Expired files will remain as tasks until they are inactivated. This will remove them from both the task list and the default TMF view.
Exporting the TMF
There are five elements of the TMF that can be exported, some of which are covered in other applicable sections in this article:
The folder structure in Excel format (shown below)
Audited activities (described in the next section)
Normally, the best approach when the TMF is needed externally is to download the files from a specific folder. This will produce a zip file with the same folder structure of the folder that was downloaded.
The next thing to download is the structure and properties

Export structure columns
Name
Description
Extension
Active/Inactive
Expiration Date
Expiration Duration
Effective Date
Version
Status
Date
Locked By
Owned By
Size
ID
Filed At Site
Date of Last Review
Signature date
Path
Path1
Path2
Path3
Activities Audited By the TMF
Prerequisite
Access to the TMF Audit Report is based on the corresponding permission granted by a host Administrator
On the Mobile App, it can be found via the Reports button at the top. On the Web Browser, there is a button to access at the right side of the table. It can also be downloaded for any specific folder. For example, if there are 6 study folders, and the audit is only needed for one of the studies.
The audit history for all folders is accessible from the right side of the TMF table:

To export the audit history only for a specific folder, open the folder properties:

The following transactions are tracked by the TMF:
|
|
|
Instructions for reading the audited transactions
For nodes that are renamed, the Node name will reference both the current file name and the “OLD” name that it was changed from. If a file is renamed several times, the current file name will be the same in all instances. The OLD name in each instance is how to see each iteration of the name over time.
For each transaction, the following is tracked:
Date and time (shown in server timezone)
Node name (file path) - This is the name of the file path, including the name of the file
Node type
Transaction
User - Who performed the action
Target User - It a right or access was changed on another user
Version ID and number
Blockchain hash
Path - Each folder is split as a separate column
Files In the Blockchain
A unique feature of TrialKit's TMF solution is its ability to store files in an independent blockchain for unparalleled audit trails and document security.
If the TMF account is enabled for blockchain storage - determined by the account Administrator - files will be automatically stored in the blockchain when they are uploaded.
If this is being done on your TMF, a button to "Verify" will display as part of the file properties on both web and app:

Tapping the Verify button will run a real-time verification against the blockchain to ensure the file is still unchanged and display the date the file was registered in the blockchain.
If the file has not yet been anchored in the blockchain, there is a button to Register the file.
What is the Blockchain and How Does it Work?
The blockchain is an open and independent location for storing transactions and encrypted content. The content of files is secure from other users seeing, but the existence of a file's content is public. The blockchain is host specific, so the content of a given file is unique with a host and cannot exist multiple times. In other words, as an example, Jane Doe’s CV from 2023 can only be uploaded once on ACME Pharma’s host. It then gets anchored in the blockchain and cannot be disputed. If that same exact file (regardless of the file name) is uploaded again, it will be blocked.
DIA Folder Structure Sample and Importing
Below is a common folder structure used which is based on the DIA model. Keep in mind that folders can be easily copied. If you create a structure for one study by importing this template ZIP file, it can be copied as a whole or in parts in the future.
Importing a zip file in the TMF gives users the option of unzipping the file to create the folder structure contained in the zip file.
CDISC (DIA) Trial Master File Template Zip File
Creating a Zip file on Mac OS
Mac computers running Mac OS create zip files with .DS_store system files included. This is unfavorable when using that zip file to import to a TMF. Please create zip files using a PC or Chrome OS to avoid that behavior.
Deactivate vs Archive vs Delete
If a folder is no longer needed, but it still needs to be retained, the folder can be either deactivated or archived. This section covers the difference.
Permissions Required
Archiving and deleting can be done by any user with the permission to delete files and folders.
Deactivating and reactivating files can be done by any user with the permission to access file properties.
Archiving
Use this when a folder or file is no longer needed, but still needs to be retained long term for record keeping. Doing so will archive all versions of that node, which will show as individual rows in the archived list.
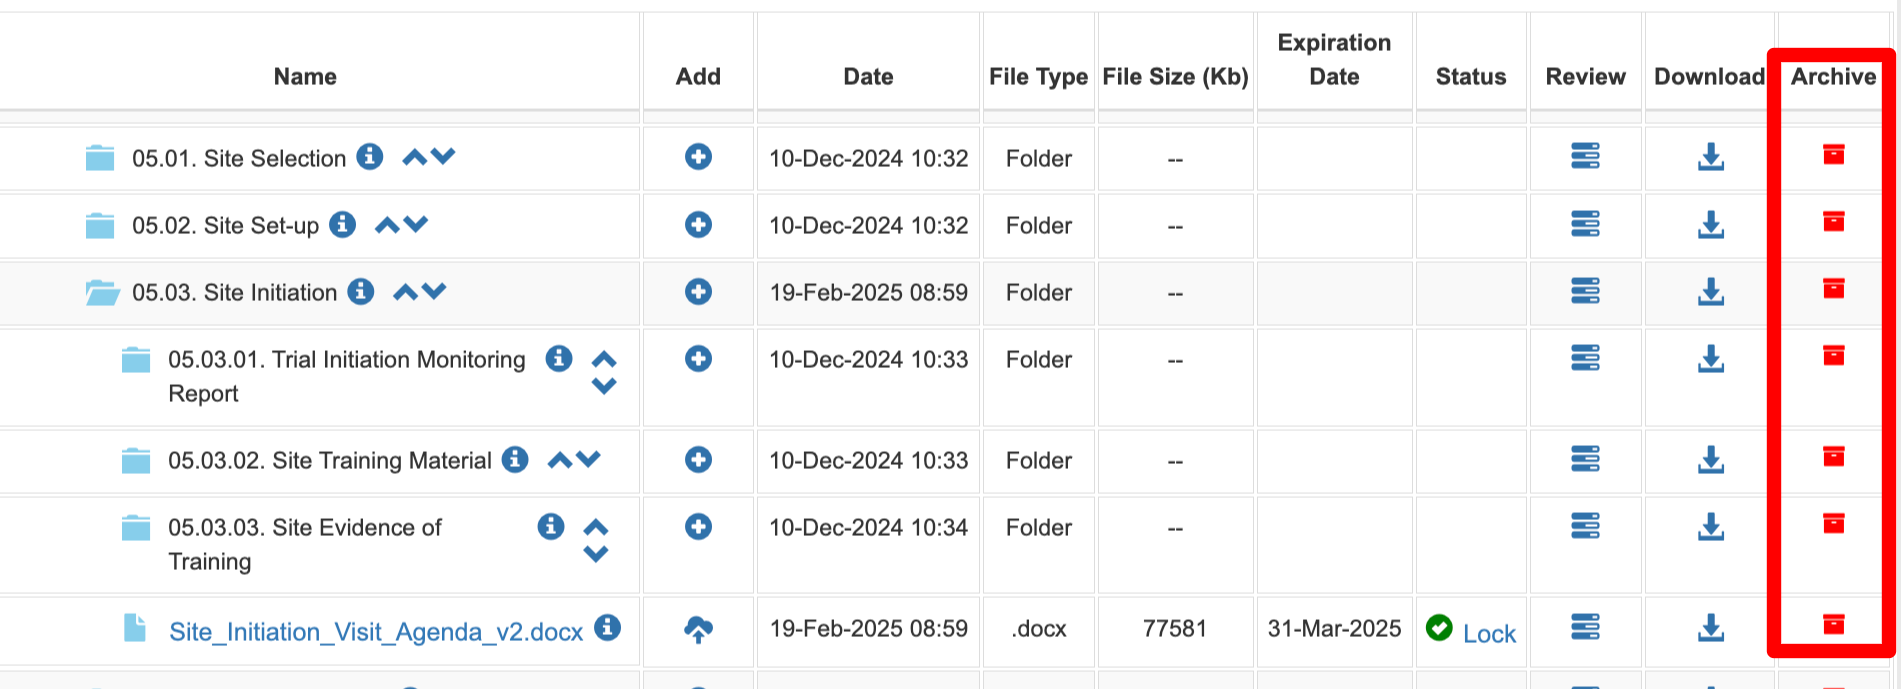
Archived nodes get moved to an archiving location which is only accessible to users who have the host level permission to View all files and folders. Any other users who had view access on the archived content, but do not have that permission, will no longer be able to access it.

Restoring an archived file
The action of archiving a node is reversible and will restore all versions of that file. Individual versions of a given node cannot be restored separately.
Deactivate
For retaining a file in a still-active folder, but where the file is not needed in immediate view at all times.
For example, an older version of the study protocol is still needed in the active study folder, but the Administrator only wants the current version of the file displayed.
To deactivate a file, open the properties window (web only):

Deactivating a file or folder will remove it from the default view of all users who have view access, but will not remove their access (i.e Those users can still see the files when using their own filters). Based on the situation, it’s worth considering if user access needs to be removed before deactivating the file.
To view inactive files, simply toggle the filter at the top of the TMF table. All users have access to this filter option.

Deleting Folders or Files
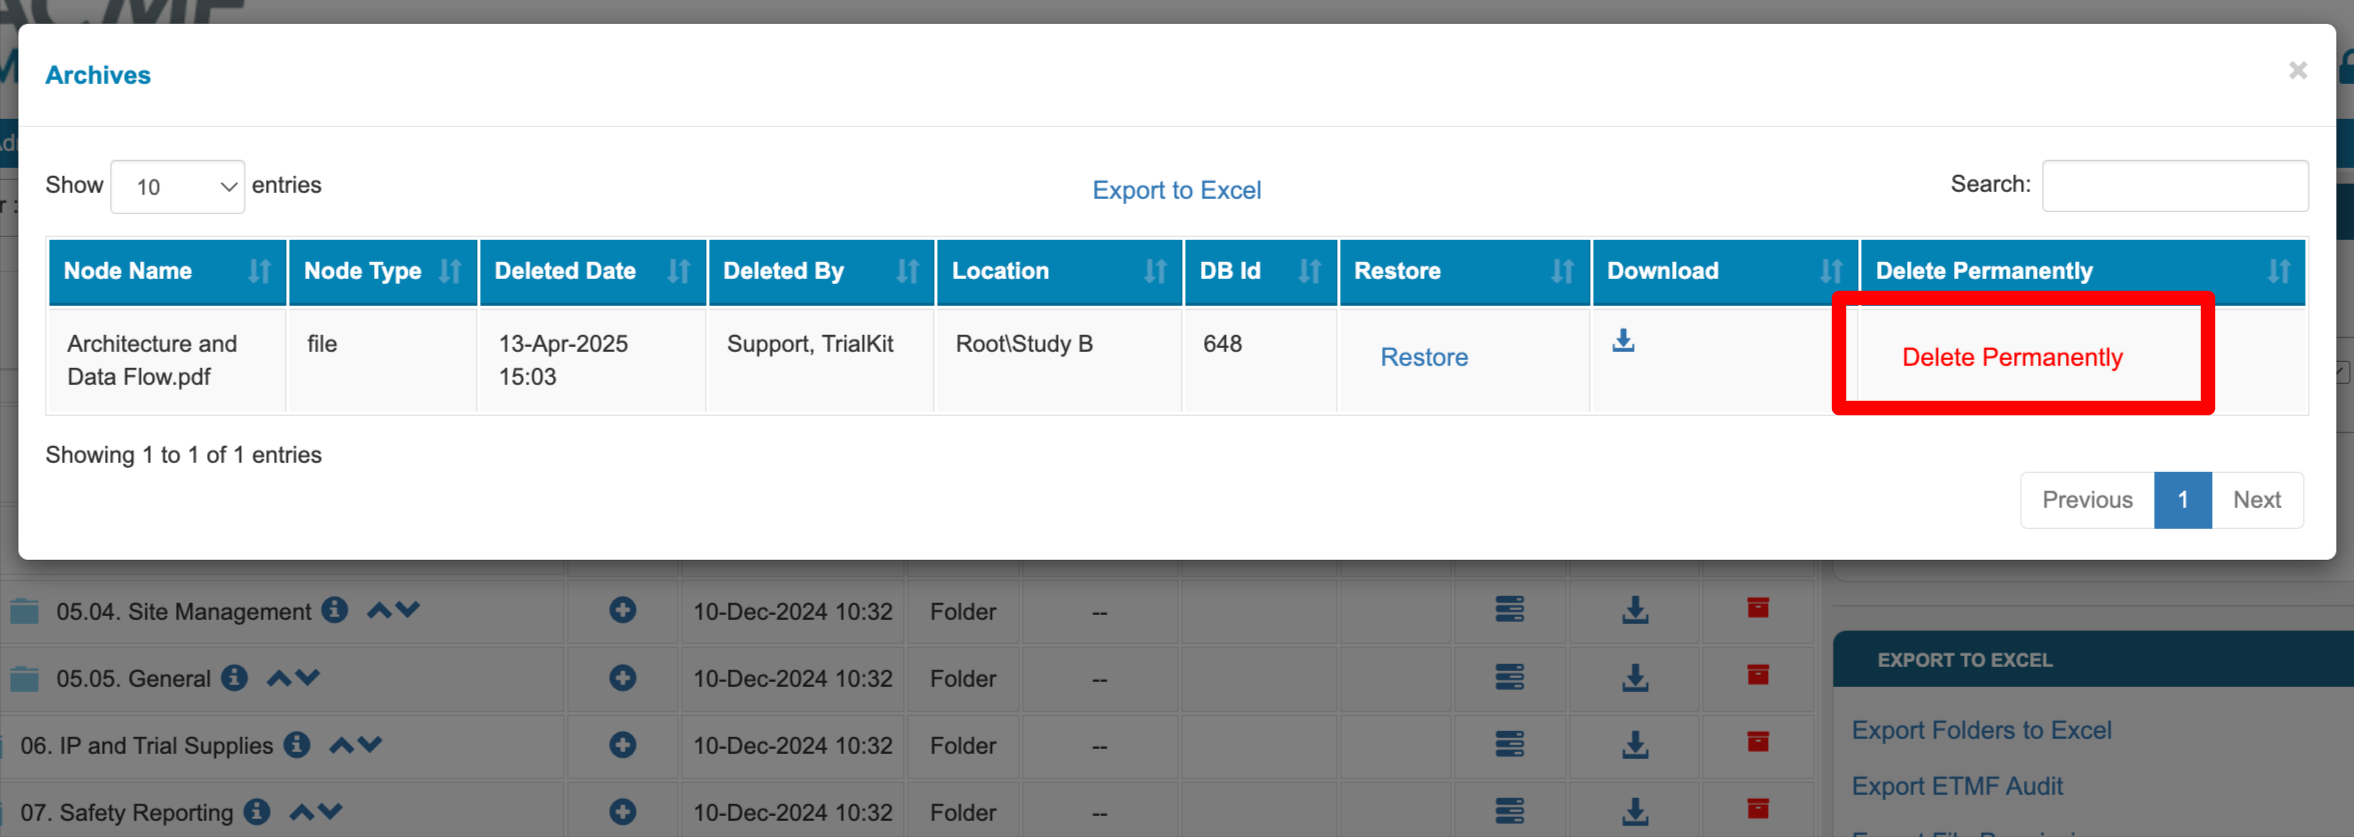
Deleting will completely remove the content from the TMF and is not recoverable. A file can only be deleted within the archives after it has already been archived. To permanently delete a file, open the Archives and tap the delete button.
Closing A Study or Folder
There are two methods to remove a folder or file from the TMF but still retain it long term:
Remove the users - This can be done from the parent study folder so all subfolder permissions will follow. The advantage of this method is to make the study folder easily accessible for referencing files or copying the structure for other studies. If a folder’s user permission history needs to be referenced later on, that can be done using the audit report.

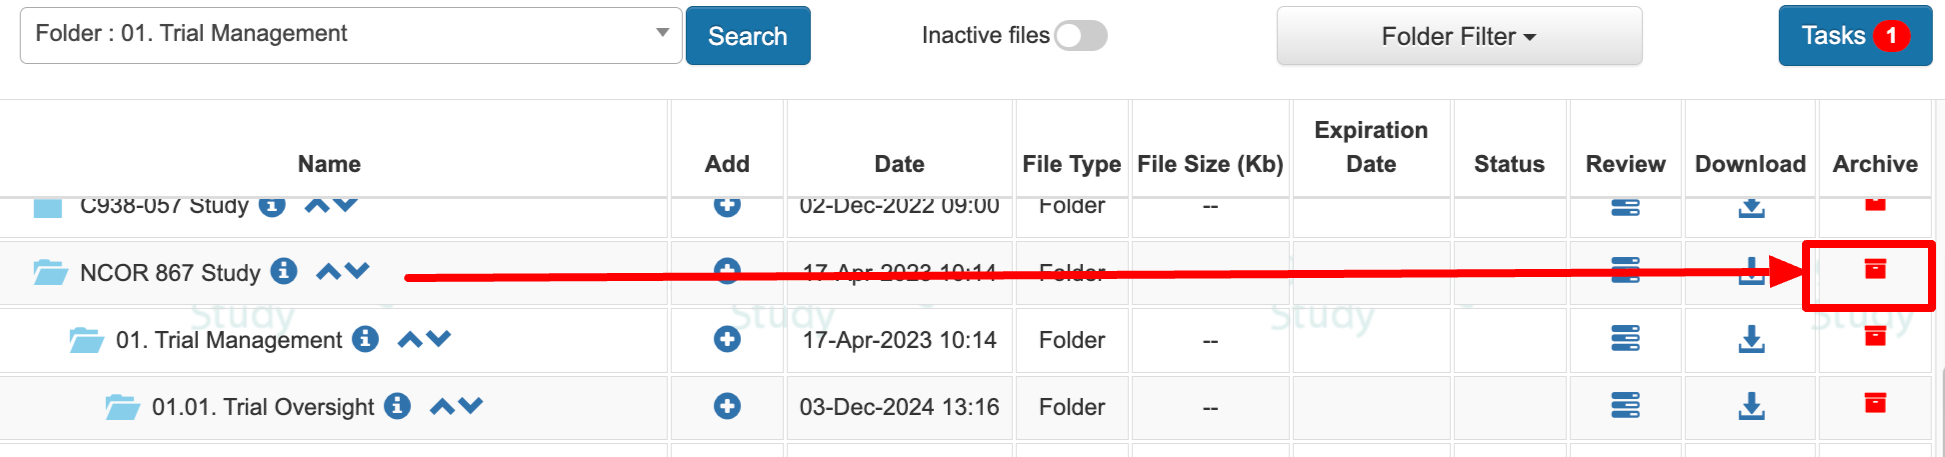
Archive a study folder - This method removes the folder entirely from the TMF, making it more difficult to reference unless it is restored to the TMF. The advantage of this method is to maintain all user permissions in order to reference those permissions in the future, but since the folder is archived the users will not have access until the folder is restored.
Note: If the study’s data collection is also being conducted in TrialKit, locking or closing the study database will not lock the study folder in the TMF. This action must be done separately.